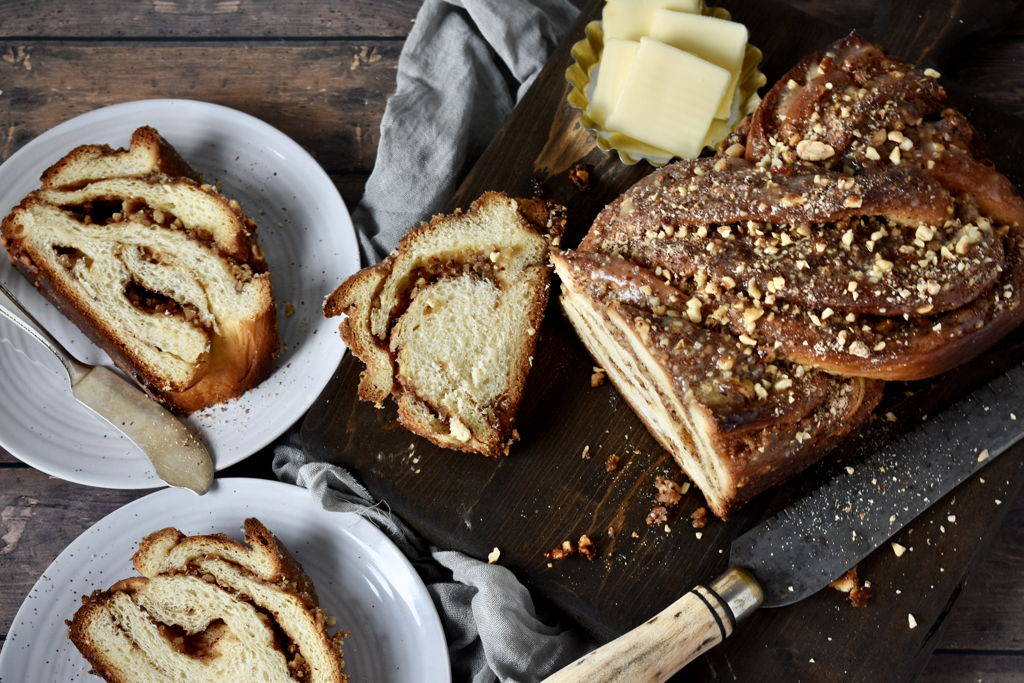
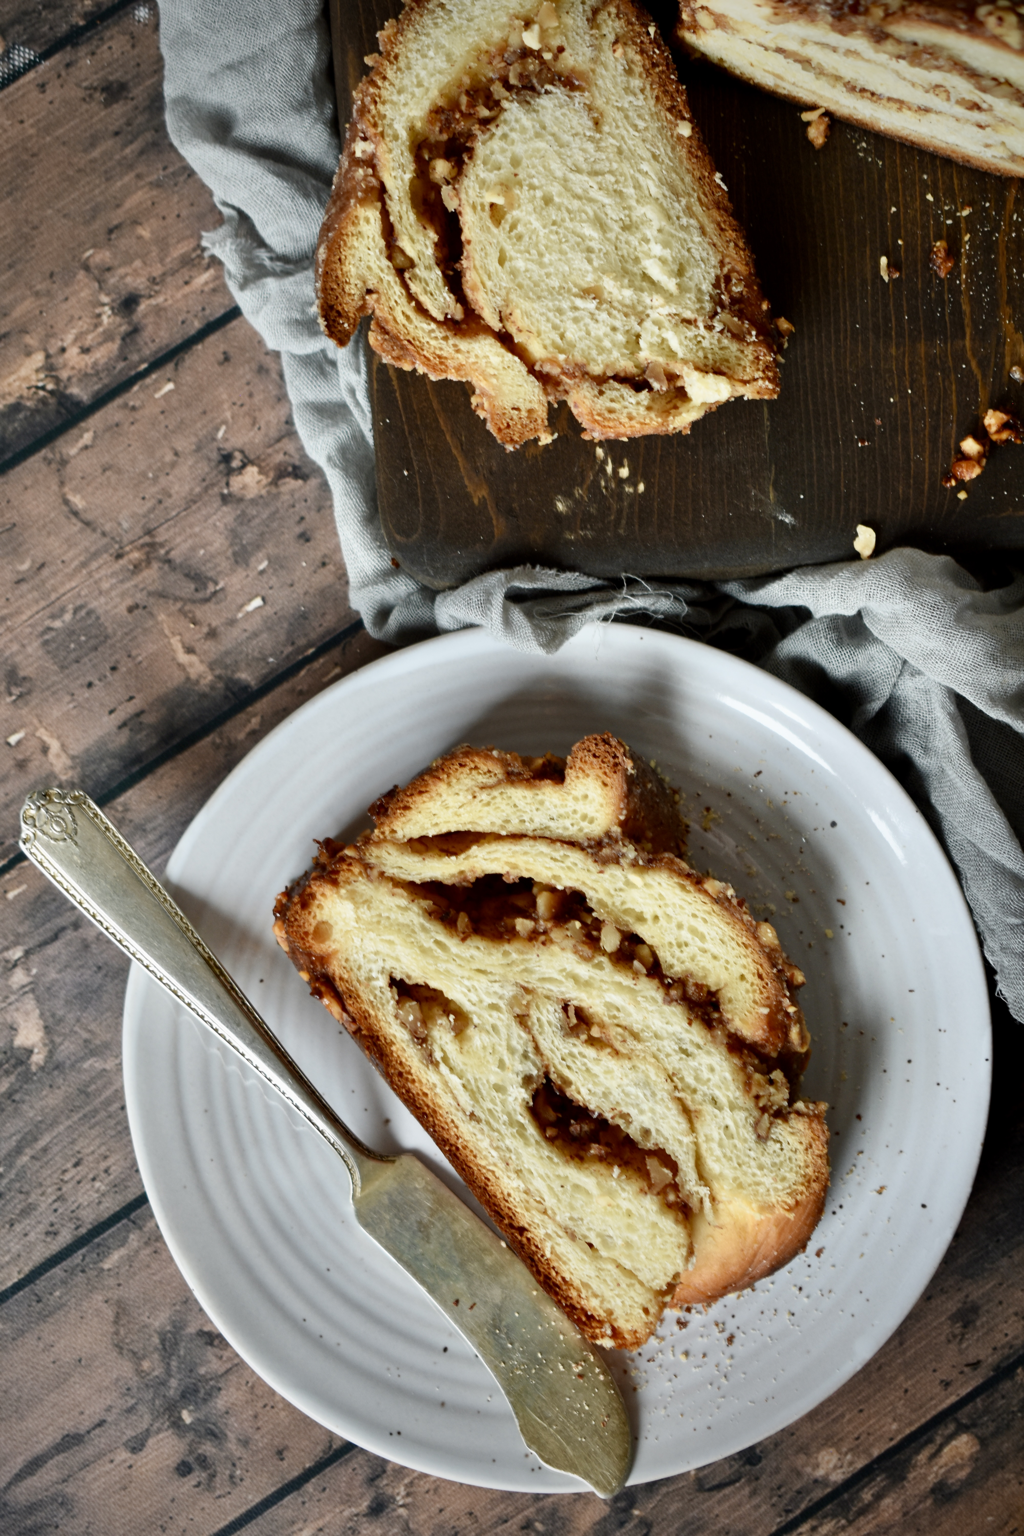
  HAZELNUT CINNAMON BABKA Makes 2 Loaves INGREDIENTS:
Dough: 4 cups all-purpose flour 1/3 cup sugar 2 1/2 tsp. active dry yeast 1 1/4 tsp. sea salt 2 large eggs 1 tsp. vanilla bean paste 1 cup lukewarm milk (110° F) 1/2 cup butter, softened Filling: 1/2 cup butter, softened 3/4 cup dark brown sugar 2 tsp. cinnamon 1 1/2 cups whole raw hazelnuts Topping: 1/4 cup butter, melted 1/4 cup sugar 1/2 tsp. cinnamon INSTRUCTIONS: Preheat oven to 350° F. Spread hazelnuts in a single layer on a sheet pan. Roast for 12-15 minutes, tossing every 4-5 minutes. Allow to cool. Once cooled, chop in a food processor until finely chopped. Set aside. Using a stand mixer with the dough hook attachment, mix together the flour, sugar, yeast, salt, eggs, vanilla, and warm milk on medium speed until well combined, about 5 minutes. Add the butter, 1 tbsp. at a time, waiting until fully incorporated before adding more. Once the butter is all added, mix on medium speed for another 5 minutes. Cover the bowl with plastic wrap and allow to rise until doubled in size, about 1 to 1 1/2 hours. Grease two loaf pans and line with parchment paper. Punch down the dough and form into a ball. Turn the dough out into a floured surface. Roll the dough into a rectangle that’s about 16” x 20”. In a small bowl, mix together the butter, brown sugar, and cinnamon for the filling. Spread the filling over the dough, leaving a 1/2” border. Sprinkle the chopped hazelnuts over the filling. Roll the dough up tightly lengthwise. Trim the ends of needed. Cut the roll in half for two loaves. For each loaf, cut the roll in half lengthwise. Turn the dough so the cut side is facing up. Twist the two pieces around each other a few times and pinch the ends. Transfer the dough to a one of the prepared loaf pans, folding the ends of the dough under. Cover with plastic wrap and repeat with the second loaf. Allow the loves to rise until doubled in size, about an hour. Preheat oven to 350° F. Bake both loaves for 35-40 minutes, until golden brown and a toothpick inserted in the center comes out clean. Cool the loaves in the pans for 15 minutes, then transfer the loaves to a cooling rack. Brush the loaves with the melted butter for the topping. In a small bowl, combine the sugar and cinnamon. Sprinkle over the butter. Allow the loaves to cool slightly before serving, or serve at room temperature.
0 Comments
This Orange Cinnamon Chocolate Chip Cookie recipe offers a subtle twist to the classic chocolate chip cookie. The cookies come out of the oven crispy around the edges and on the bottom, but with a soft and chewy center…. Everything a cookie should be! ORANGE CINNAMON CHOCOLATE CHIP COOKIES Makes about one dozen cookies INGREDIENTS:
1 1/4 cups butter, softened 1 cup sugar 1 cup dark brown sugar 1/2 tsp. salt 1/2 tsp. cinnamon 1 tbsp. vanilla extract 2 tbsp. orange zest 2 eggs 3 cups all-purpose flour 1 tsp. baking soda 8 oz. (2 bars) Baker’s semi-sweet chocolate, roughly chopped INSTRUCTIONS: Preheat oven to 350° F and line two large cookie sheets with parchment paper. Using a stand mixer with the paddle attachment, combine the butter, sugar, and brown sugar and mix on high until light in color and fluffy. Quickly mix in the salt, cinnamon, vanilla, orange zest, and eggs. Once combined, stop the mixer and add the flour and baking soda. Mix on low just until the flour is combined, then add the chopped chocolate and mix just until the chocolate is evenly distributed. Using a cookie scoop, scoop and place the dough onto the prepared cookie sheets, leaving about 2-3” between cookies. Bake the cookies on the bottom rack of the oven at 350° F for 13-15 min., just until the edges look a little wrinkled and are beginning to brown. Remove from the oven and cool on the pan for 2 minutes, then transfer to a wire rack to finish cooling. 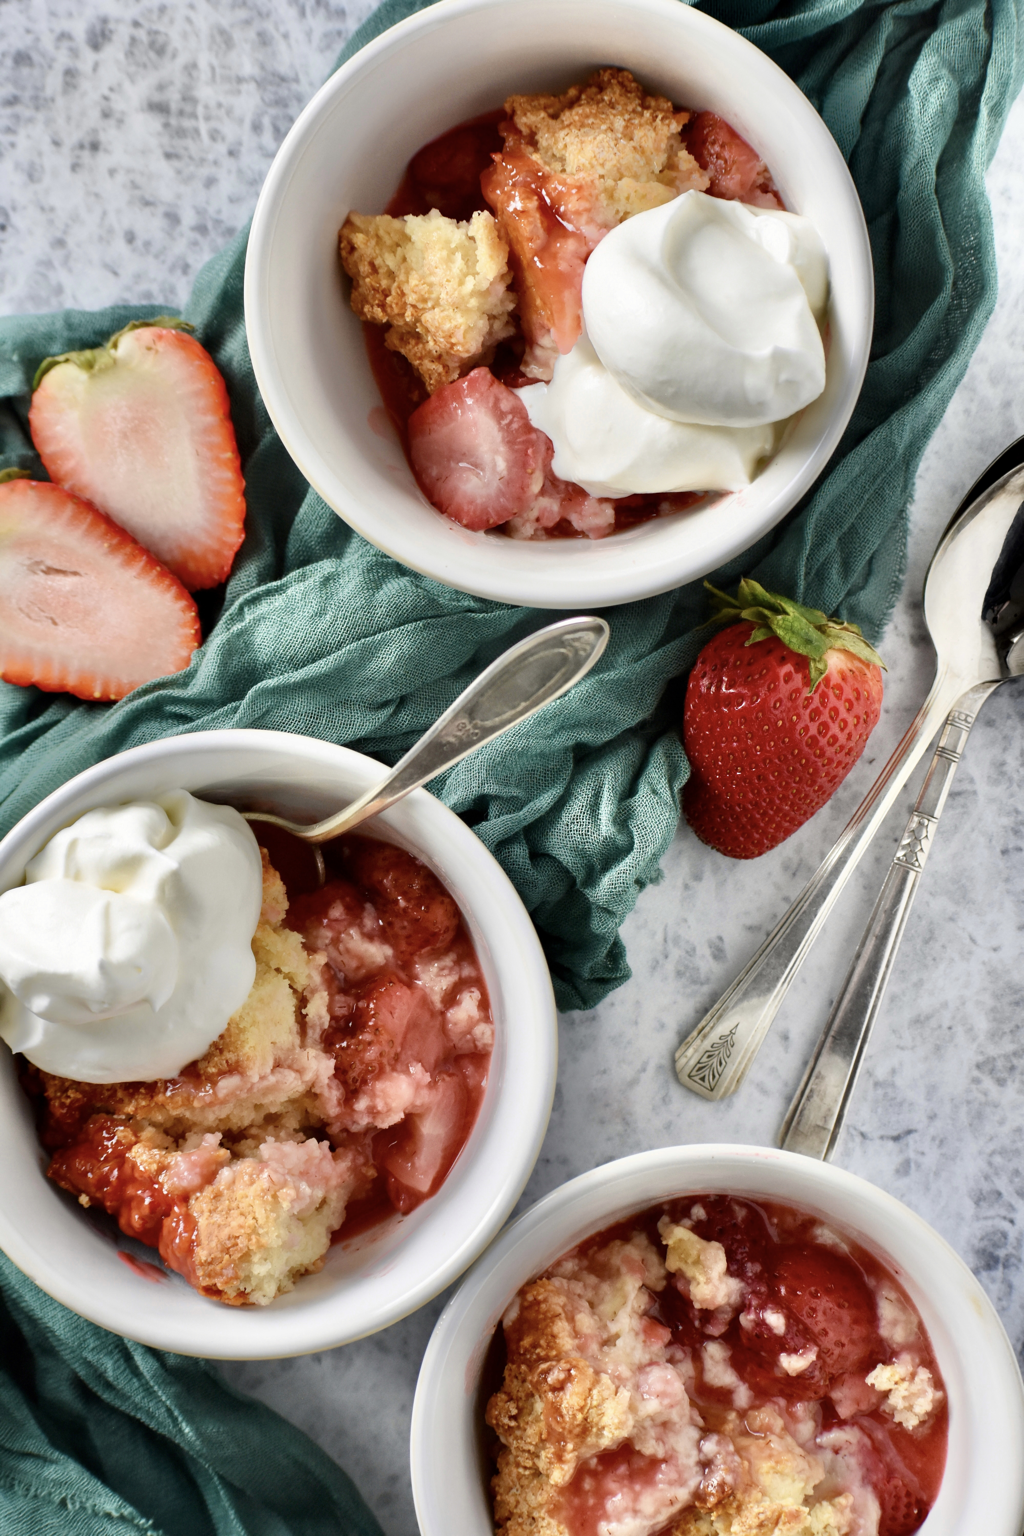 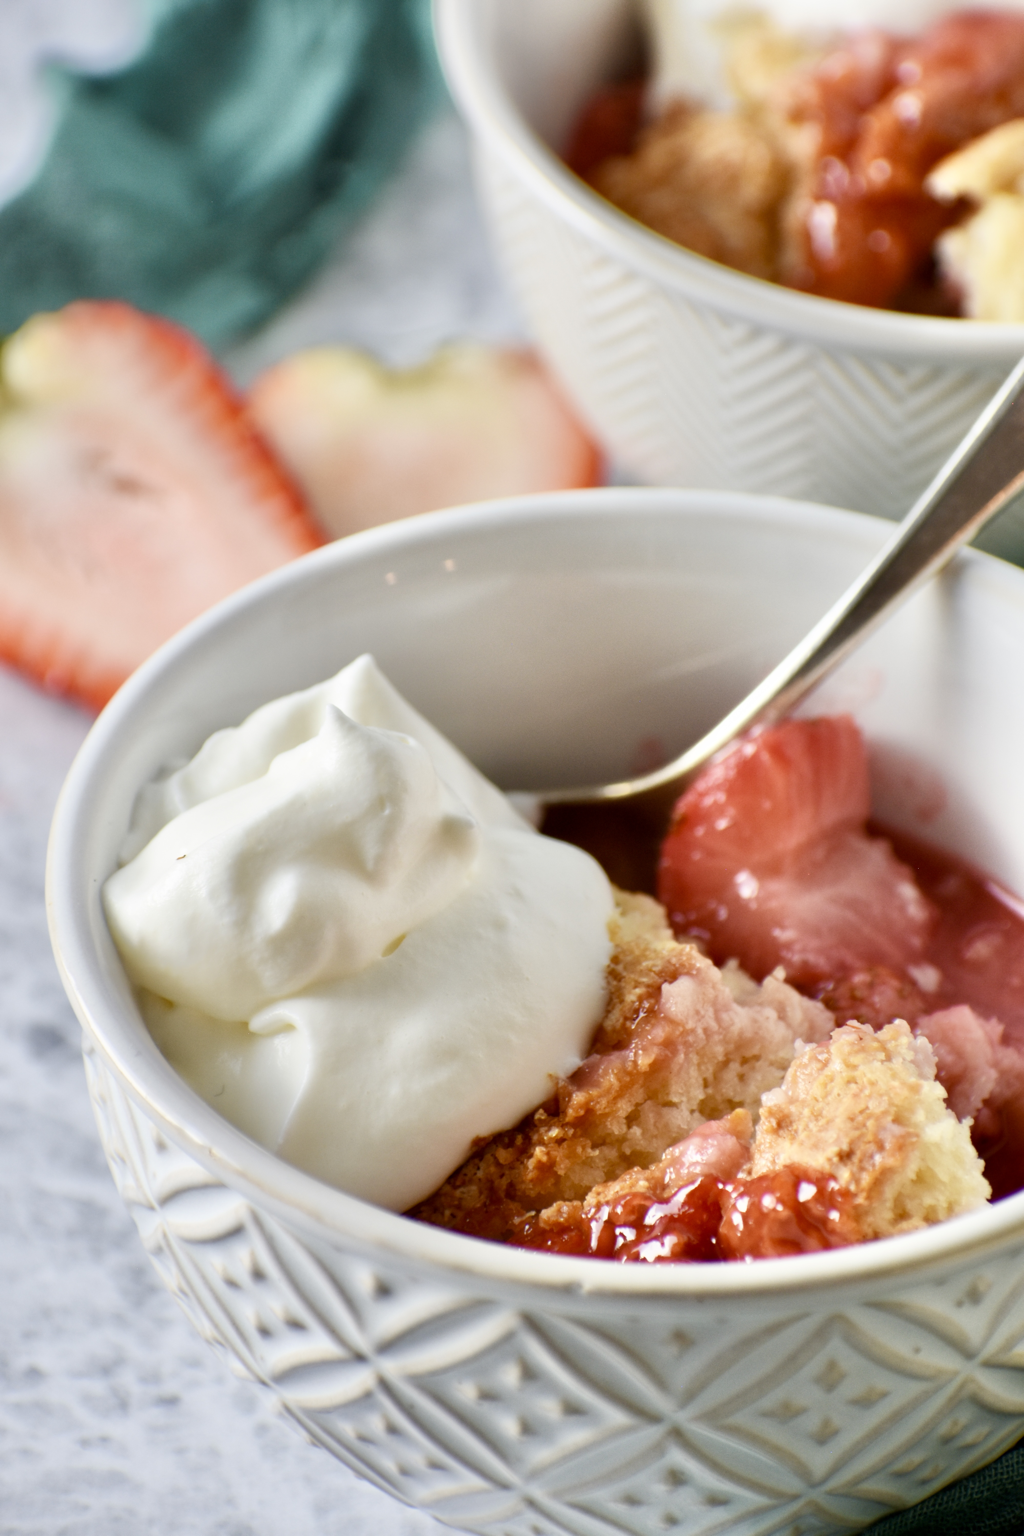 STRAWBERRY COBBLER Makes about 8 servings INGREDIENTS:
Strawberry Base: 6 cups strawberries, cut in halves or quarters 1/2 cup sugar 1 1/2 tsp. cornstarch 1 tbsp. all purpose flour Juice from half a lemon Topping: 1 3/4 cups all purpose flour 4 tsp. baking powder 1/4 cup + 2 tbsp. sugar 5 tbsp. cold butter, cubed 1 cup whole milk 2 tbsp. turbinado sugar or cinnamon sugar INSTRUCTIONS: Preheat oven to 375° F. Lightly grease a 9”x13” pan and set aside. In a large bowl, toss together all the ingredients for the strawberry base. Spread the mixture into an even layer on the bottom of the prepared pan. In another large bowl, mix together the flour, baking powder and sugar for the topping. Using a pastry blender, cut in the cold butter until we’ll blended and the largest pieces are about pea sized. Pour the milk over the flour mixture and using a couple fingers, stir in the milk just until all the flour is barely moistened. The mixture should be very lumpy and sticky. Using your fingers, drop clumps of the dough over the strawberries until most of the pan is covered. Be sure to leave gaps between the clumps for even cooking. Sprinkle the top with turbinado sugar or a cinnamon sugar mixture and place the pan in the oven. Bake at 375° F for 35-45 minutes, or until the topping is golden brown around the edges and a toothpick inserted into the topping comes out clean. Allow to cool for about 20-30 minutes before serving. Serve with whipped cream or ice cream, if desired. Rice Krispie treats have always been one of my favorite sweets. When I was in high school playing volleyball, I they were my “energy bar”, and I don’t even want to admit to how many I probably consumed. But these Rice Krispie treats are seriously next level deliciousness. The sweetened condensed milk makes them ooey gooey, and the hint of peanut butter and vanilla adds a little more depth of flavor. They are so dang good! I may or may not have eaten this whole pan by myself. Shhhh….. 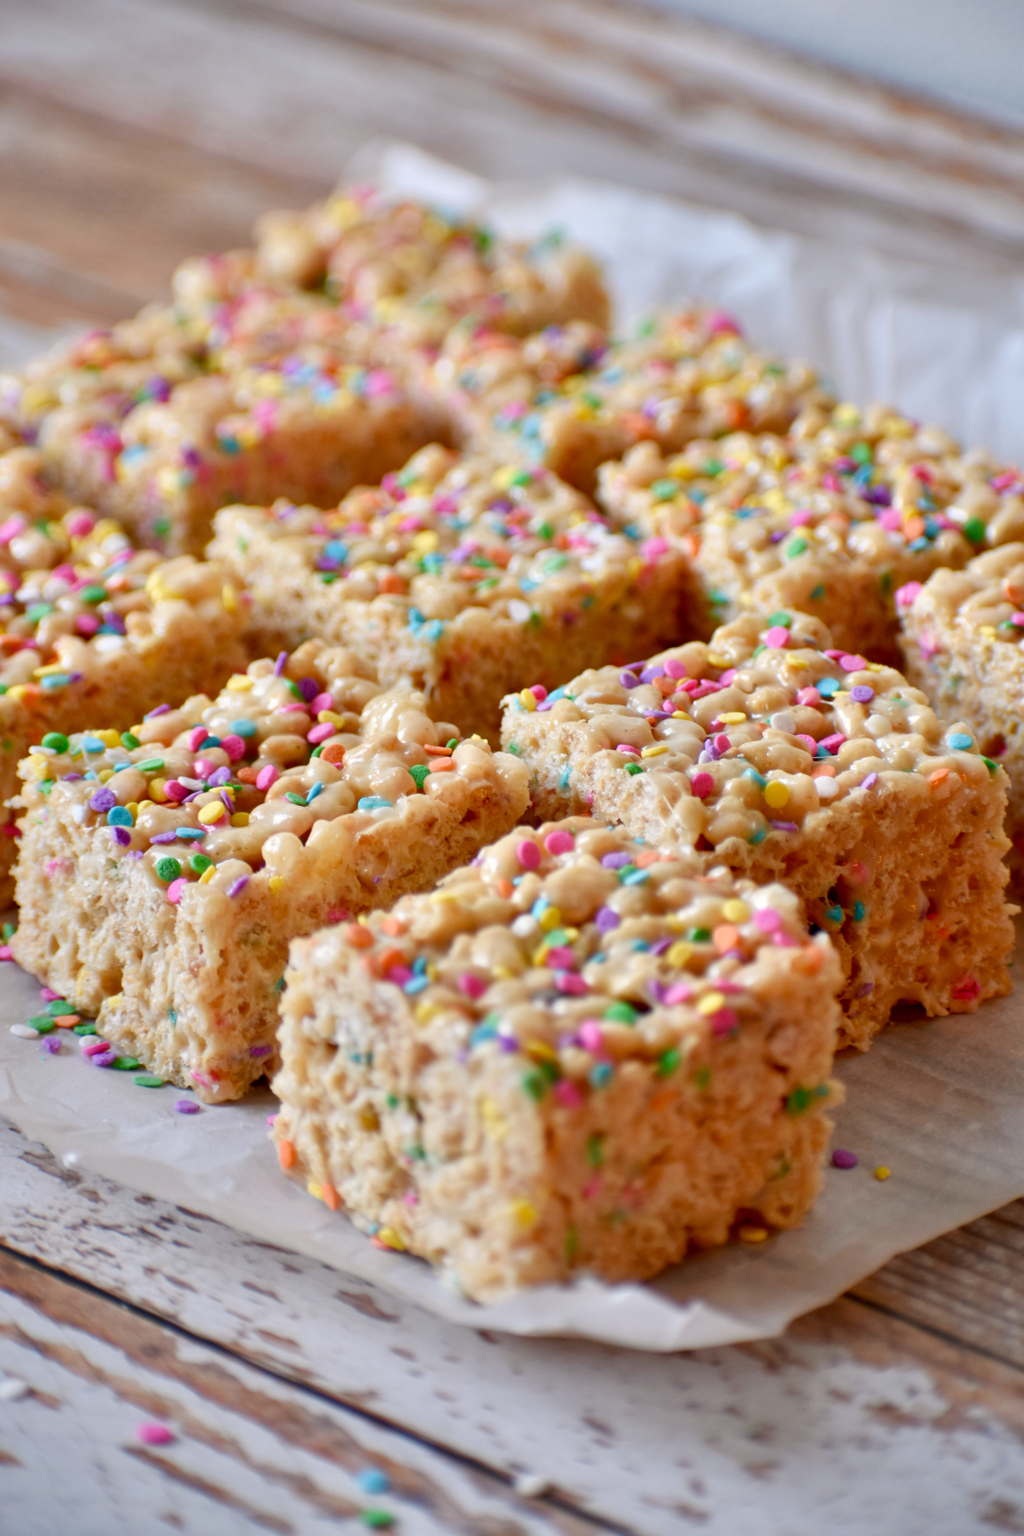 NEXT LEVEL RICE KRISPIE TREATS Makes about 12 servings INGREDIENTS:
6 tbsp. salted butter 1/2 cup sweetened condensed milk 1 tsp. vanilla bean paste 3 tbsp. JIF creamy peanut butter 1 16oz. bag of mini marshmallows 5 1/2 cups of Rice Krispies 1/4 cup sprinkles (if desired) INSTRUCTIONS: Line an 8”x12” or 9”x13” pan with parchment paper or grease the bottom and sides of the pan with butter. Lightly grease the inside of a large bowl. Place Rice Krispies and sprinkles in the bowl and set aside. Lightly grease a large spatula and set aside. In a large saucepan over medium-low heat, melt the butter, then stir in the sweetened condensed milk, vanilla bean paste, and peanut butter. Once melted and combined, stir in the marshmallows. Continue stirring until all the marshmallows have melted. Pour the melted marshmallow mixture over the Rice Krispies and stir until evenly combined. Pour the mixture into the greased 8”x12” or 9”x13” pan. Using the greased spatula, gently press the mixture down into an even layer. Allow the Rice Krispie treats to set for 30-45 minutes, then cut and serve. 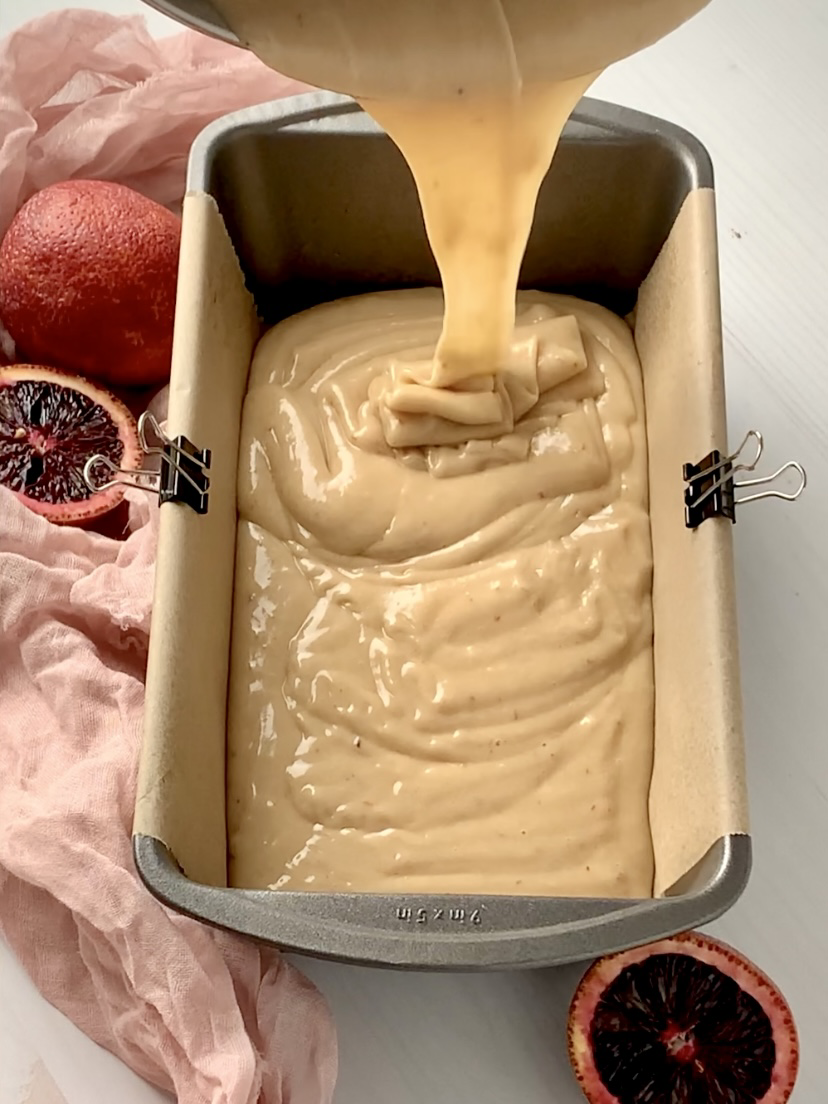  BLOOD ORANGE OLIVE OIL LOAF CAKE Makes 8-10 servings INGREDIENTS:
Cake: 1/2 cup olive oil 1 1/2 cups sugar 3 eggs 1/2 cup sour cream 1 tbsp. fresh squeezed blood orange zest 1/4 cup blood orange juice 1 1/2 cups + 2 tbsp. all purpose flour 1/4 tsp. baking soda 1/4 tsp. salt Icing: 1 cup powdered sugar 2 tbsp. fresh squeezed blood orange juice 1 tbsp. whole milk INSTRUCTIONS: Preheat oven to 325° F. Line a loaf pan with parchment paper as spray lightly with oil. Using a stand mixer or hand mixer with the whisk attachment, mix together the olive oil, sugar, eggs, sour cream, zest and juice until well combined. Add in the flour, baking soda, and salt and mix on high until batter is smooth. Pour the batter into the prepared loaf pan and bake for 55-60 minutes or until a toothpick inserted in the center comes out clean. Set on a cooling rack to cook for 10-15 minutes. While the cake is cooling, mix together all the ingredients for the icing. It should be thin enough to drizzle over the cake, but not too runny. Add more powdered sugar to thicken it, 1 tbsp. at a time, or more milk to thin it down, 1/2 tsp. at a time. lift the cake out of the loaf pan using the parchment paper. Drizzle the cake with the icing, then slice and serve. The cake may be served warm or at room temperature, but I recommend serving it while it’s still warm. OK, so I must admit that I am not a fan of cooked apples. But this apple crisp is so dang delicious! I added some apple butter and whiskey to the apple mixture, which gives it a little more of a condensed apple flavor and a perfect warmth. This is definitely one cozy dessert!  Since I’m not a fan of the texture of cooked apples, I dice my apples really small. This allows them to cook down well and get nice and soft. This step is probably my least favorite part of making this dessert. I peel all the apples with a vegetable peeler, then cut them into four sections, around the core. Then I chop them into about a half inch dice. It just seems to take forever to prep. If it’s taking you a while to cut your apples and they begin to brown, simply toss them with a couple tablespoons of fresh lemon juice. This will stop them from browning and won’t affect the flavor. 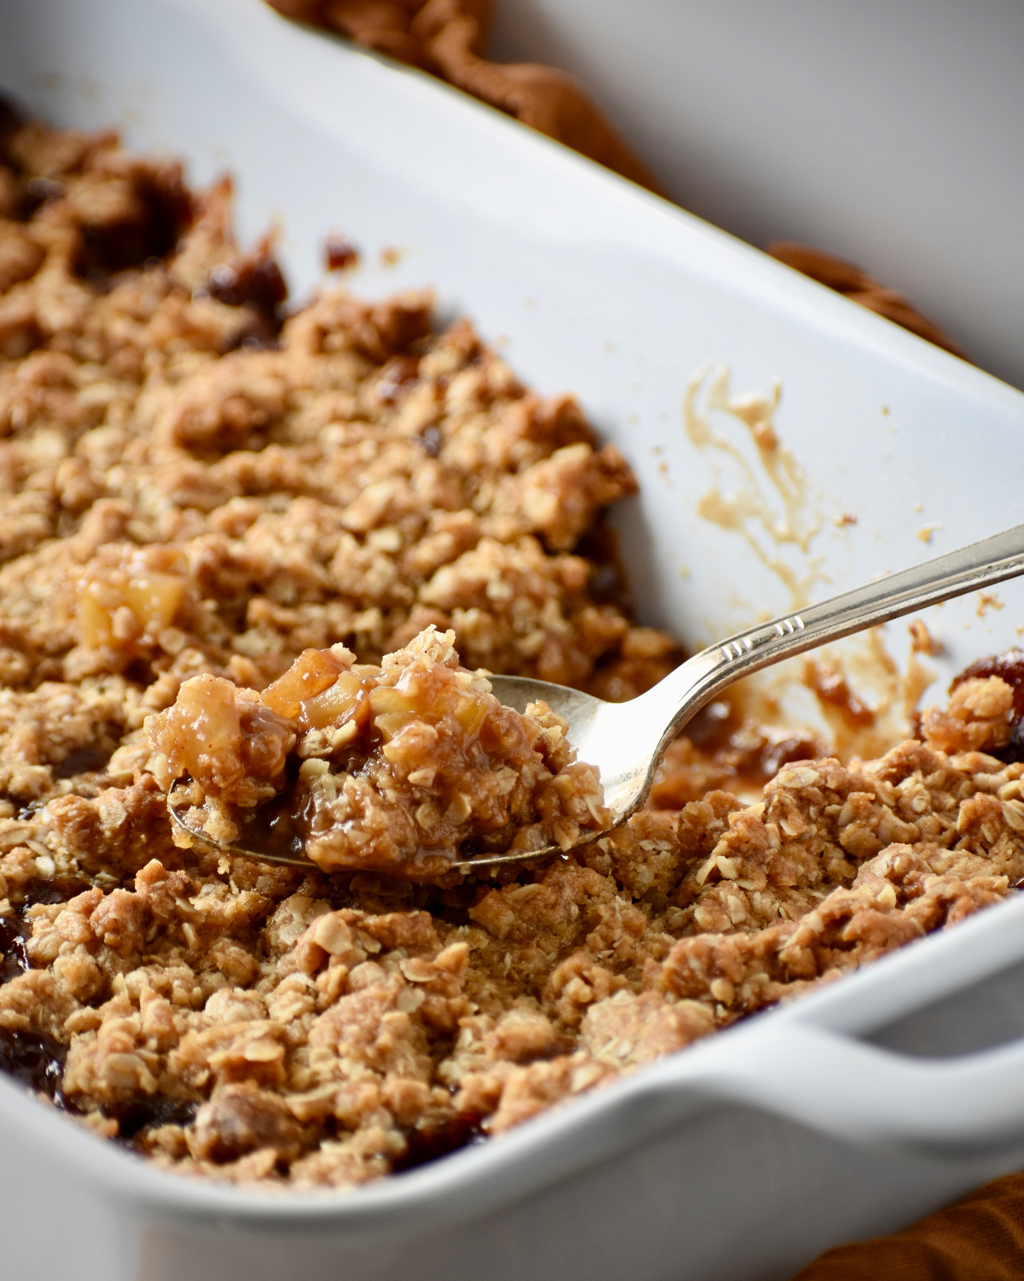 I made this no-churn ice cream a little differently than most no-churn ice creams. I really like the flavor of the egg yolk in my ice cream, so I did this recipe similar to how you would make regular churned ice cream. If you want a simpler version of the no-churn ice cream…. you could just make the standard base for a no-churn ice cream, which is 2 cups of heavy whipping cream, one 14 oz. can of sweetened condensed milk, and 1 tbsp. of vanilla bean paste. You whip the cream until stiff peaks form, then slowly add in the sweetened condensed milk and vanilla while whisking on high speed. From there, you can transfer the mixture to a bread pan and swirl in the apple butter like you do in the recipe below. 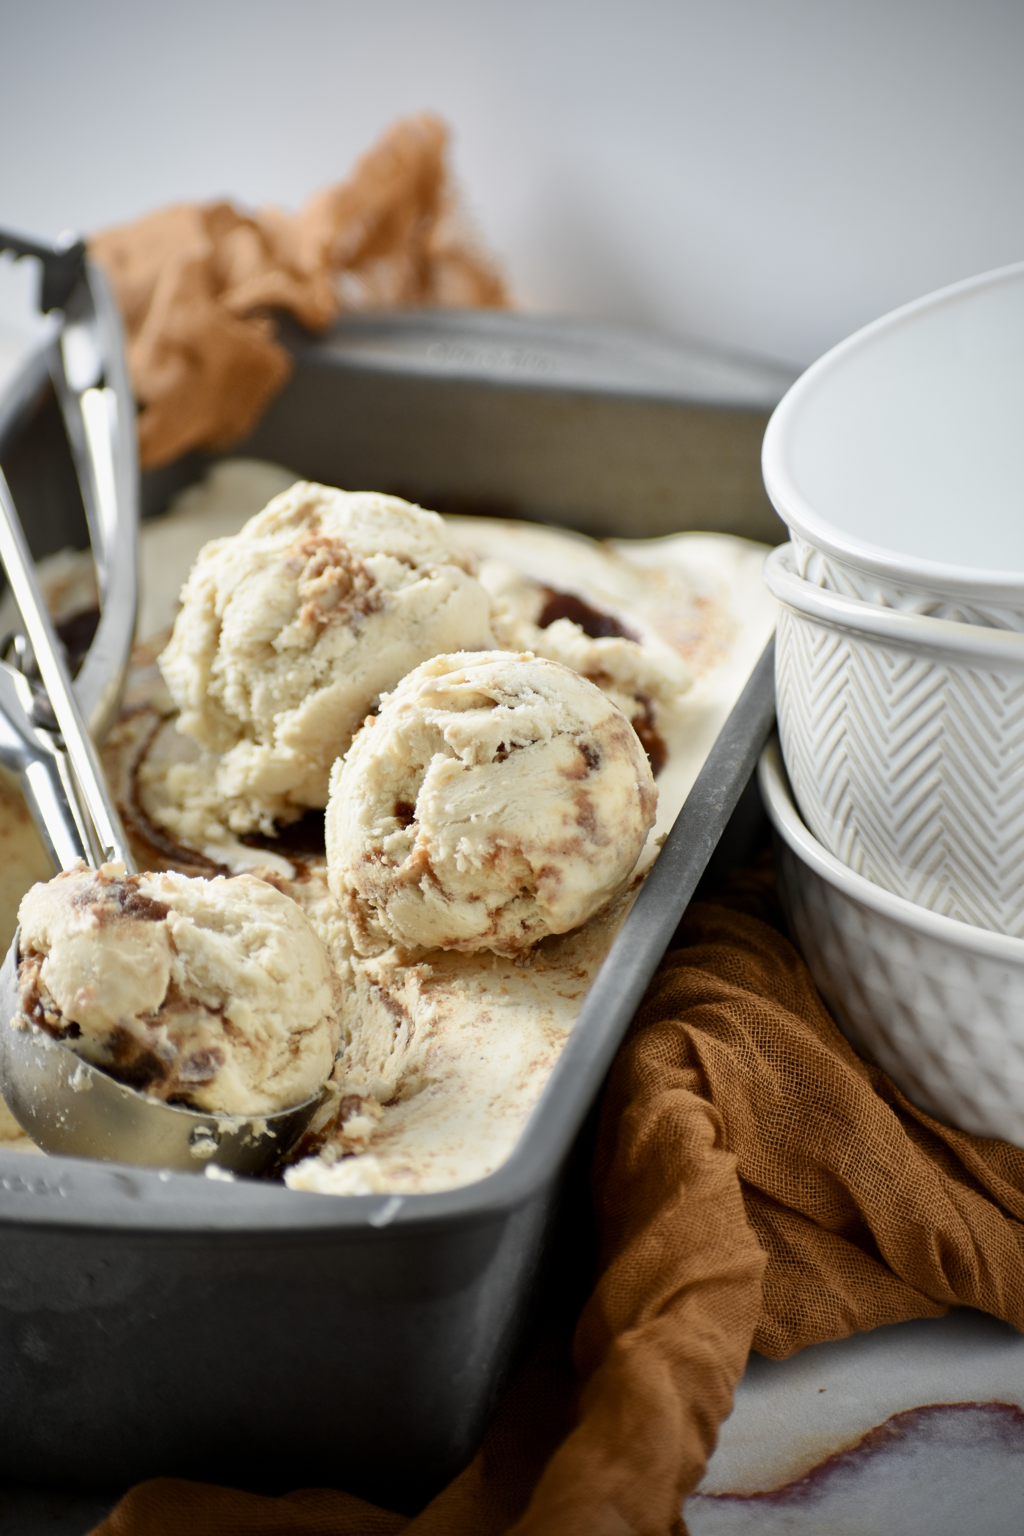 DRUNKEN APPLE CRISP WITH APPLE BUTTER NO-CHURN ICE CREAM Makes 10-12 servings INGREDIENTS:
Apple Butter No-Churn Ice Cream: 1 1/4 cups whole milk 1 tbsp. vanilla paste or 1 tsp. vanilla extract 1/2 cup + 2 tbsp. apple butter 3 egg yolks 1/2 cup sugar 1 1/2 cups heavy whipping cream Drunken Apple Crisp Base: 6 Granny Smith apples, peeled, cored and diced small (1/2” dice) 1/3 cup dark brown sugar 6 tbsp. whiskey or bourbon 3 tbsp. all-purpose flour 1 cup apple butter Drunken Apple Crisp Topping: 1 cup all-purpose flour 1 cup dark brown sugar 1 1/4 cups quick oats 1 tbsp. cinnamon 1 tsp. sea salt 1 cup (2 sticks) butter, melted INSTRUCTIONS: Apple Butter No-Churn Ice Cream: Combine the whole milk, vanilla, and 2 tbsp. apple butter in a small saucepan and heat over medium heat until it begins to simmer, stirring occasionally. Meanwhile, in a heat-safe bowl, whisk together the egg yolks and sugar until pale yellow and fluffy. Remove the milk from the heat and pour in a slow and steady stream into the bowl with the egg yolks while whisking the entire time. Pour the egg and milk mixture back into the saucepan and return to the stove over medium heat. Stir constantly until the mixture begins to thicken slightly. Do not let it come to a boil. Remove from heat and continue to stir for a minute. Transfer to a heat-sage bowl and place in the freezer for about 30 minutes to an hour, until completely chilled but not frozen. In a stand mixer or with a hand mixer with a whisk attachment, whisk the heavy whipping cream until soft peaks form. While the mixer is running, slowly pour in the egg and milk mixture. Whisk on high until stiff peaks form. Transfer the mixture to a bread pan. Spoon 1/2 cup of apple butter over the mixture and use a knife or spatula to swirl it into the cream mixture. Immediately place the pan in the freezer. Freeze for at least 4 hour or overnight before serving. You may need to let the ice cream set out for about 10 minutes to soften prior to scooping and serving. Drunken Apple Crisp: Preheat oven to 350° F. Grease an 8”x12” or 9”x13” pan. In a large bowl, mix together the diced apples, sugar, and whiskey. Add the flour and mix thoroughly. Add the apple butter and mix thoroughly. Spread the apple mixture evenly in the prepared pan. Set aside. In a medium bowl, mix together the flour, brown sugar, oats, cinnamon, and salt for the topping. Stir in the melted butter until evenly combined. Using your fingers, crumble and sprinkle the topping evenly over the apples. Do not press the topping down, it should be pretty chunky to allow it to cook properly. Place in the oven and bake at 350° F for 1 hour or until the topping is slightly brown and edges are bubbly. Remove from heat and allow to cook at least 20 minutes before serving. Serve warm or at room temperature with a big scoop of the Apple Butter No-Churn Ice Cream. This pie instantly takes me back to Maui, Hawaii, where I celebrated my 40th birthday. After I arrived on Maui, the first place I went to was a little restaurant called Waikapu on 30. It's a quaint little place just south of Kahului, run by a local woman who makes everything from scratch. You order from the counter and take your food to-go or enjoy it outside on one of their picnic tables. From what I've heard, and from what I've experienced, it's one of the best home-cooking style restaurants on Maui. It was so good that I ended up going there three times during my week-long trip. And one of the main reasons I kept going back was for their haupia sweet potato pie. It was sooooo good! Their's had three layers - a shortbread crust, mashed Okinawan (purple) sweet potatoes, and a thick coconut pudding. After I returned home from my vacation, I was still craving it almost daily! I had to know how to make it, so I reached out to Waikapu on 30 via Facebook and asked if they would be willing to share their recipe. To my surprise, they did!  This haupia pie recipe is my slightly sweetened, sans sweet potato take on their version. Honestly, I would've added the purple sweet potatoes, but I found them impossible to find in Alaska, and still very difficult to find in Nebraska. But this simple version is still fantastic and captures all the sweet and nutty deliciousness that I loved in the original.   HAUPIA PIE WITH MACADAMIA SHORTBREAD CRUST Makes 8-10 servings INGREDIENTS:
Crust: 3/4 cup flour 2 tbsp. sugar 6 tbsp. butter, softened or coconut oil 1/2 cup macadamia nuts, toasted and finely ground Filling: 1 cup water 1/2 cup + 2 tbsp. cornstarch 1 cup sugar 2 cans of coconut milk (full fat) INSTRUCTIONS: Preheat oven to 350° F. Lightly grease a deep dish pie pan, tart pan, or 9" springform pan. In a large bowl, mix together the flour and sugar for the crust. Using a fork, mix in the butter or coconut oil until well blended, then mix in the macadamia nuts. Press the mixture into the bottom of the prepared pan. Bake the crust for about 25 minutes, or until the edges start to brown. Remove from oven and allow to cool completely before you start working on the filling. For the filling, in a large saucepan, mix together the cornstarch and water until dissolved. Place over medium heat and mix in the coconut milk and sugar. Stir the mixture constantly with a whisk until it thickens to a pudding consistency, about 8-10 minutes. Remove from heat. Pour the mixture on top of the cooled crust. Refrigerate the pie uncovered for at least 3 hours before serving. Serve as is or topped with toasted coconut, toasted macadamia nuts, or coconut whipped cream. Years ago, my grandma used to make us Chicken Cordon Blue every so often for our Sunday family dinners. It was one of my favorite things she made. Come to find out, she didn't make it from scratch. Ha! Our family business sold them premade, so she really just baked them. Regardless, the dish always reminds me of her. I wanted to come up with an easier version of it, but one that's still as delicious. This Chicken Cordon Blue Pasta Casserole was just the ticket! It's pretty quick and easy to make, still highlights all the delicious chicken, ham, and swiss flavors, and is topped with a crispy bread crumb topping to mimic the breading of the chicken. So yummy! I think grandma would enjoy this one.  CHICKEN CORDON BLUE PASTA CASSEROLE Makes about 8-10 servings INGREDIENTS:
2 tbsp. butter 6 large garlic cloves, minced 2 tbsp. flour 1 cup heavy whipping cream 2 cups whole milk 2 1/2 cups swiss cheese 4 ounces cream cheese 1/2 cup sour cream 1 tbsp. dijon mustard 1 tbsp. fresh thyme 2 tbsp. fresh chives, minced 1 tsp. salt 4 cups shredded chicken (from 1-2 large rotisserie chickens) 8 ounces smoked ham, cut into small cubes 12 ounces bite-sized pasta of choice (penne, macaroni, rigatoni, fusilli, cavatappi all work well) 3/4 cup panko bread crumbs 3 tbsp. butter 1 tsp. garlic salt 1 tbsp. chives, minced INSTRUCTIONS: In a large saucepan or stock pot, bring water to a boil and cook pasta according to package instructions. Meanwhile, in a large saucepan, melt 2 tbsp. butter over medium heat. Add the garlic and cook for 1 minute. Add the flour and cook for 1 more minute. Stir in the heavy cream until smooth, then add the milk. Bring the mixture to a simmer, then stir in the swiss cheese, cream cheese, sour cream, dijon, thyme, chives,and salt. Stir until sauce is smooth. Reduce heat to low. Stir in the chicken and ham. Once the pasta is done cooking, toss the pasta with the sauce, then pour the mixture into a 9x13 inch baking dish. Cover with foil while you make the panko topping. In a sauté pan, melt 3 tbsp. butter over medium heat. Once melted, add the garlic salt and pank bread crumbs and toss to coat. Stir and toss the bread crumbs frequently for about 3 minutes until golden brown. Stir in the chives, then sprinkle the mixture over the pasta. Serve immediately. This Cherry Amaretto Loaf Cake is slightly dense, similar to a pound cake, with a soft amaretto/almond flavor and a layer of amaretto soaked cherries, then topped with an amaretto glaze and a crunchy layer of candied almonds. It is so moist and delicious, it'll be hard to resist!  CHERRY AMARETTO LOAF CAKE Makes 1 loaf cake, approximately 6-8 servings INGREDIENTS:
Cherry Amaretto Cake: 1 1/2 cups dark sweet cherries, fresh or frozen**, pitted & halved 2 tbsp. amaretto 1/2 cup butter, softened 1 1/2 cup sugar 2 tbsp. dark brown sugar 3 eggs 1/2 cup sour cream 1 tsp. almond extract 2 cups all-purpose flour 1 tsp. baking powder Amaretto Glaze: 1 1/2 cups powdered sugar 2 tbsp. amaretto 2 tbsp. milk Candied Almond Topping: (optional) 1 cup almonds, sliced 1/4 cup sugar 2 tbsp. water **If using frozen cherries, thaw them out first and very gently squeeze to remove excess moisture. (Don't squeeze all of the juice out of them though!) INSTRUCTIONS: Preheat oven to 350° F. Grease and line a loaf pan with parchment paper. In a small bowl, combine the cherries and amaretto. Set aside and allow to soak for 10-30 minutes. In a large bowl or using a stand mixer with a whisk attachment, combine the butter, sugar, and brown sugar, and mix for about 2 minutes. Add the eggs, sour cream, and almond extract and mix until smooth. Mix in 1 cup of flour. Strain the cherries and add the amaretto to the cake batter and mix until combined. Add the remaining flour and baking powder and mix until smooth. Pour half of the cake batter into the prepared loaf pan. Evenly distribute the cherries in the loaf pan, then top with the remaining cake batter. Bake at 350° F for 50-60 minutes, or until a toothpick inserted in the center comes out clean. Remove from pan from the oven and cook the cake in the pan for about 20 minutes. Lift the cake out of the pan using the parchment paper and continue to cool completely on a wire rack. To make the candied almond topping, combine the almonds, sugar and water in a small saucepan and heat over medium-high heat. Gently stir and toss the almonds frequently for 3-5 minutes, or until the almonds begin to toast slightly and the sugar coats the almonds. Pour the mixture out onto a sheet of parchment paper and spread into a thin layer. The mixture will harden quickly as it cools. Set aside to cool completely. In a small bowl, mix together all the ingredients for the amaretto glaze. If the glaze is too thick, add more milk 1 tsp. at a time. If the glaze is too thin, add more powdered sugar 1 tbsp. at a time. Once the cake is completely cooled, drizzle the glaze over the top of the cake, then top with the candied almonds. Slice and serve. Strawberries and chocolate are a classic pairing, yet as I thought about brownies with strawberries, I couldn’t recall ever seeing that combo before. So of course I had to try it! I was originally going to just too these brownies with a layer of roasted strawberries and ganache, but then remembered how my husband (and even me sometimes) doesn’t like chunks of fruit in his baked goods. So the roasted strawberries morphed into a smooth and creamy strawberry cheesecake layer. And I couldn’t be any happier! I seriously could eat one of these Strawberry Cheesecake Brownies every single day of my life!  The base brownie recipe is one that I developed while working on my cookbook (which is still sort of a work-in-progress). It is dense, chewy and fudgy and everything a brownie should be, in my opinion. To make the brownies, you start off mixing the dry ingredients, then melt the butter and chocolate in a double boiler (see below), then add the sugar and other wet ingredients to the chocolate, stir that into the dry ingredients, then mix in more chocolate. It may sound a little complicated, but after you do it once, it’s a breeze! And trust me, you will want to make these brownies more than once! What is a double boiler, you ask? Well, a double boiler is essentially a medium-sized heatproof bowl (stainless steel or glass) that’s set over a medium-sized saucepan that has about an inch or two of water in it. The bottom of the bowl should not touch the water. The saucepan is placed over medium or medium-low heat and once the water is hot and bubbly, but not boiling, the double boiler is ready. (Wait, you don’t want a double BOILER to boil? I know, it’s confusing!) The double boiler is used a lot for melting chocolate or for egg based sauces because it is a slower, more gentle heat source that won’t cause the chocolate or sauce to seize up and separate like it would with direct heat.  STRAWBERRY CHEESECAKE BROWNIES Makes about 9 servings INGREDIENTS:
Brownies: 3/4 cup all-purpose flour 1/4 cup cocoa powder 1/4 tsp. salt 1/4 tsp. baking soda 1/2 cup butter, cut into cubes 1 cup semisweet chocolate chips 1/2 cup sugar 1/2 cup packed dark brown sugar 2 eggs + 1 egg yolk, room temperature 1 1/2 tsp. vanilla 3/4 cup semisweet chocolate chips 1/2 cup peanut butter Strawberry Cheesecake: 1 cup fresh strawberries, leaves removed** 8 oz. cream cheese, room temperature 1/3 cup powdered sugar 1 egg 1/2 tsp. vanilla INSTRUCTIONS: Preheat oven to 350° F. Line an 8x8 inch to 9x9 inch baking dish with parchment paper. In a food processor, add all ingredients for the strawberry cheesecake and process for 1-2 minutes until smooth. Set aside. In a large bowl, mix together the flour, cocoa powder, salt, and baking soda. Set aside. In a double boiler, melt the butter and 1 cup of chocolate chips, stirring constantly until fully melted. Once melted, remove from heat and whisk in the sugar and brown sugar until smooth. Quickly whisk in the eggs and egg yolk, then the vanilla. Add the chocolate mixture to the flour mixture and mix until well combined and batter is smooth. Stir in the chocolate chips. Spread the brownie batter in the bottom of the prepared baking dish. Pour the strawberry cheesecake over the top of the brownies. Sprinkle with chocolate chips if desired. Bake the brownies at 350° F for 30-35 minutes or until the center is set when the dish is jiggled. Cool completely in the dish. Once cool, lift the brownies out of the dish by the parchment paper, cut and serve. Thick, chewy cookie bars with a little crunch and a lot of gooey chocolate chips... that's what I was aiming for with these cookie bars. And on Round 2 of working on this recipe, that's exactly what I got.  My first attempt at creating this recipe was a bit of a flop. They turned out to be too sweet, almost gritty with sugar. Come to find out, there were a couple reasons for this:
Now, I could've kept the brown butter and just made one of those other adjustments, but I also found that the flavor combo was a bit too rich and actually competed against the richness of the chocolate and walnuts instead of complimenting them. I wanted those two ingredients to shine in this recipe, so regular softened butter it was!   LOADED OATMEAL COOKIE BARS Makes 24 servings INGREDIENTS:
1 cup unsalted butter, softened 1/2 cup sugar 3/4 cup dark brown sugar 2 large eggs 1 tsp. maple extract 1 tsp. vanilla extract 1 tbsp. molasses 1 1/2 cups all-purpose flour 1/2 tsp. salt 1 tsp. baking soda 1 tsp. baking powder 2 cups old-fashioned oats (not quick oats) 1 1/2 cups semi-sweet chocolate chips 1/2 cup walnuts, chopped & lightly toasted Flaky sea salt, to garnish, if desired INSTRUCTIONS: Preheat oven to 350° F. Generously grease or line an 8x12 inch or 9x13 inch baking dish with parchment paper. Using a stand mixer with a paddle attachment, mix together the butter, sugar, brown sugar, eggs, maple extract, vanilla extract, and molasses. Mix on medium speed for about 3 minutes. Add the flour, salt, baking soda, and baking powder to the bowl and mix on low speed for about 2 minutes. Add the oats and mix until well combined, then add the chocolate chips and walnuts and mix until well combined. Press the cookie dough into the prepared baking dish until you have an even, smooth layer. Bake at 350° F for 25-30 minutes until the edges are golden brown. Remove from oven and cool for at least 20 minutes before cutting. Cut into 24 pieces and serve warm or at room temperature. Have you ever tried grilled melon? If not, you're missing out! I am a huge fan of any kind of grilled fruit. I love the smoky flavor mixed with the sweetness, and how the sugars in the fruit create a beautiful char. This Grilled Cantaloupe and Prosciutto with Burrata was no exception. It was incredible! This dish makes an excellent appetizer prior to dinner, or a nice snack to enjoy on a patio on a sunny day, sipping some white wine.  The first step in grilling is to make sure your grill is hot and clean. I use a gas grill and preheat it for a good 10-15 minutes on high. Once the grill is preheated, I use a grill brush and sometimes a scraper to clean off the grates. To grill the fruit, first make sure you have nice and ripe cantaloupe to work with. Use a sharp knife to cut the cantaloupe in half lengthwise, then scoop out the seeds and gooey-ness from the inside. Next, trim off the rind, and then slice into about 5-6 slices. Brush the cantaloupe with olive oil. Right before I place the cantaloupe on the grill, I use tongs and a paper towel that's been dipped in olive oil to quickly brush the grill grates. Then I place the cantaloupe on the grill. (Oiling the grates isn't usually necessary, but I like to take a little extra precaution so that the fruit doesn't stick to the grill.) I let the slices grill for about 3-5 minutes per side, until they got some good grill marks and a bit of char. Use a good pair of tongs with metal ends to flip and remove the cantaloupe. They are much easier to work with.  GRILLED CANTALOUPE AND PROSCIUTTO WITH BURRATA Makes 4 servings INGREDIENTS:
1/2 cantaloupe melon 1/2 loaf Como bread, cut into 1" thick slices (any rustic style white bread would work) 2 tbsp. olive oil 3 oz. prosciutto 16 oz. burrata cheese 1/4 cup basil leaves, whole or chopped 1 tbsp. olive oil INSTRUCTIONS: Preheat your grill on high for 10-15 minutes. Once preheated, clean the grill with a grill brush and scraper if needed. Using a sharp knife, carefully slice the cantaloupe in half lengthwise. Remove the core and seeds, then trim off the ride of the melon. Slice the cantaloupe into 5-6 slices. Brush the cantaloupe slices and bread slices with olive oil on both sides. Place the cantaloupe and bread on the grill. Grill the bread for only about 1 minutes per side, keeping a close eye on it, as it may burn quickly. Grill the cantaloupe for 3-5 minutes per side, until you see nice grill marks and a bit of char. Transfer the melon and bread to a clean plate and allow to cool. Cut the cantaloupe slices and bread slices in half. Arrange the cantaloupe, prosciutto, burrata, fresh basil, and bread on a serving platter and drizzle with 1 tbsp. olive oil prior to serving. This bright and springy salad was actually inspired by this gorgeous chevre I found at a cheese shop in Anchorage, Alaska called Fromagio's. It's called Tea Rose from Capriole Goat Cheese, a goat dairy in Greenville, Indiana. On their website, they call Tea Rose a "breath of Spring". And it certainly is! This goat cheese pleasantly lacks the funk that a lot of goat cheeses tend to have, and instead is bright and tangy. It's coated with fennel pollen, fresh herbs, and dried flower petals that are found around their farm, so it has really nice floral/herbal notes as well. And I mean, just look at it! Isn't it just the most beautiful cheese you've ever seen?  Am I geeking out too much about this cheese? If I am, sorry! A little known fact is that I worked at a goat dairy for a few months back in 2015 in Longmont, Colorado. I mainly handled the sales logistics, but I got to indulge in all different kinds of award-winning goat cheeses every day. So obviously I'm a huge fan of goat cheese and tend to geek out on it.  I wanted to come up with a salad that would compliment the cheese and embody that same "breath of Spring" vision. Looking at the color palette of the Tea Rose and considering the bright crispness of its flavor, the rhubarb and fennel were obvious choices to me. Roasting them both brings out their flavor and natural juices, allowing the ingredients to shine rather than being masked by a salad dressing. This is definitely my favorite salads this spring, so I hope you try it! Let me know what you think in the comments below!  ROASTED RHUBARB FENNEL & GOAT CHEESE SALAD Makes 2 servings INGREDIENTS:
3-4 medium stalks of rhubarb, cut into 1" sections (about 3 cups) 3 tbsp. honey 2 large fennel bulbs, stalks removed & thinly sliced 1 tbsp. olive oil 1 cup baby arugula 1/4 cup walnuts, chopped 2 ounces goat cheese, crumbled (preferrably Capriole's Tea Rose!) 1 tbsp. lemon zest, to garnish Fennel fronds, to garnish INSTRUCTIONS: Preheat oven to 450° F. Line two small baking sheets or dishes with foil, then spray the foil with oil. On one of the prepared baking sheets, spread the rhubarb in a single layer. Drizzle the honey over the rhubarb. Roast in the oven for about 8-10 minutes, or until the rhubarb has softened. Keep a close eye on it so the honey doesn't burn. Remove from oven and allow to cool completely. Reserve the juices that have collected on the foil. In a large bowl, toss the fennel with the olive oil. Spread it out in an even layer on the second prepared baking sheet. Roast for about 20 minutes, just until it starts to brown a bit around the edges. Remove from oven, transfer the fennel to a bowl and allow to cool completely. On the same pan as the fennel, arrange the walnuts in a single layer. Place in the oven for 5 minutes to toast. Remove and allow to cool completely. Arrange the arugula on a serving platter or individual plates, then top with the rhubarb, fennel, walnuts, and goat cheese. Drizzle the reserved juices from the rhubarb over the salad, and garnish with lemon zest and fennel fronds. I bet you haven’t grilled nearly enough vegetables! Grilling isn’t just for meats, you know. Grilling vegetables and even fruits will take them to a whole other level. The smokiness and bit of char create such flavorful veggies. You’ll just want more and more! 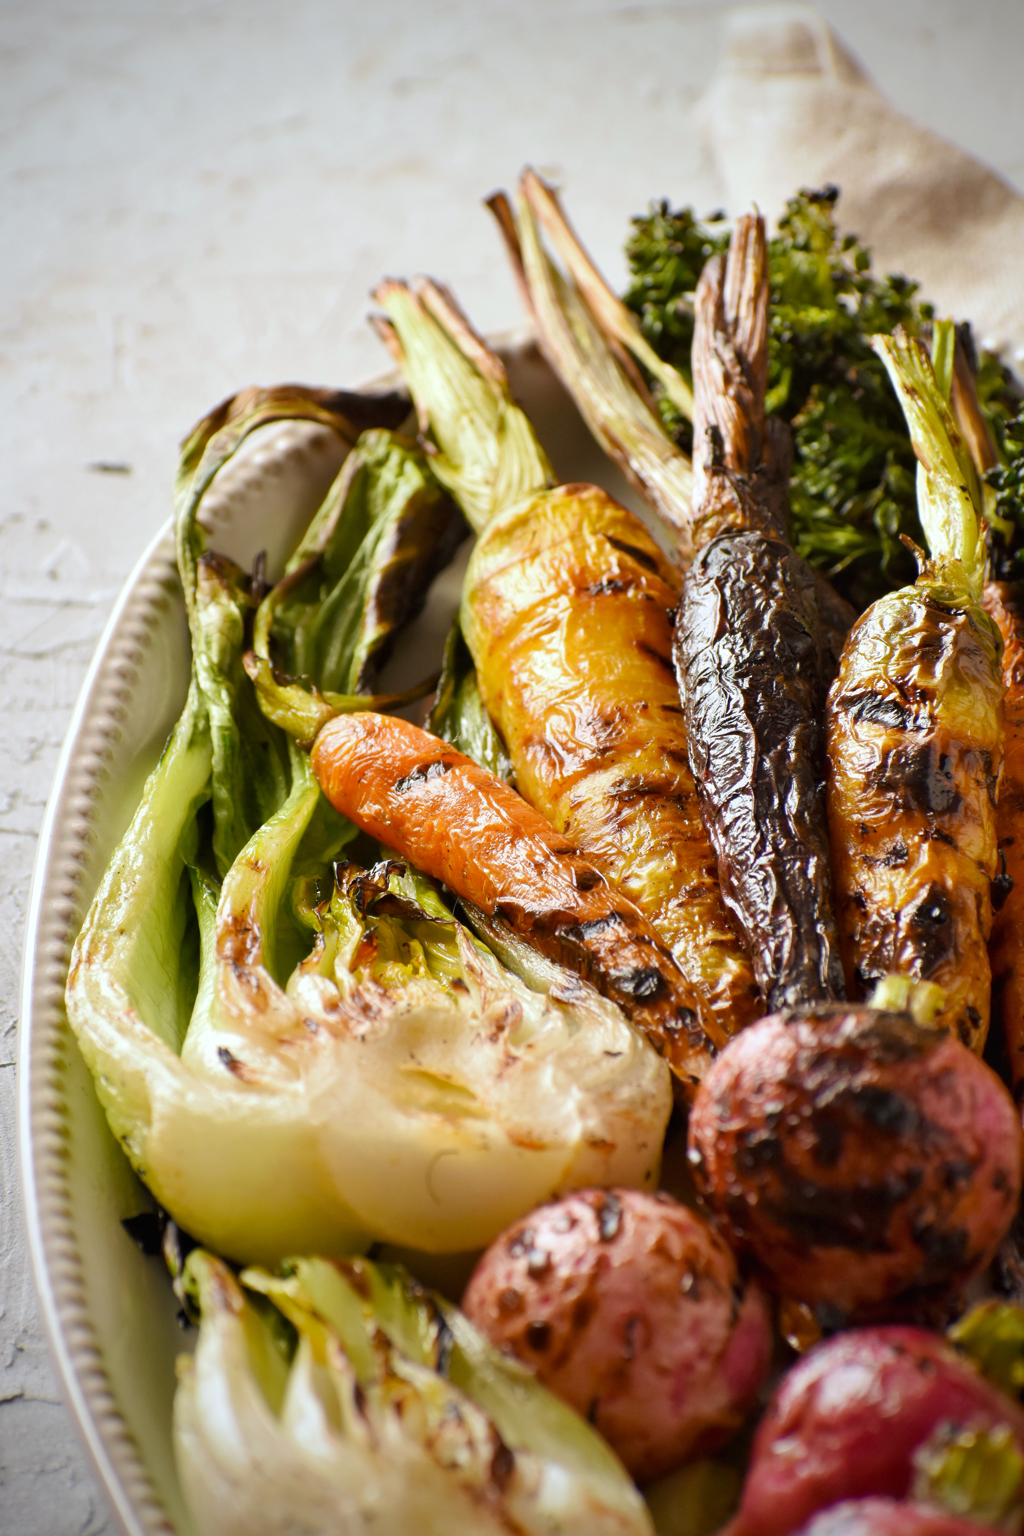 Helpful tips for grilling your veggies.
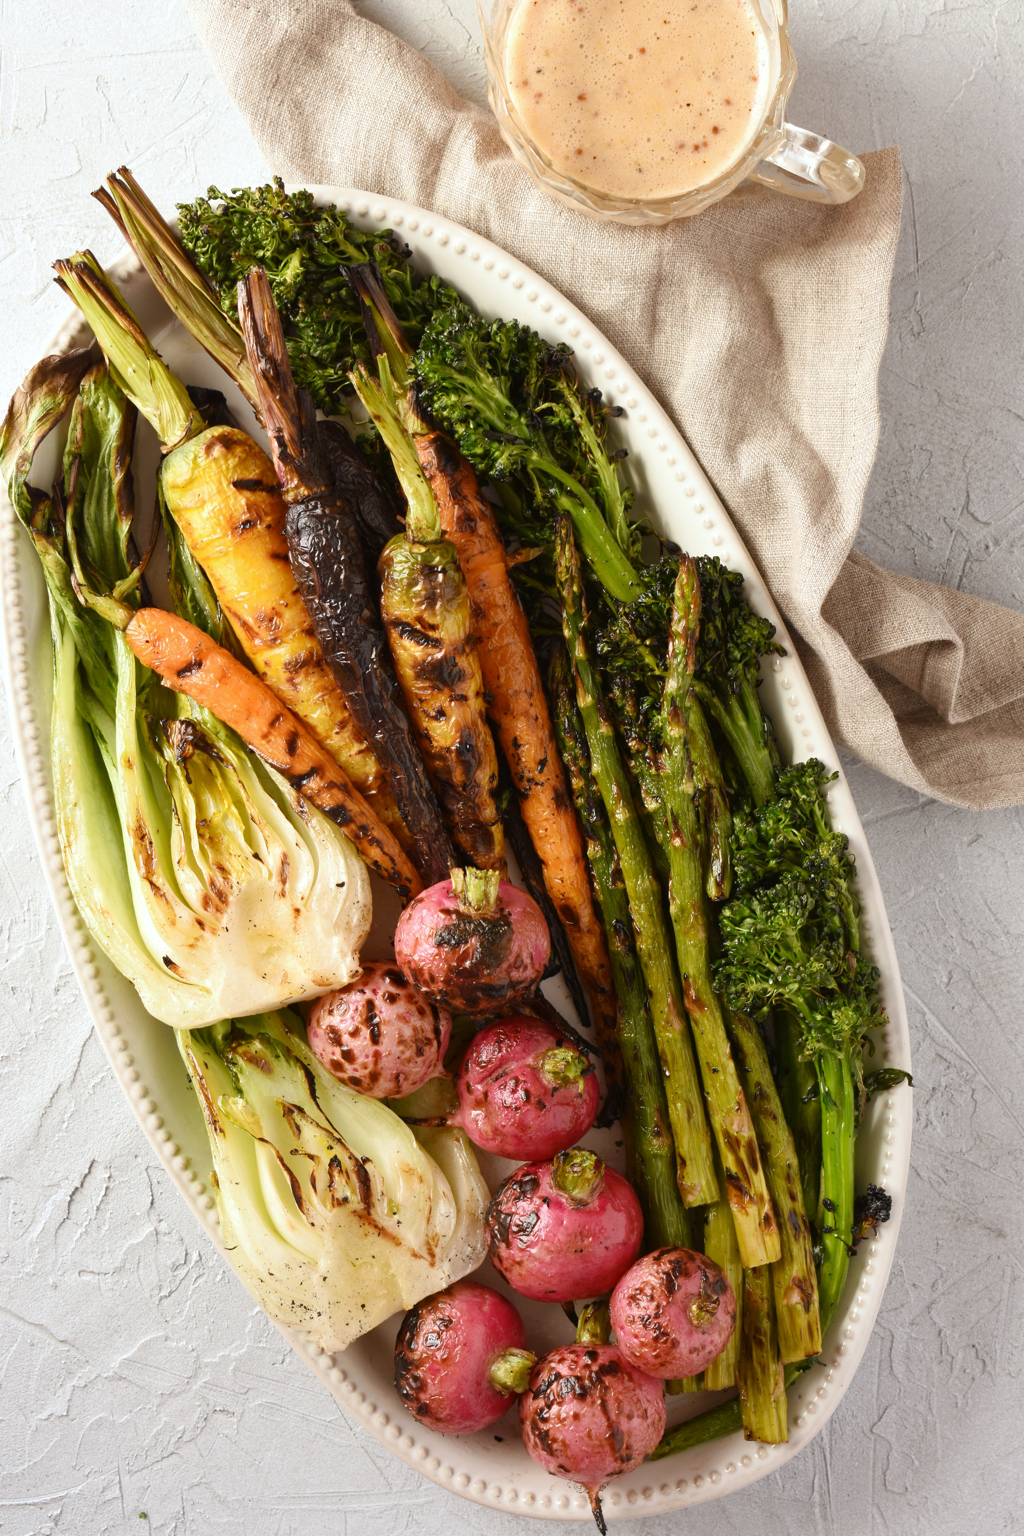 GRILLED SPRING VEGGIE SALAD WITH WHOLE GRAIN MUSTARD VINAIGRETTE Makes about 4-6 servings INGREDIENTS:
Veggies: 6-8 small carrots (3/4” thick or less), greens removed and rinsed 6-8 large radishes, greens removed and rinsed 1 large bunch broccoli rabe, 1/2” of the ends trimmed off 10-15 asparagus spears, 1” of the ends trimmed off 2 baby bok choy, rinsed and cut in half lengthwise 1/4 cup olive oil Chunky sea salt, to taste Other veggie alternatives: 1 red onion, peeled and quartered lengthwise 1 small bunch kale, stems trimmed 2-3 turnips, rinsed and halved or quartered lengthwise 1 head of romaine lettuce, rinsed and halved lengthwise Vinaigrette: 2 tbsp. whole grain mustard 1 tbsp. honey 2 tbsp. red wine vinegar 3 tbsp. olive oil 1/2 tsp. salt 1/4 tsp. black pepper INSTRUCTIONS: Preheat your grill for 10-15 minute on high. Once preheated, clean the grates with a spatula or grill brush. Reduce the heat to medium-high. Brush all sides of each veggie generously with olive oil. Place the carrots on the grill first. After about 2 minutes, place the radishes on the grill and rotate the carrots. After 2 minutes, rotate the radishes and the carrot, then again after 2 more minutes. Add the broccoli rabe, asparagus, and bok choy. Every 2 minutes, rotate the veggies and flip the bok choy until they are evenly cooked with bits of char. Once the veggies are done, transfer them to a platter. Using a blender or small bowl with a whisk, mix together all ingredients for the vinaigrette. To serve, arrange the veggies on a serving platter and drizzle with the vinaigrette, or chop the grilled veggies into large bite-sized pieces and toss with the vinaigrette. These cupcakes scream girly! Using Betty Crocker's French Vanilla Cake Mix as a base, and incorporating a reduction of Barefoot rosé moscato, these fluffy little bites of heaven are super easy to make and full of sweet rosé flavor!  EASY ROSÉ CUPCAKES WITH ROSÉ BUTTERCREAM Makes 2 dozen cupcakes INGREDIENTS:
Rosé Reduction: 2 1/2 cups sweet rosé wine (I used Barefoot's rosé moscato) Cupcakes: 1 cup of the rosé reduction 1 box of Betty Crocker Super Moist French Vanilla cake mix 1/2 cup vegetable oil 4 eggs Frosting: 1/2 cup butter, softened 3 1/2 - 4 1/2 cups powdered sugar 1/4 cup of the rosé reduction 1 tbsp. heavy cream INSTRUCTIONS: In a large saucepan, bring the rosé to a boil over medium high heat. Allow to boil for approximately 30 minutes, or until it has reduced by half and you are left with 1 1/4 cups of rosé. Remove from heat and allow to cool completely. Preheat oven to 350° F. Generously grease two muffin pans, or line with paper liners. In a large bowl or using a stand mixer with the whisk attachment, mix together all ingredients for the cake. Whisk on medium-high for 5 minutes. Divide the batter evenly amongst the cups, filling each about half way full. Bake for 13-16 minutes, or until a toothpick inserted in the center comes out clean. Remove from oven and allow to cool in the pan for 5 minutes, then transfer to a wire cooling rack to cool completely before frosting. Using a stand mixer with the whisk attachment, beat the butter and 1 cup of powdered sugar for 2 minutes until light and fluffy. Mix in the rosé reduction and heavy cream. Add the remaining powdered sugar, 1/2 cup at a time, until you reach the desired consistency. Frost the cupcakes and serve. |