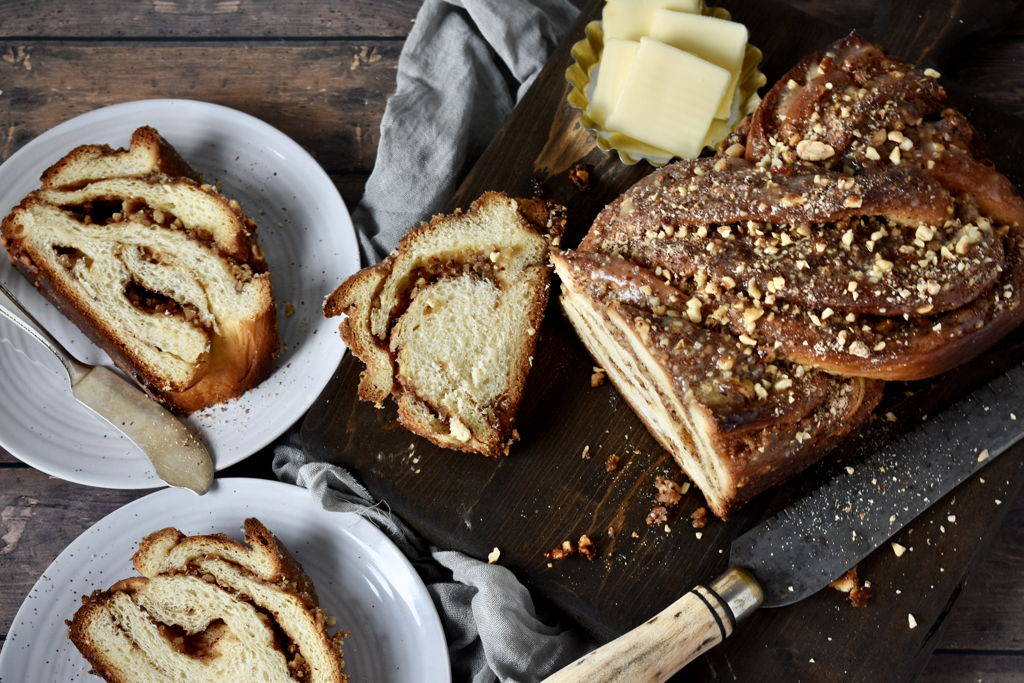
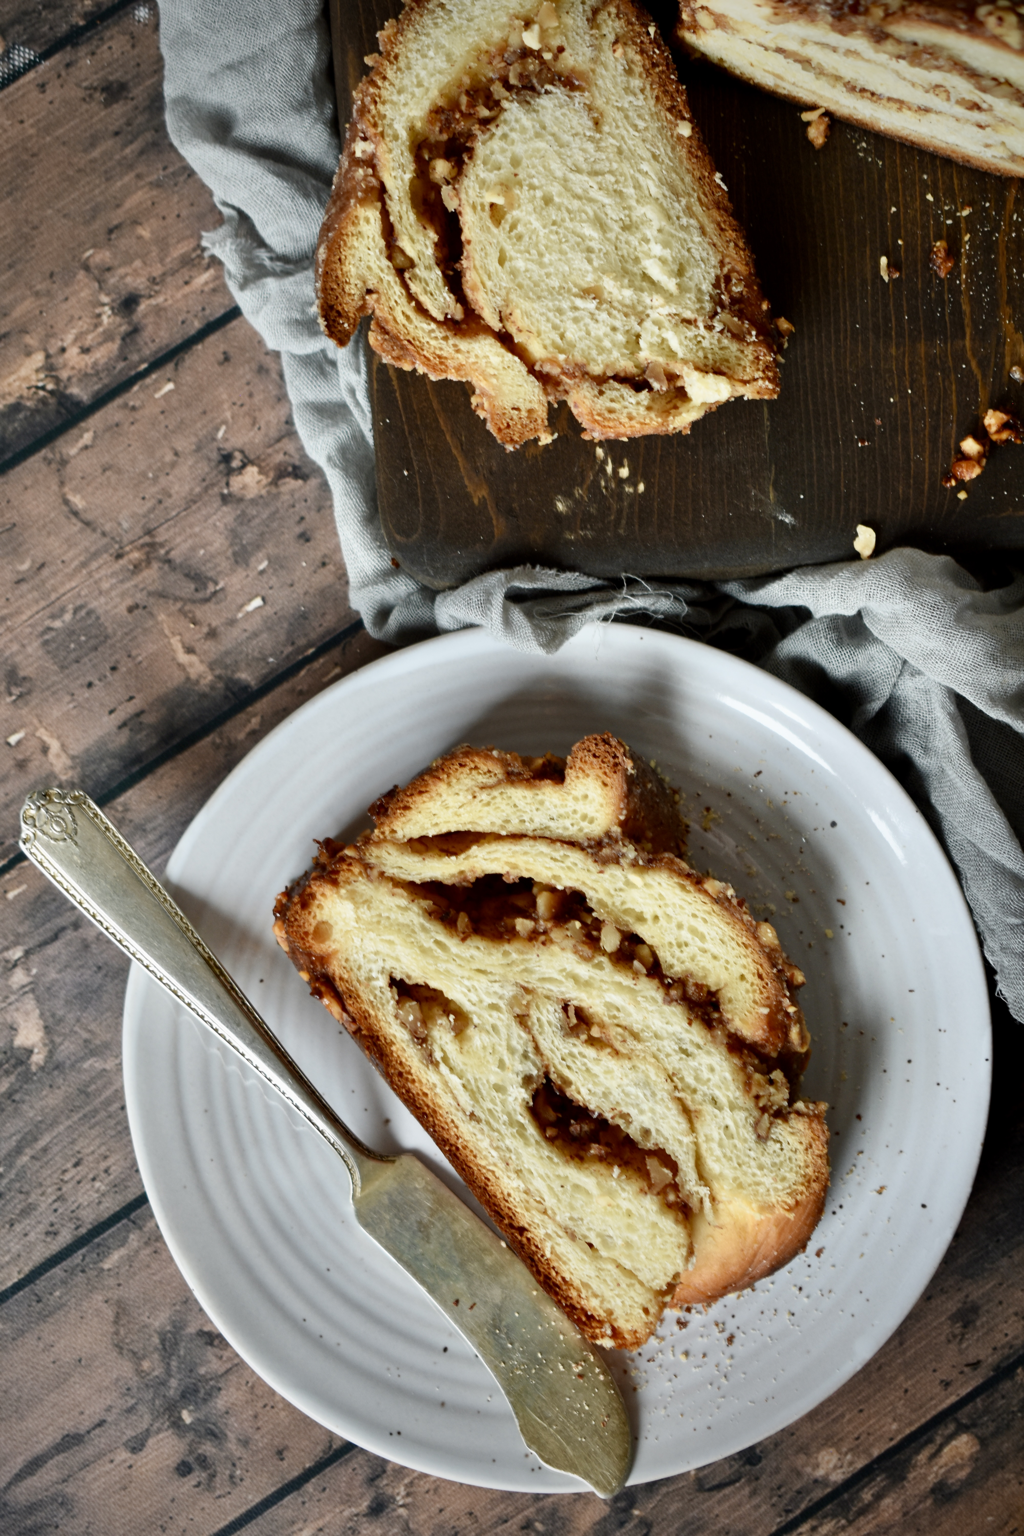
  HAZELNUT CINNAMON BABKA Makes 2 Loaves INGREDIENTS:
Dough: 4 cups all-purpose flour 1/3 cup sugar 2 1/2 tsp. active dry yeast 1 1/4 tsp. sea salt 2 large eggs 1 tsp. vanilla bean paste 1 cup lukewarm milk (110° F) 1/2 cup butter, softened Filling: 1/2 cup butter, softened 3/4 cup dark brown sugar 2 tsp. cinnamon 1 1/2 cups whole raw hazelnuts Topping: 1/4 cup butter, melted 1/4 cup sugar 1/2 tsp. cinnamon INSTRUCTIONS: Preheat oven to 350° F. Spread hazelnuts in a single layer on a sheet pan. Roast for 12-15 minutes, tossing every 4-5 minutes. Allow to cool. Once cooled, chop in a food processor until finely chopped. Set aside. Using a stand mixer with the dough hook attachment, mix together the flour, sugar, yeast, salt, eggs, vanilla, and warm milk on medium speed until well combined, about 5 minutes. Add the butter, 1 tbsp. at a time, waiting until fully incorporated before adding more. Once the butter is all added, mix on medium speed for another 5 minutes. Cover the bowl with plastic wrap and allow to rise until doubled in size, about 1 to 1 1/2 hours. Grease two loaf pans and line with parchment paper. Punch down the dough and form into a ball. Turn the dough out into a floured surface. Roll the dough into a rectangle that’s about 16” x 20”. In a small bowl, mix together the butter, brown sugar, and cinnamon for the filling. Spread the filling over the dough, leaving a 1/2” border. Sprinkle the chopped hazelnuts over the filling. Roll the dough up tightly lengthwise. Trim the ends of needed. Cut the roll in half for two loaves. For each loaf, cut the roll in half lengthwise. Turn the dough so the cut side is facing up. Twist the two pieces around each other a few times and pinch the ends. Transfer the dough to a one of the prepared loaf pans, folding the ends of the dough under. Cover with plastic wrap and repeat with the second loaf. Allow the loves to rise until doubled in size, about an hour. Preheat oven to 350° F. Bake both loaves for 35-40 minutes, until golden brown and a toothpick inserted in the center comes out clean. Cool the loaves in the pans for 15 minutes, then transfer the loaves to a cooling rack. Brush the loaves with the melted butter for the topping. In a small bowl, combine the sugar and cinnamon. Sprinkle over the butter. Allow the loaves to cool slightly before serving, or serve at room temperature.
0 Comments
This is literally the easiest and best rustic-style bread you can make. There’s nothing tricky about it, and it takes like maybe 10 minutes total hands-on work time! You can mix it up in the morning and then just forget about it all day. Pop it in the oven right before dinner and you’ve got a fresh loaf to serve with your dinner and for sandwiches for lunch the next day. And the bread itself is fantastic! It’s airy with a slightly chewy texture and a crisp crust. It’s also great for French toast, crostini, or to serve with a cheese platter. 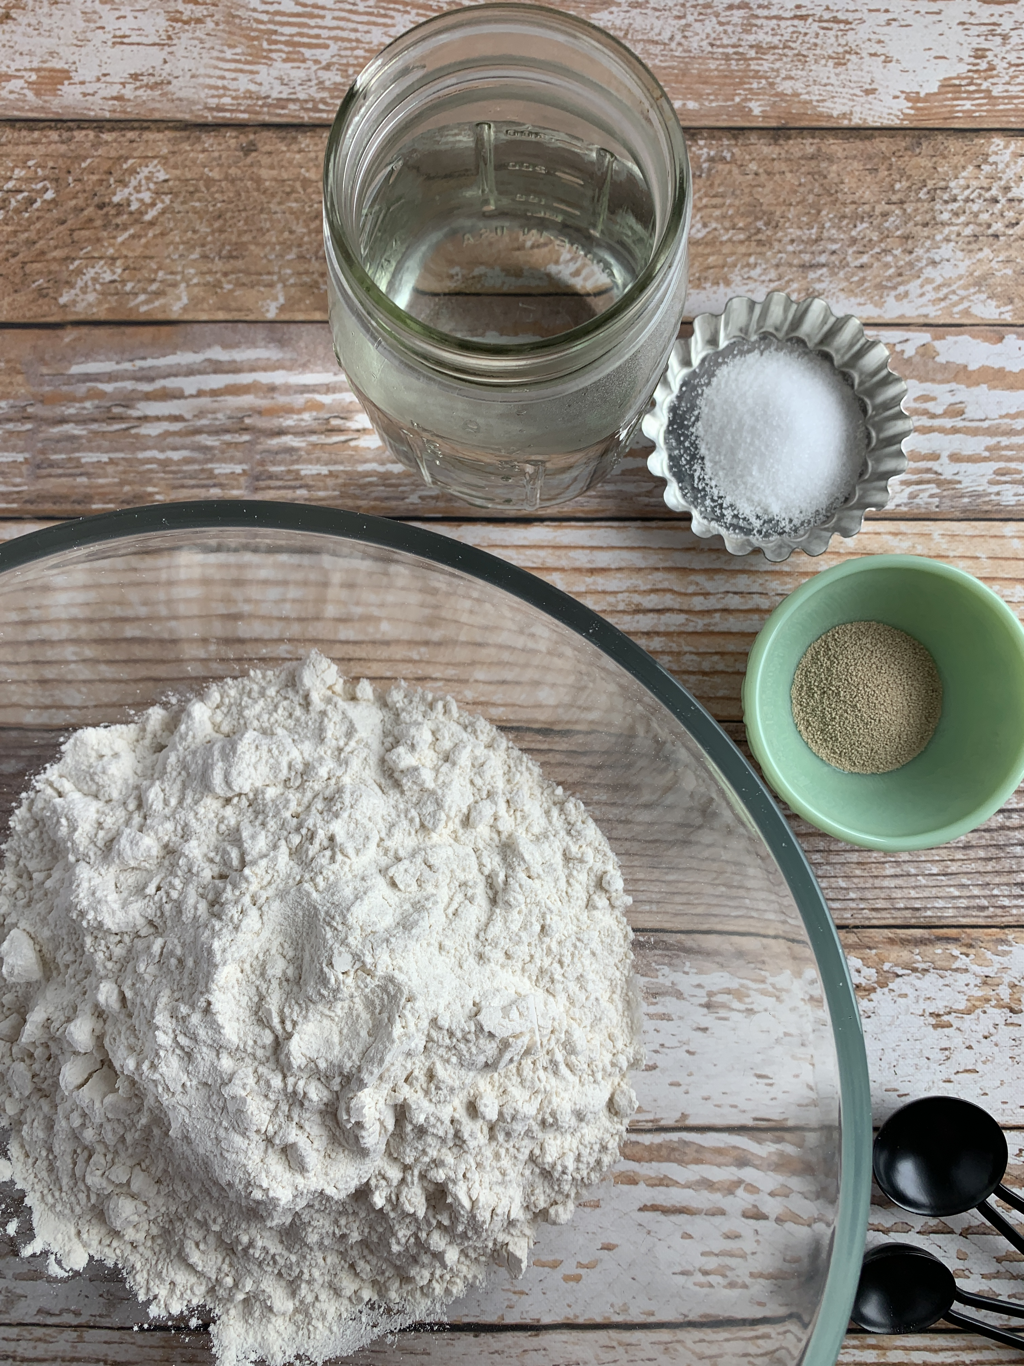 You only need 4 basic ingredients! You can’t get much simpler than that! Mix it all up just until all the flour is moistened. The dough will look like a shaggy mess, and not at all like anything that’s turn into a loaf of bread, but trust me, it all comes together in the end. Just cover it with some plastic wrap, leave it on your counter and forget about it for about 8-12 hours. 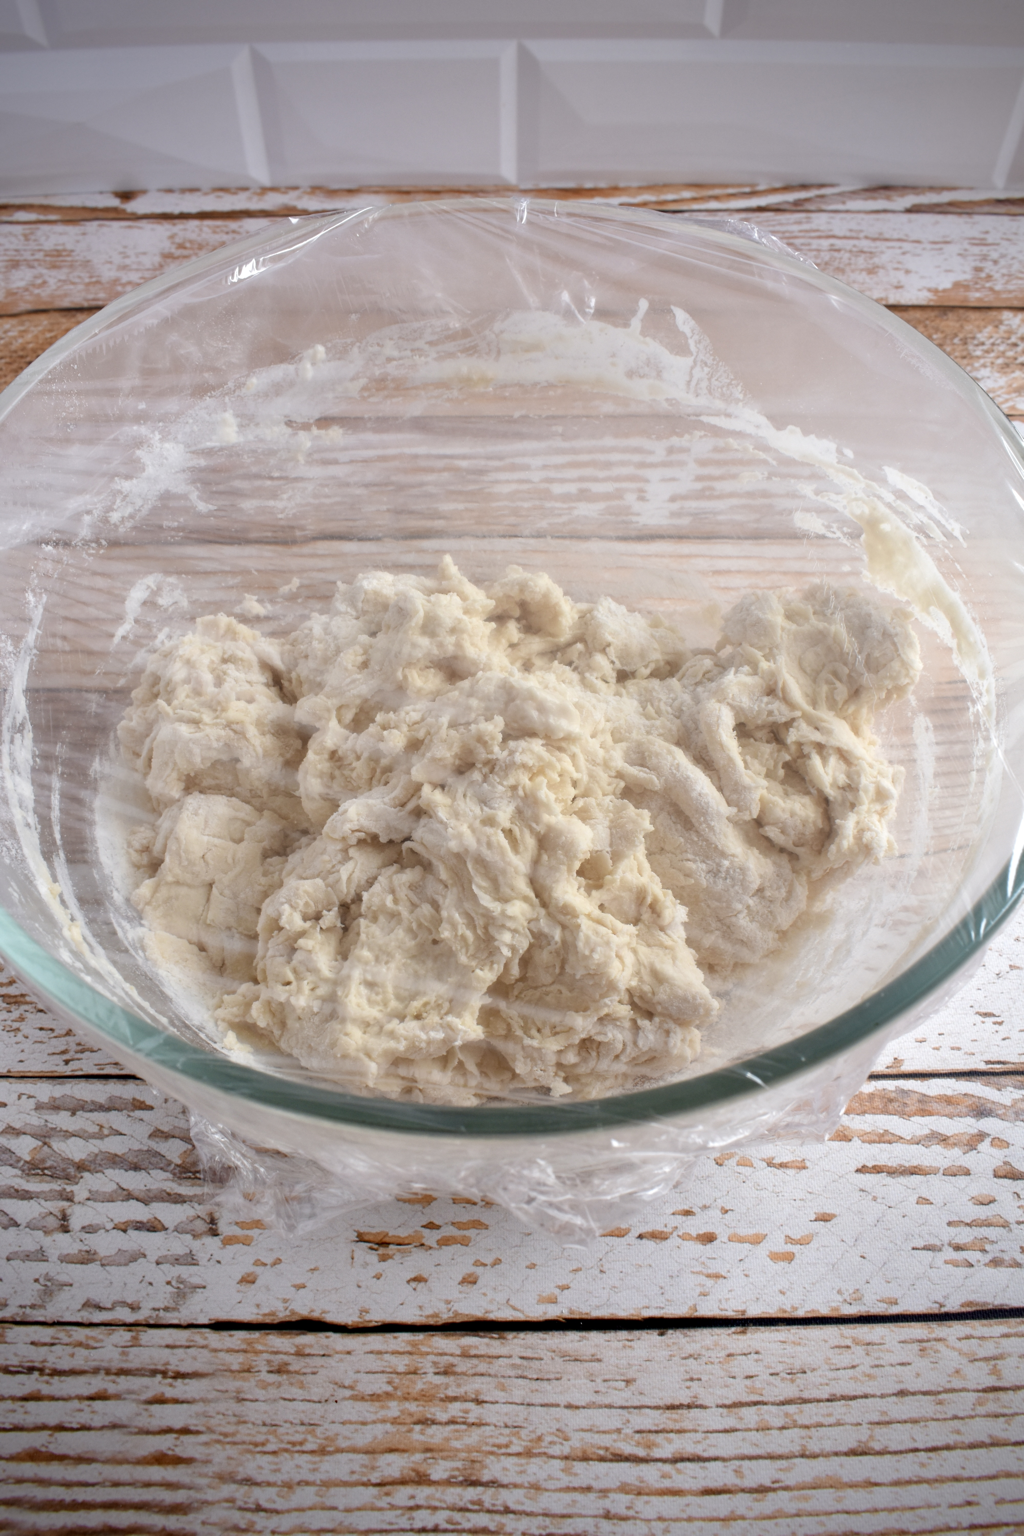 After it’s been left alone to rise for at least 8 hours, put your empty dutch oven in the oven and turn it on to 450°F. Set a timer for 30 minutes. While that’s heating up, you’ll scoop the bread dough out onto a well- floured surface and gently shape the dough into a ball. Put the ball onto a large sheet of parchment paper. It might feel chunky and dry in spots, but again, trust me! When the timer goes off, take the dutch oven out, put the dough and parchment paper inside, put the lid on and put the dutch oven back in the oven to bake. Bake the bread for 40 minutes with the lid on, then 15 minutes without the lid. 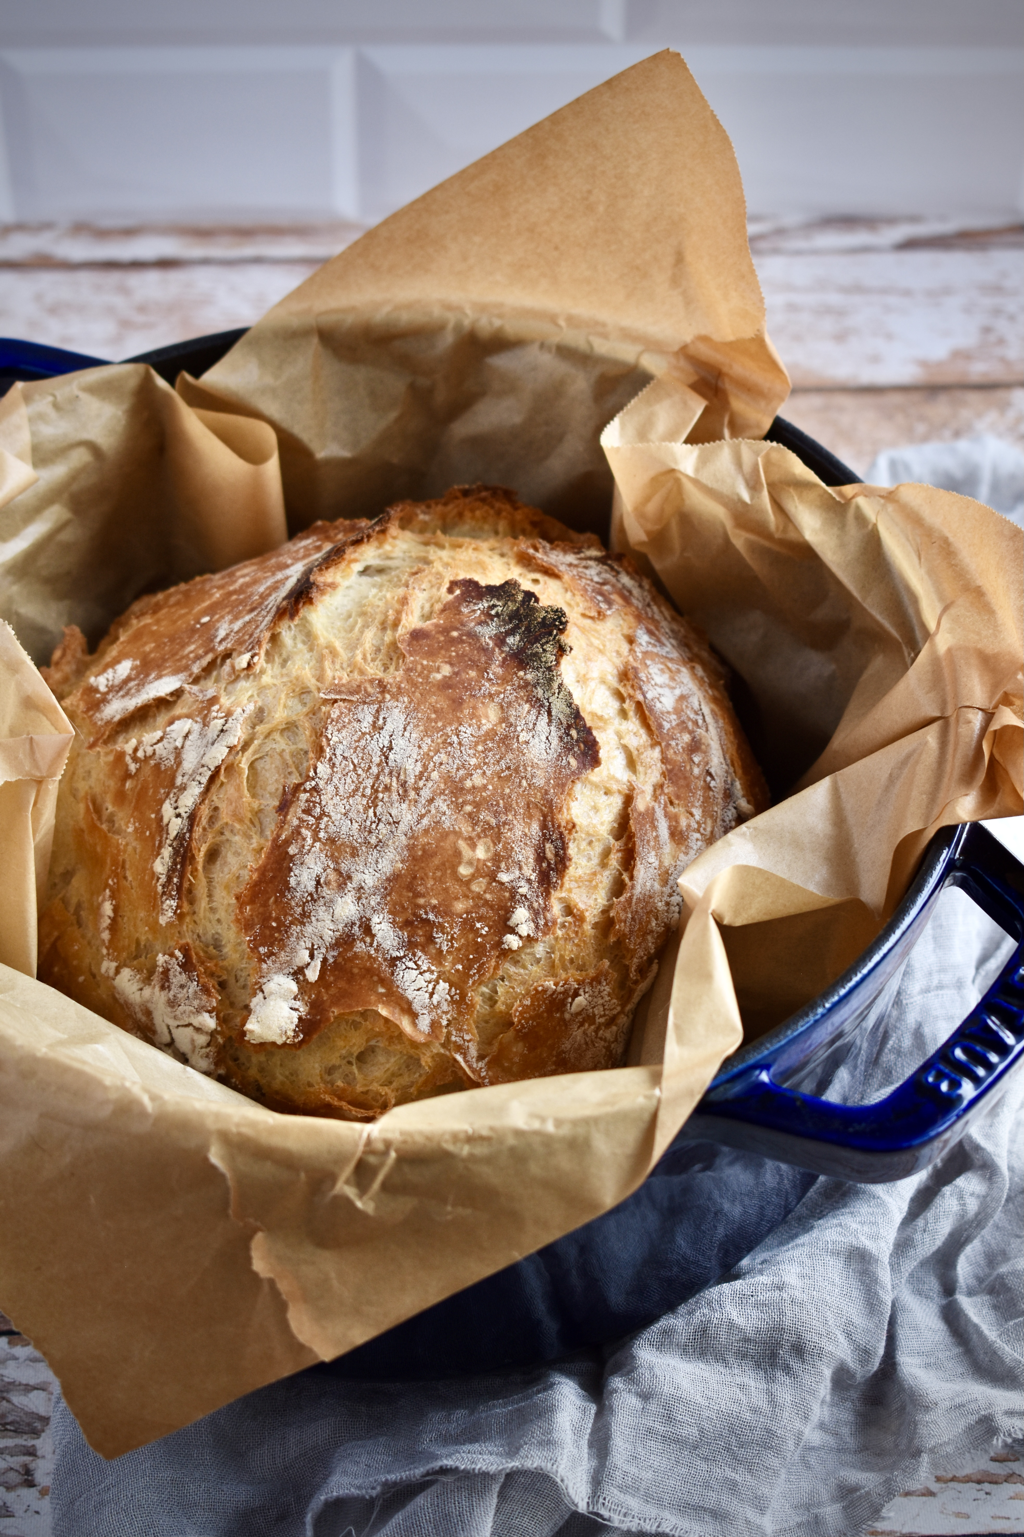 And you’re done! It’s that easy! Now go enjoy this gorgeous loaf that looks like it's straight from the bakery! 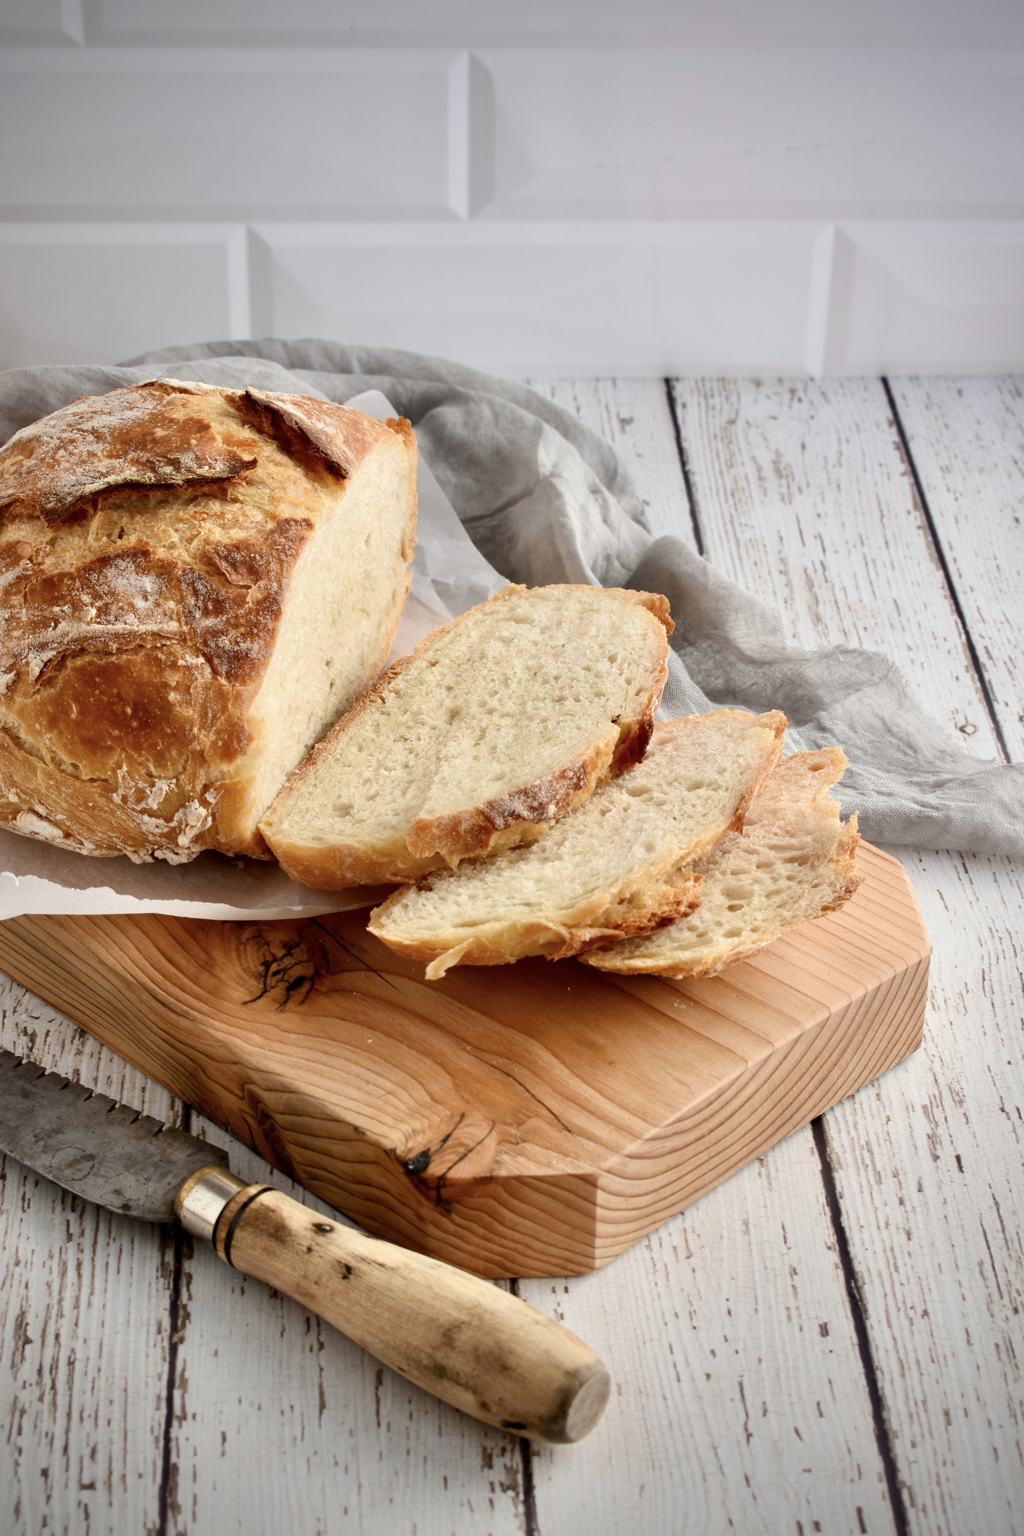 EASY RUSTIC ARTISAN BREAD Makes 1 round rustic-style loaf, roughly 7-8 inches in diameter INGREDIENTS:
3 cups all-purpose flour 1 tsp. active dry yeast 1 1/2 tsp. salt 1 1/2 cups warm water INSTRUCTIONS: In a large bowl, combine flour, yeast, and salt. Pour the warm water over the mixture and stir just until all the flour is moistened. The dough will look like a shaggy mess, not a nice smooth ball. Cover the bowl with plastic wrap and leave the bowl on the counter for 8-12 hours. Place a 4-6 quart Dutch Oven with the lid on inside the oven and preheat the oven to 450° F for 30 minutes. While the oven is preheating, transfer the dough to a floured surface and gather it into a ball. Place dough on a large piece of parchment paper. Once the oven and Dutch Oven have preheated for 30 minutes, carefully remove the Dutch Oven and lift the bread dough using the parchment paper, placing it inside the Dutch Oven. Cover with the lid. Bake at 450° F for 40 minutes with the lid on, then remove the lid and bake for an additional 15 minutes, or until the crust is golden brown. Remove from oven, and carefully lift the bread out of the Dutch Oven using the parchment paper. Allow the bread to cool on a wire rack. These rolls take me back! Back home to Nebraska where soft dinner rolls like this accompanied almost every dinner. These rolls take just over an hour to make, so they’re easy to get done even a little last-minute. A quick note: I used Crisco in the dough cuz I think it creates a softer texture, but you could definitely swap that out for butter if you’d rather. The key though is the couple layers of melted butter brushed on top of the rolls. 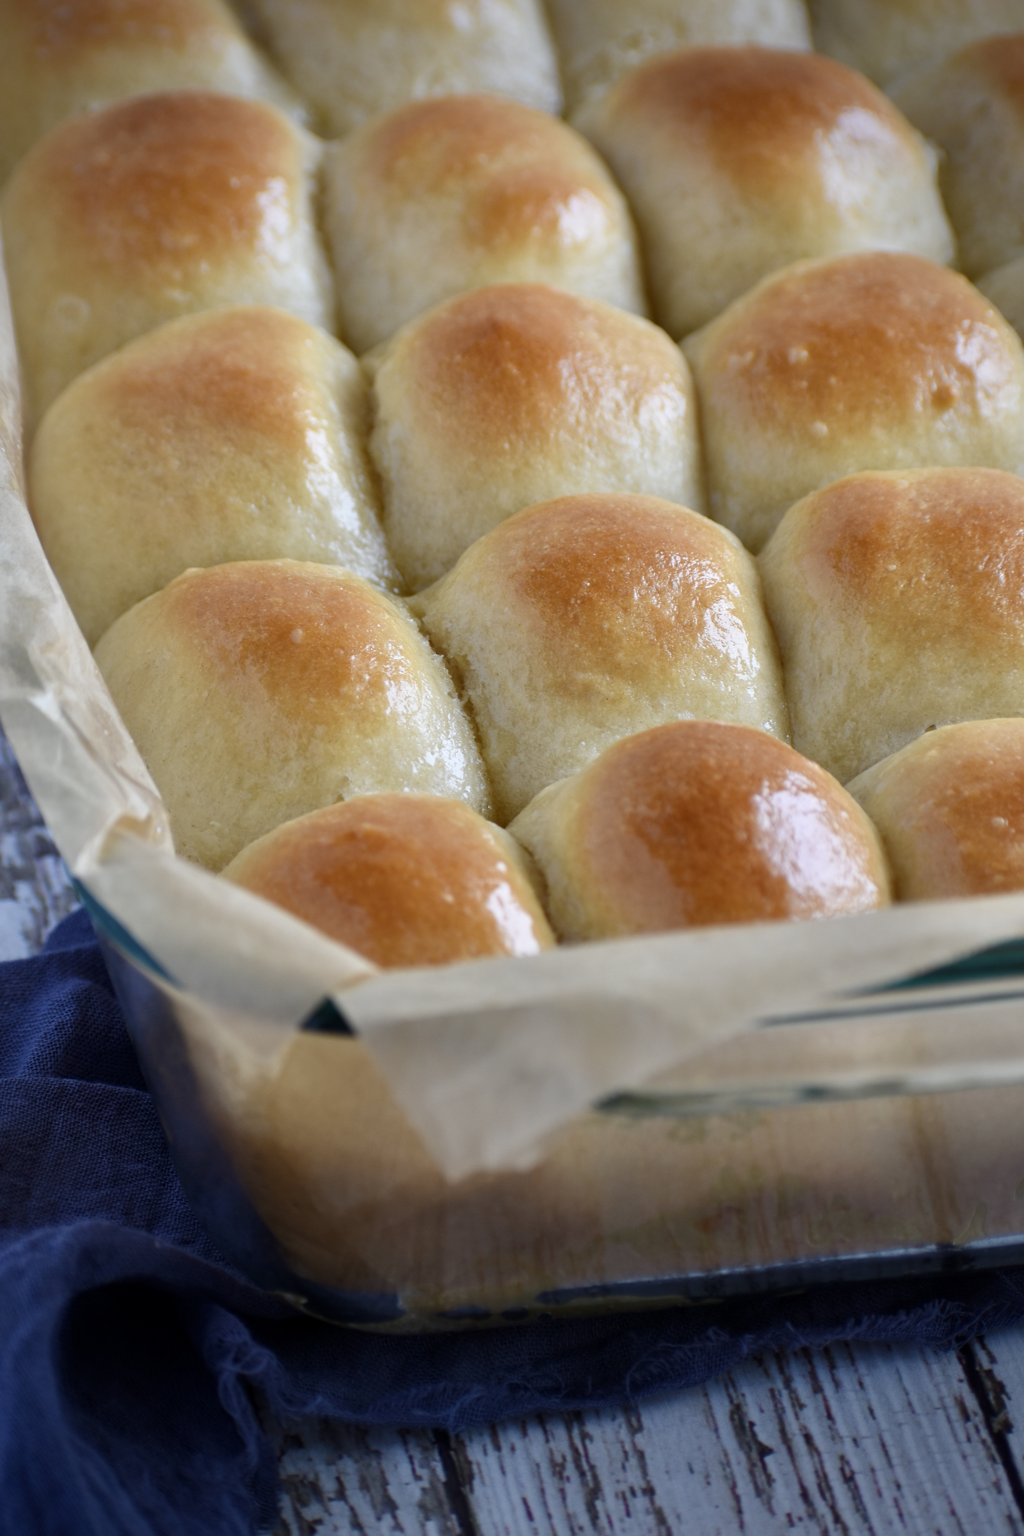 SOFT BUTTERY DINNER ROLLS Makes 20 rolls INGREDIENTS:
1/2 cup warm milk 1 tbsp. active dry yeast 2 tbsp. sugar 1 cup warm water 2 tbsp. Crisco shortening 1 tsp. salt 3 1/2 cups all-purpose flour 1/4 cup butter, melted, for brushing INSTRUCTIONS: Mix together the milk, yeast, and sugar. (Microwave the milk for about 30 seconds. It should be warm to the touch, but not too hot or you may kill the yeast.) Let the milk mixture rest for 5-10 minutes to rehydrate the yeast. After 5-10 minutes, the milk mixture should become foamy on top. Using a stand mixer with a dough hook, mix together the milk mixture, warm water, Crisco, salt, and 2 cups flour on low until well combined. Add the remaining 1 1/2 cups of flour. Once the flour is combined, increase speed to medium and mix for 5 minutes. The dough should be smooth and elastic. Cover the bowl with plastic wrap and allow the dough to rest for 20 minutes. Grease a 9x13 inch pan or line it with parchment paper and set aside. Divide the dough into 20 equal sized pieces and roll each piece into a ball. (I used a digital scale to make sure mine were equal sized, about 1.6-1.7 ounces, but you can just eyeball it too.) Place each dough ball into the prepared pan. Brush the tops generously with butter. Cover the pan with plastic wrap and allow the rolls to rise for 20-30 minutes. Preheat the oven to 400° F. Bake the rolls for 15-20 minutes until the tops are golden. Remove from the oven. Brush the tops of the rolls with butter once again, then allow them to cool for 5-10 minutes prior to serving. Making artisan bread from scratch is surprisingly easy and much cheaper than buying those fancy loaves in the store. It only takes a handful of ingredients and 2-3 hours total for you to have some delicious, fresh-baked bread. In this post, I'll share with you the basic technique of making bread from scratch, along with some tips and tricks I've learned throughout the years. basic ingredientsA basic bread recipe only needs four ingredients, most of which I'm sure you've got in your kitchen right now - flour, salt, water, and yeast. Some breads will add additional ingredients to alter the texture or flavor of the bread, but really all that's needed is those four basic ingredients.
Ok, now we've covered the basic ingredients, let's start making the bread! Here are the typical steps for making a bread from scratch... rehydrating the yeastIf you are using active dry yeast, you'll need to rehydrate/reactivate it first. I keep my yeast in an air-tight jar in the refrigerator to keep it lasting longer. Keep an eye on that expiration date, because once yeast "goes bad", it's essentially dead and will not produce the leavening gasses needed to make your bread rise. Add your yeast to a warm liquid. Usually this will be water, which is what I'm using here, but occasionally a recipe may call for milk or another liquid. The water should be about 110° F, which is warm, but not too hot to the touch. Feel free to use a thermometer until you get comfortable remembering how that temperature feels. Add the yeast to the water and give it a quick stir, just enough to moisten the yeast. Then let it sit for 5-10 minutes, until it starts to get foamy. (If the recipe calls for sugar, it is often added to the water with the yeast.) If the water and yeast doesn't foam up after 5-10 minutes, either your yeast is expired or your water was too hot and it killed the yeast. If that happens, just start over with fresh yeast or slightly cooler water. 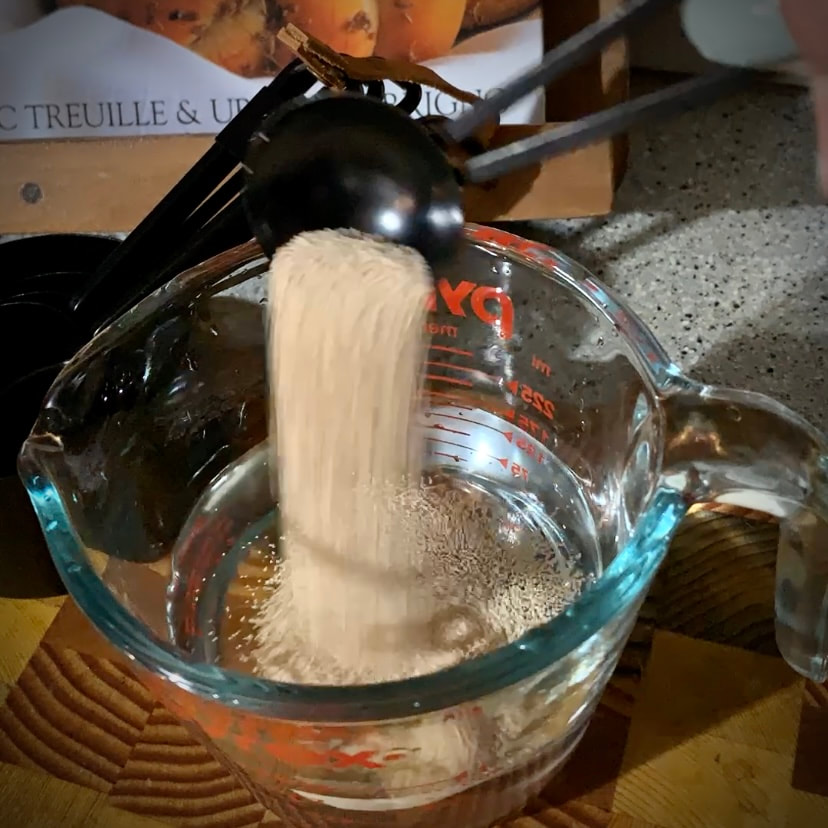 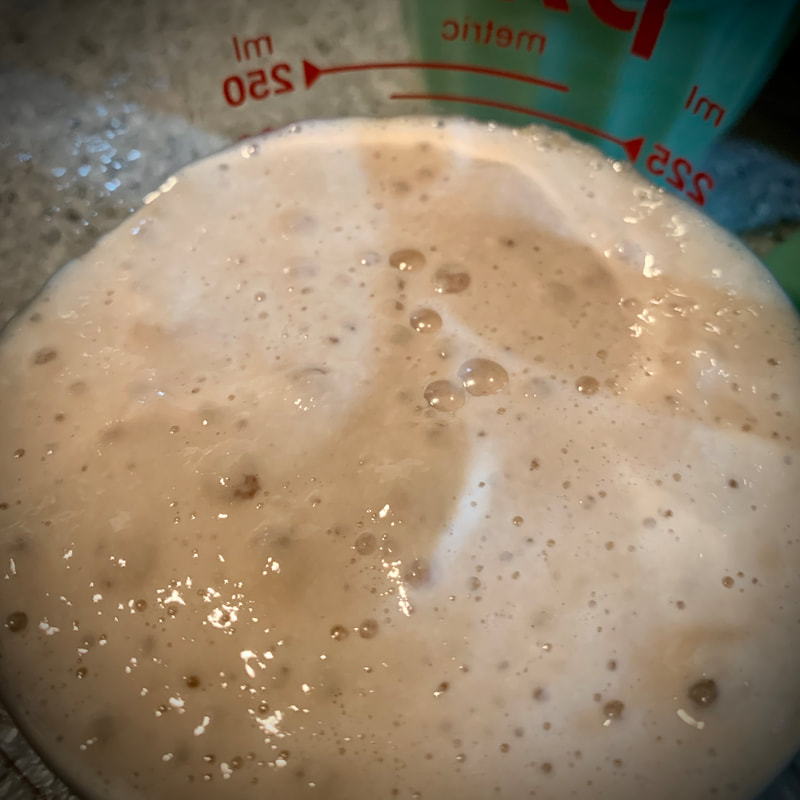 mixing the dough & kneadingMixing the dough and kneading it is how we develop the gluten in the bread. While the yeast is rehydrating, mix together your dry ingredients in the bowl of a stand mixer, and attach a dough hook. If you don't have a stand mixer, use a large mixing bowl and your hands from this point forward, rather than a spoon. When the yeast has begun to foam up, add the yeast and water mixture to the flour and salt. If you are using any of the optional ingredients mentioned above, you will add those now too. If using a stand mixer, mix the ingredients on low speed until well combined. You may need to scrape the sides once or twice to help incorporate all the flour. Then increase the speed to medium and let it run for about 5 minutes. This takes place of the kneading process, and speeds things up considerably. If you don't have a stand mixer, you'll need to mix all the ingredients by hand, and knead the dough on a well-floured surface for about 15-20 minutes. Kneading dough is simply pushing it away from you with the heel of your hand, then folding it over itself, pulling it back, and repeating that multiple times. This does take some hand and forearm strength, so be prepared for that! 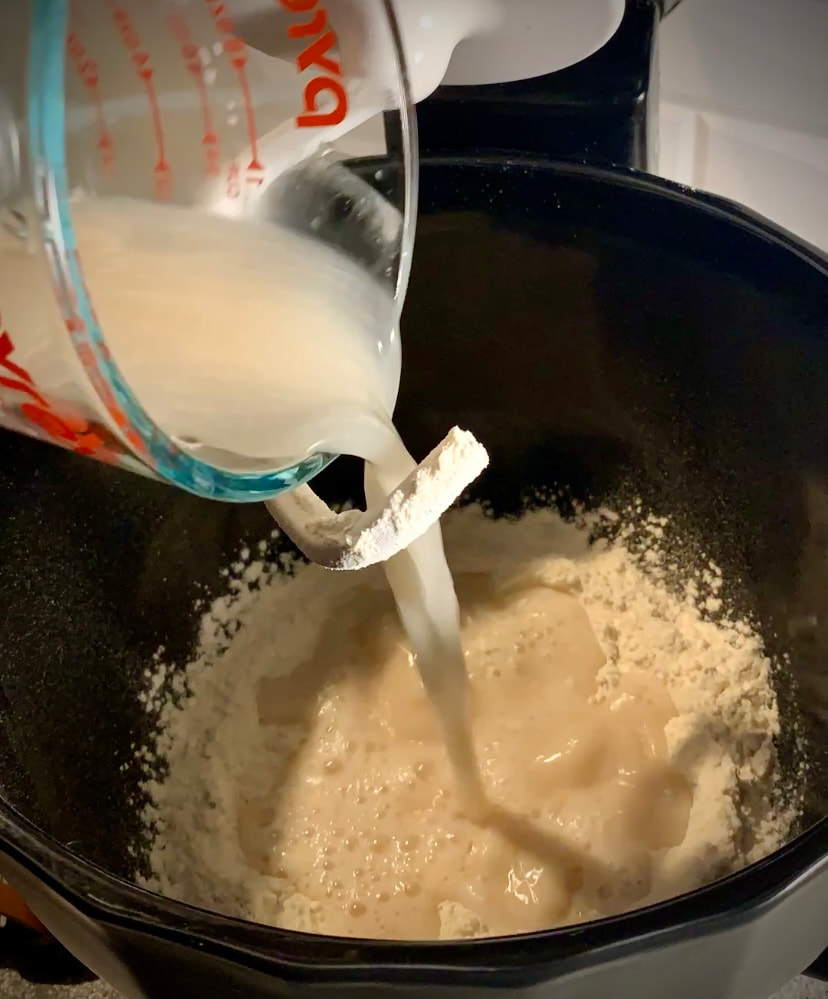 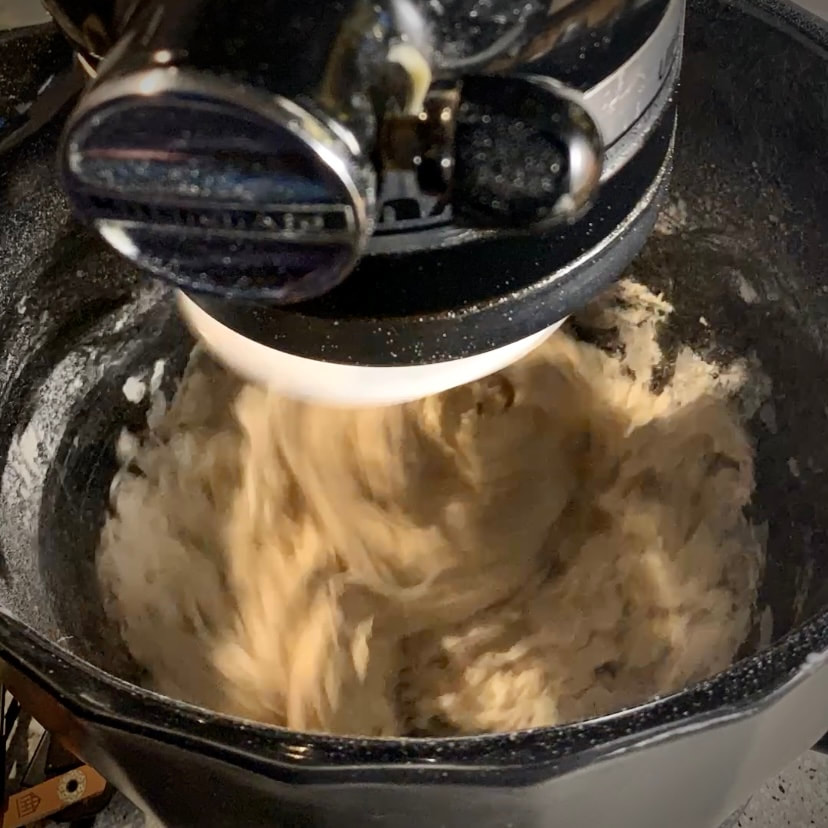 The dough is ready once it is smooth and stretchy, yet holds its shape. If you poke the dough and it springs back quickly, it's good to go. 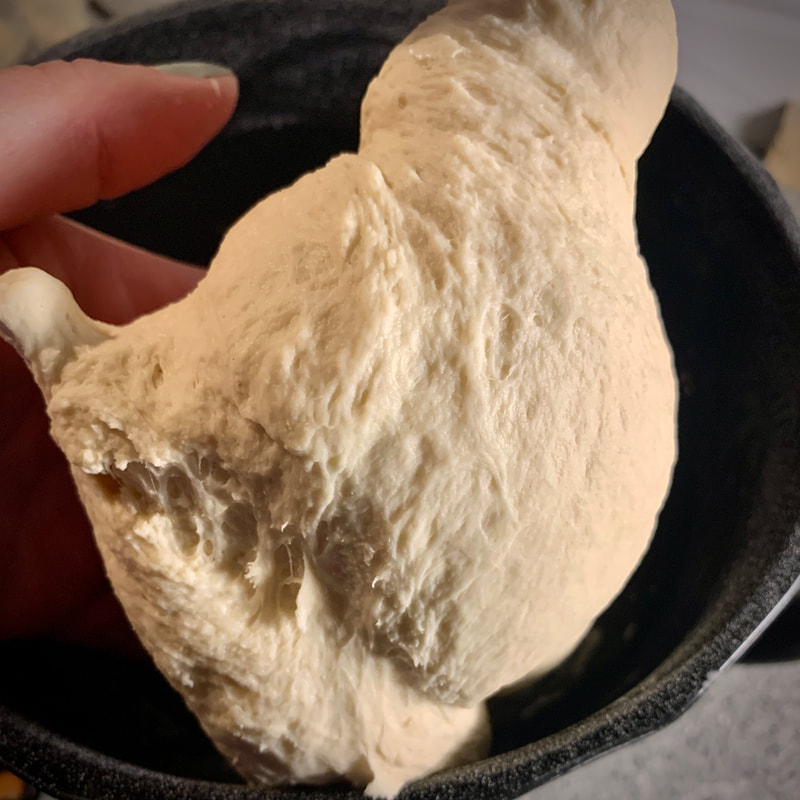 first riseNow we are on to the first rise. This is where we allow the dough to rest and give the yeast time to do it's thing. Transfer the dough to large greased bowl. You can cover the bowl with a clean dishtowel, or even a clean dampened dish towel, but I personal prefer to use plastic wrap. I find that it holds in the moisture of the dough better and helps it to rise. Another thing I've found that helps sometimes, is spraying the plastic wrap with oil first. That way, if your dough expands a little higher than your bowl, it will easily pull away from the plastic wrap when you take it off. To do this, lay a piece of plastic wrap flat on a table or countertop, spray it with oil, then flip the plastic wrap and cover the bowl, oil side down.   In commercial kitchens, they have something that's called a proofer or proof box. It is basically a container that helps the dough rise faster and more effectively by creating the right warm temperature and humidity for the yeast to ferment and create its gasses. You can easily create a proof box at home with some boiling water, a bread pan, and an oven. Place one rack in your oven on the bottom shelf. Place a second rack on the middle shelf. Set your bowl with the dough on the middle rack in the oven. Boil some water on the stove, then poor it in a bread pan and place the bread pan on the bottom rack of the oven underneath the bowl. Close the oven door and keep it closed with the oven turned off for about 45 minutes to an hour, or until the dough has doubled in size. (*Doubled in size is the key part here.*) The warmth and steam from the water will create the right temperature and humidity for the bread to rise quickly. (Note: You can just set the bowl on the counter and let it rise there, but depending on the temperature and humidity in your house, it could take significantly longer for the dough to double in size, like 2-4 hours, rather than 1 hour.) 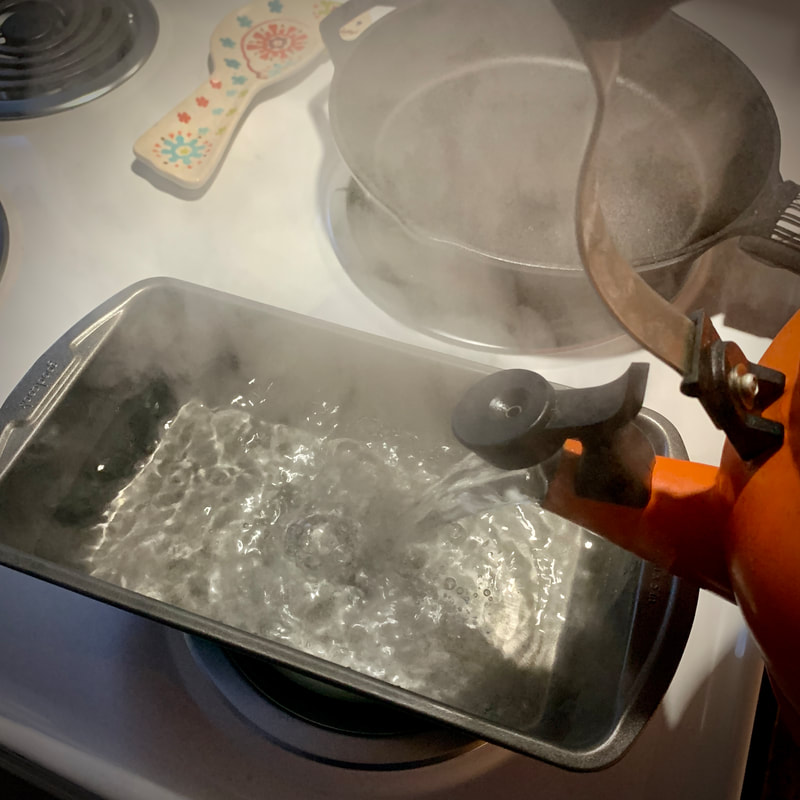 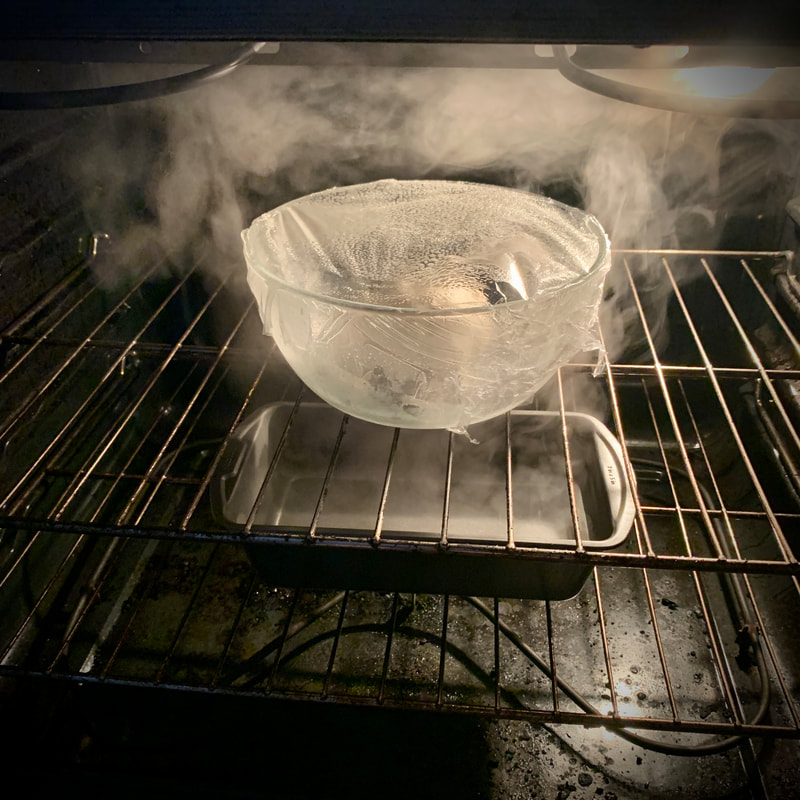 shaping the dough & second riseAfter the first rise, you punch down the dough to release the buildup of gasses so that you can shape the dough into a loaf or loaves. Punching down the dough redistributes the yeast, which gives it more sugars to eat during a second rise, improving the flavor of the bread. The more air pockets you remove when punching down, the finer the crumb and texture will be. If you only fold the dough over a couple times, rather than punching it down and kneading it, you will leave large air pockets in the bread, creating a looser crumb and bread that will rise higher. This works great for airy, rustic styles of bread like baguettes that have large holes inside. Take the bowl out of the oven and remove the plastic wrap. (Set it aside, as you will use it again later.) To punch the dough down, you gently (not forcefully) press your fist into the center of the dough while it is still in the bowl, then fold down the sides and press them gently to form a ball with the dough. Transfer the dough to a floured surface and knead it two or three times, then roll or form the dough into the shape you'd prefer. 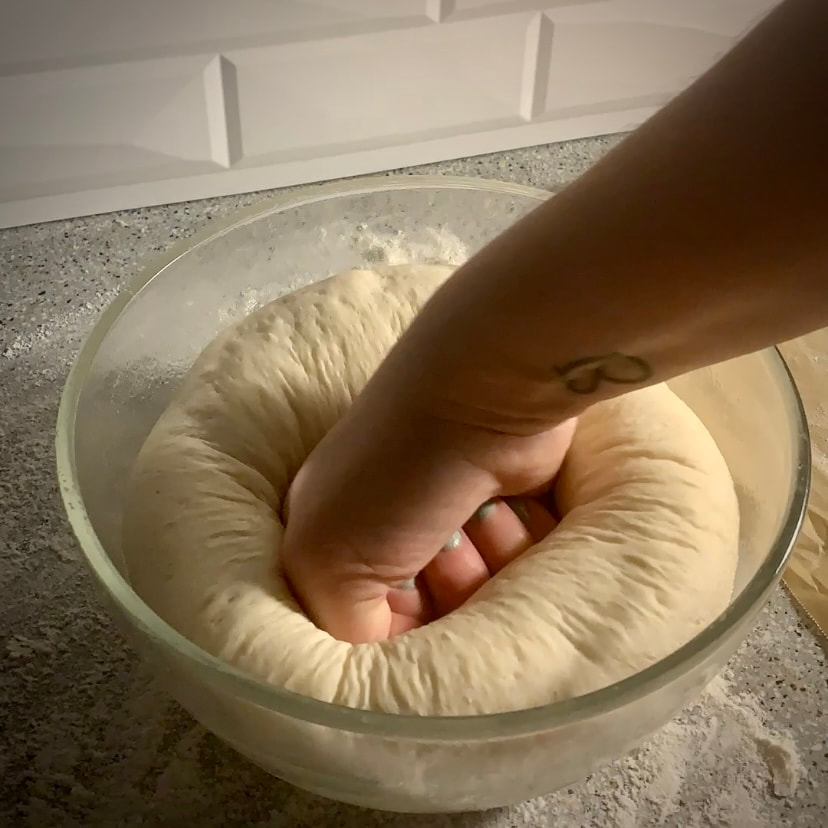 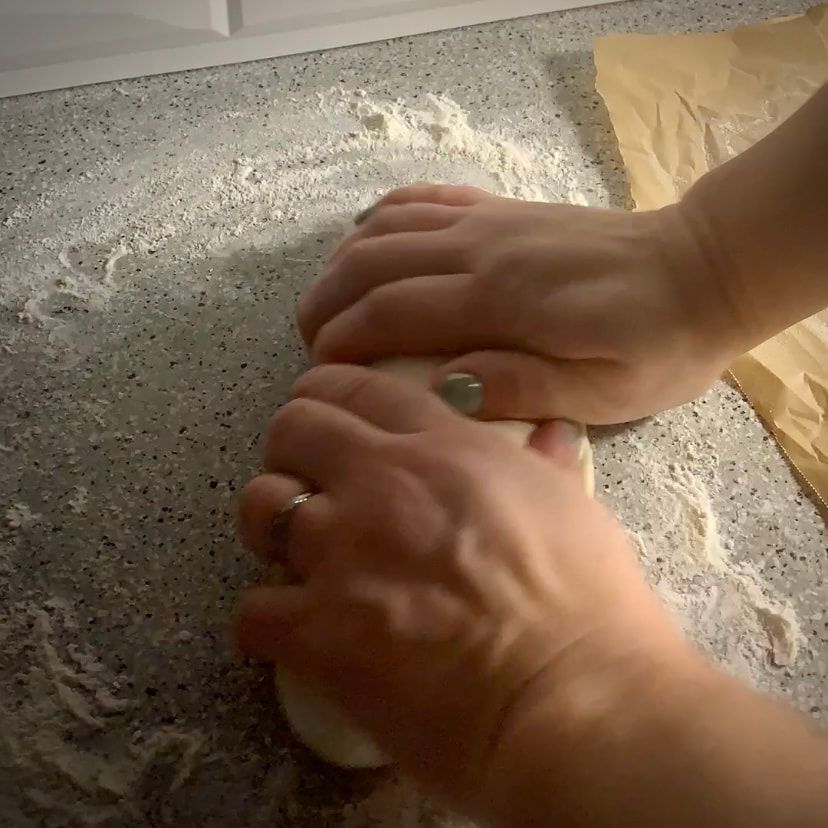 Once you have the dough in your desired shape, place it on baking stone or a parchment paper lined baking sheet. Cover it loosely with the greased plastic wrap. Place the dough back in the oven for another 20 minutes to an hour, depending on your recipe, for a second rise. 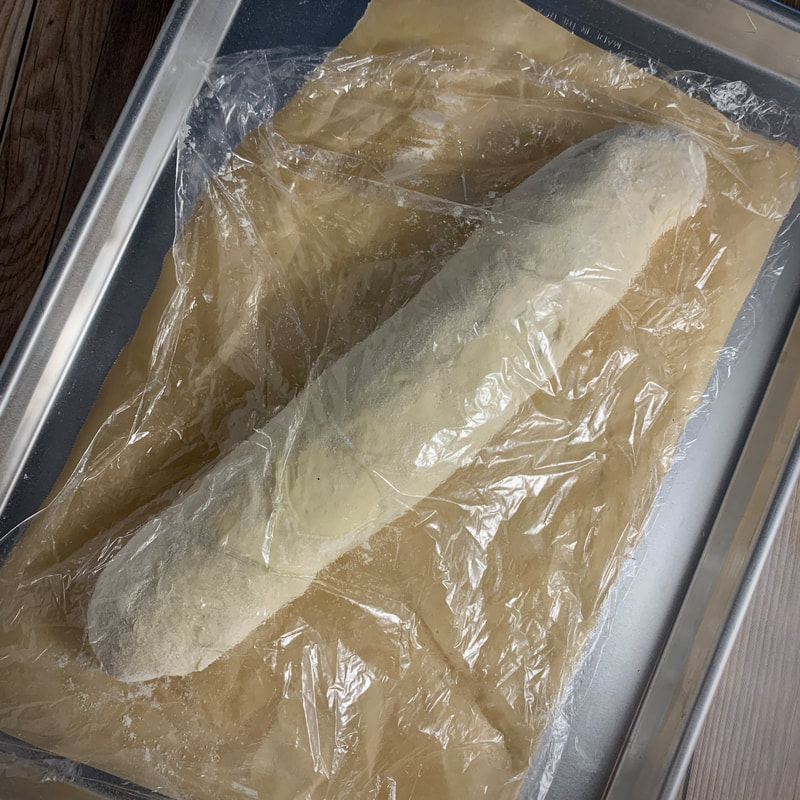 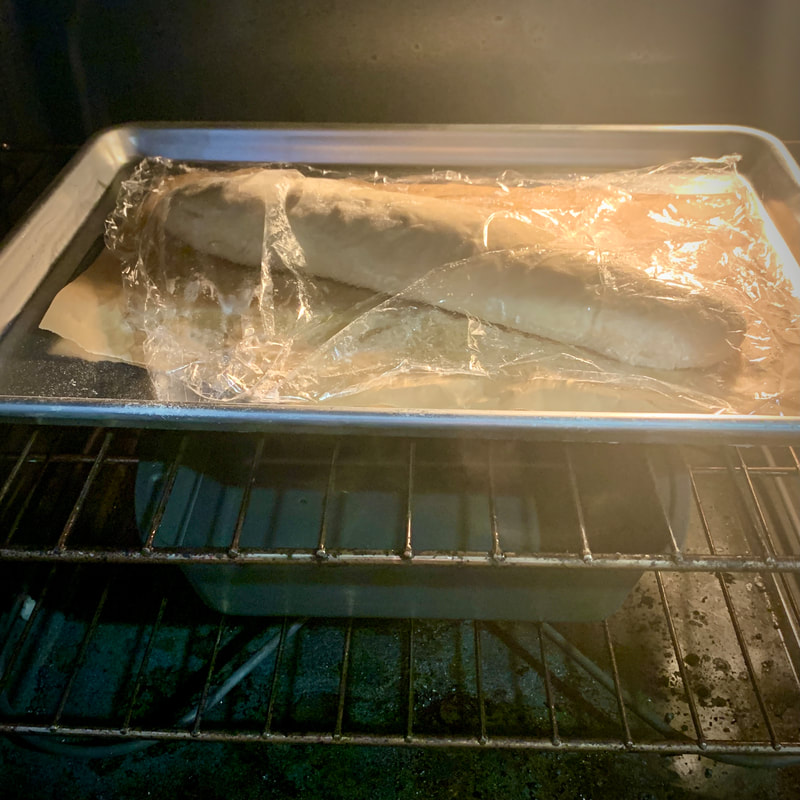 baking the breadAfter the second rise, take the dough and the bread pan with water out of the oven, and move the middle rack to a higher shelf. Turn your oven on to preheat it to the temperature according to your recipe. Often times bread will be baked at a higher temperature for a shorter period of time. Now is when you can make artistic cuts in the dough, and/or brush it with egg, milk, olive oil, butter, or dust it with flour.
Here, I've decided to make some angled slices and brush it with an egg wash, which is 1 egg whisked together with 1 tsp. water. I will note that I didn't use the sharpest knife here to make my cuts, so they didn't turn out too good. It is best to use your sharpest knife or even a razor blade, and very gently slide it across the bread in one single motion. Do not press hard or make a sawing motion. You don't want to flatten the dough.  Once your bread is done, and the crust is a nice golden brown, take it out of the oven and transfer it to a wire cooling rack. Let it cool for at least 15-20 minutes before cutting and serving. You can also cool it completely and reheat it in a 400° F oven for 5-8 minutes just before serving. 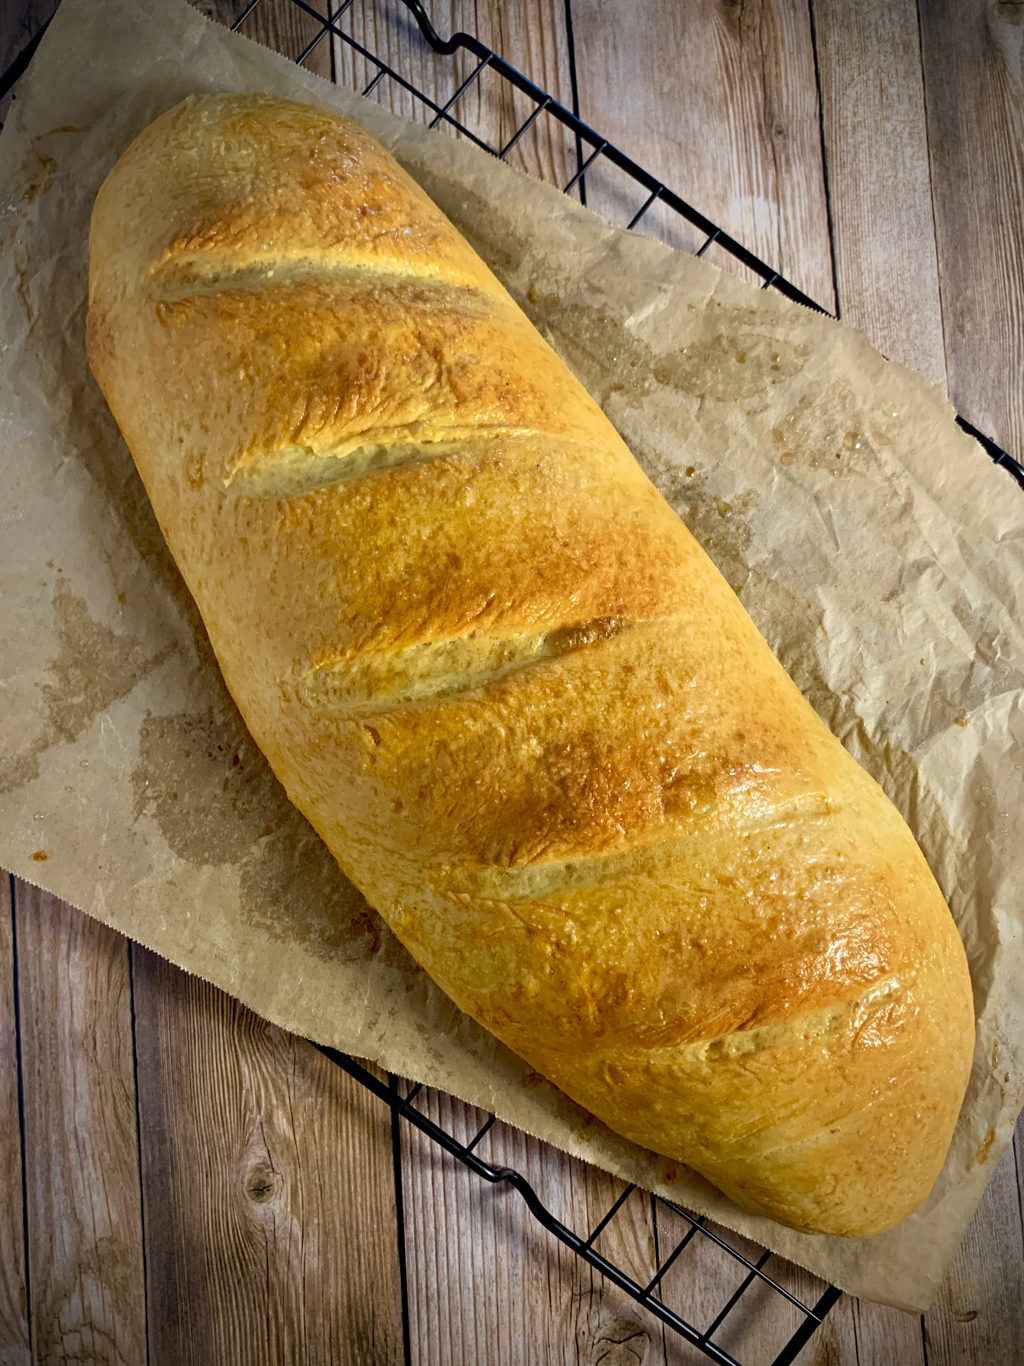 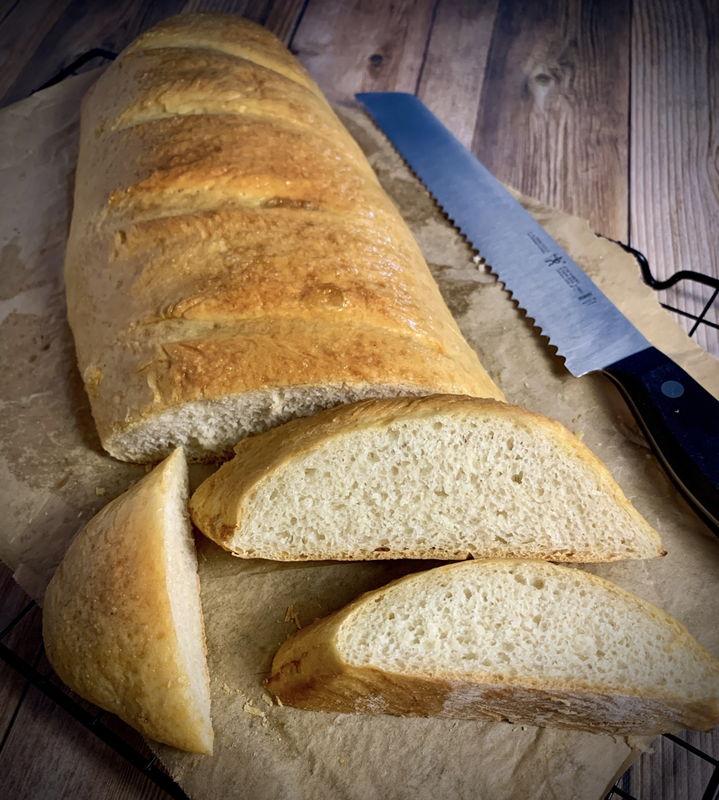 let's recap!Let's do a quick recap on the typical steps of making bread from scratch:
HOMEMADE FRENCH BREAD Makes 1 loaf INGREDIENTS:
3/4 cups warm water, about 110° F 1 1/2 tsp. active dry yeast 3/4 tsp. sugar 1 1/2 tsp. olive oil 2 cups flour 3/4 tsp. salt INSTRUCTIONS: In a small bowl or a measuring cup, mix the water, yeast and sugar. The water should be warm to the touch, but not too hot or else it will kill the yeast. Let it sit for 5-10 minutes until it begins to foam. In the bowl of a stand mixer with a dough hook attachment, mix together the flour and salt. Pour in the water/yeast mixture, and then the olive oil. Mix on low spead until all the flour is well combined. You may need to scrape the sides once or twice. Once combined, increase the speed to medium and let it run for 5 minutes, until the dough is smooth and stretchy. If you poke the dough with your finger and it springs back, it is ready. Transfer the dough to a greased bowl, and cover the bowl with a plastic wrap that has been sprayed with oil, greased side down. Place the bowl on the center rack in the oven. Place a bread pan full of boiling water on the bottom shelf, underneath the bowl. Close the oven door and keep it closed with the oven turned off for 45 minutes, or until the dough has doubled in size. Take the bowl out of the oven and carefully remove the plastic wrap. Set the plastic wrap aside, as you'll use it again later. Gently punch down the down with your fist, then transfer it to a floured surface. Knead the dough 2-3 times, then begin to shape it into a long roll. Place the dough on a baking stone or a baking sheet lined with parchment paper. Loosely cover the dough with the plastic wrap, greased side down. Place the baking sheet back in the oven for 30 more minutes. Take the baking sheet out of the oven and preheat the oven to 375° F. While the oven is heating, make 4-5 angled cuts in the top of the dough with a very sharp knife or razor blade. Use one single gently swipe motion. Do not press hard or make a sawing motion or you will flatten your dough. (The cuts are optional and purely decorative.) Brush the dough with an egg wash, if desired, which is mixture of 1 egg whisked with 1 tsp. water. You could also brush it with olive oil or dust it with flour. Bake the bread at 375° F for approximately 25 minutes, or until the crust is a light golden brown. Remove from the oven and allow to cool on a wire rack for 15-20 minutes before cutting and serving. This pizza dough recipe is intended for a 10-inch cast iron skillet. It yields a fairly deep dish style of pizza. If you use it a smaller cast iron pan, you’ll end up with a thicker crust, and if you use it in a larger pan, it will be thinner. I found the 10-inch to be perfect. It gives you a crispy outside crust with a soft and fluffy inside. This recipe is also pretty darn good as a regular pizza too. Just place the dough on a baking sheet lined with parchment paper and bake the pizza at 500° F for about 10 minutes.  INGREDIENTS: 3/4 cup + 2 tbsp. warm water 1 1/8 tsp. active dry yeast 1 tsp. sugar 2 cups all-purpose flour 1 tsp. salt 1 tbsp. olive oil 1 tbsp. cornmeal 2 tbsp. olive oil Salt & pepper, to taste INSTRUCTIONS: In a small bowl, combine the warm water, yeast, and sugar. Let sit for 5 minutes until foamy. Meanwhile, in the bowl of a stand mixer with a dough hook attachment, combine the flour and salt. When ready, pour the water/yeast mixture into the bowl, along with the olive oil. Mix on medium speed for about 5 minutes or until dough is smooth. It will be a fairly sticky dough. Grease a large bowl and transfer the dough to the greased bowl. Cover the bowl with plastic wrap. Place the bowl in the oven on the center rack. On the bottom rack, place a bread pan filled with boiling water. Close the oven door. Keep the door closed and the oven off for 1 to 1 1/2 hours, until the dough has doubled in size. While the dough is rising, prep your topping ingredients. Take the dough out of the oven, as well as the bread pan with water. Preheat the oven to 500° F. Place your seasoned 10-inch cast iron skillet on the stove and preheat it over medium heat. The skillet should be hot, but should not be smoking. Once hot, sprinkle the pan with cornmeal, then immediately transfer the dough to the pan. Press and stretch the dough evenly across the bottom of the pan and up the sides. Turn off the stove. Brush the entire crust with olive oil, then sprinkle with salt and pepper. Top the crust with your desired sauce and toppings, then place it in the oven on the bottom rack. Bake 500° F for 15-20 minutes, or until the top and edges are golden brown. Remove the pizza from the oven. Cut and serve hot. Click here to see my Sausage and White Cheddar Cast Iron Pan Pizza recipe. (Shown below.) 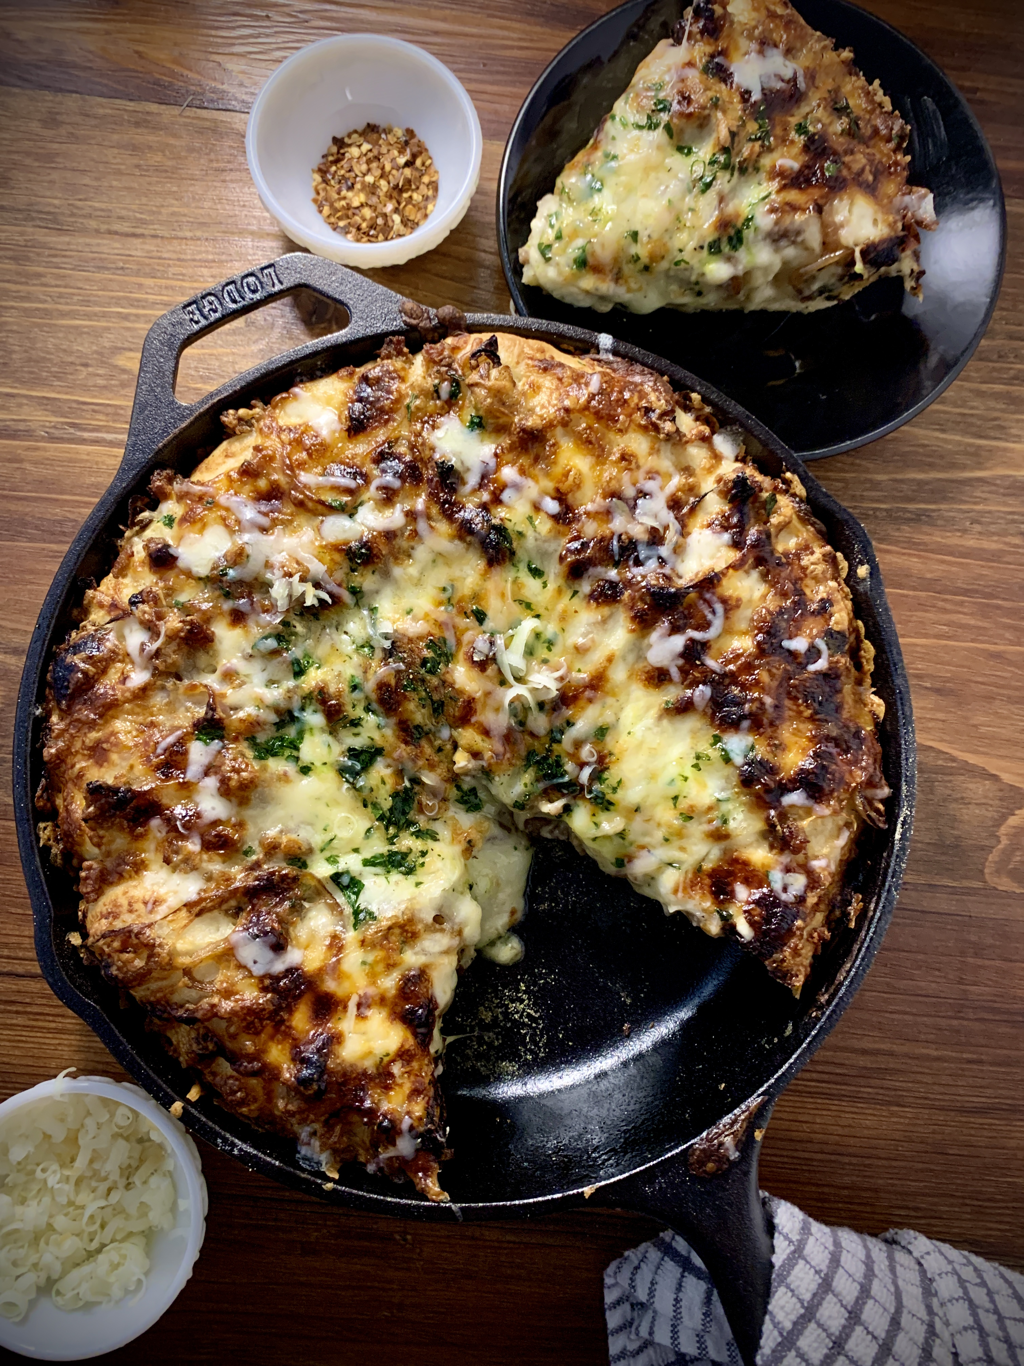 hand-tossed pizza doughINSTRUCTIONS: Using the same ingredients as above, in a small bowl, combine the warm water, yeast, and sugar. Let sit for 5 minutes until foamy. Meanwhile, in the bowl of a stand mixer with a dough hook attachment, combine the flour and salt. When ready, pour the water/yeast mixture into the bowl, along with the olive oil. Mix on medium speed for about 5 minutes or until dough is smooth. It will be a fairly sticky dough. Grease a large bowl and transfer the dough to the greased bowl. Cover the bowl with plastic wrap. Set the bowl on the counter in a warmer part of the kitchen, and allow to set for about 3 hours. Place a pizza stone in the oven and preheat the oven and stone at 450 F for 20-30 minutes. Turn the pizza dough out onto a well-floured surface and press the dough into a round disc, rubbing the top of the disc with flour as needed to prevent sticking. Lift the dough and stretch it over the back of your fists until its about 14" in diameter or the size of your pizza stone. Place the dough on a sheet of parchment paper that has been sprinkled with cornmeal. Brush the crust with olive oil, then top with your favorite ingredients. Using a tray, carefully transfer the parchment paper to the hot pizza stone and bake for 10-12 minutes, or until the crust begins to turn golden brown. Remove from oven, cut and serve. 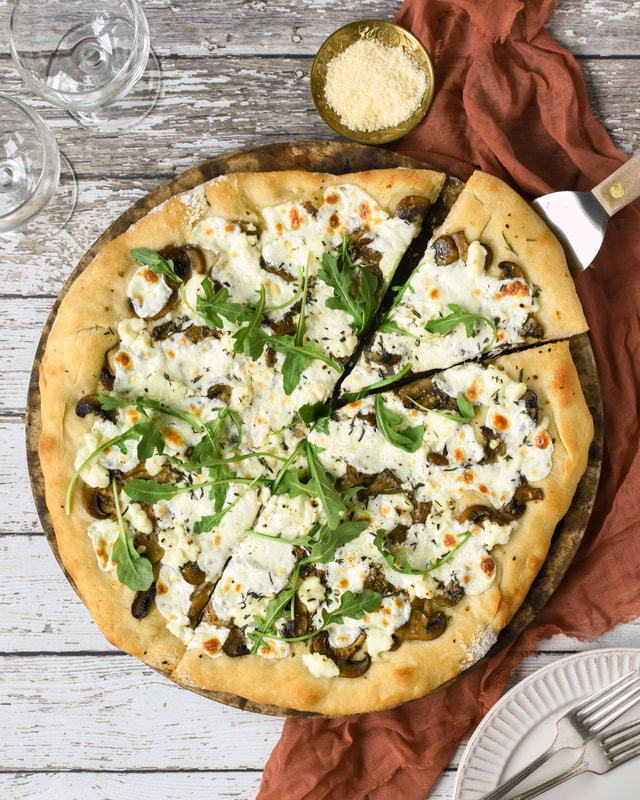 |