|
This Orange Cinnamon Chocolate Chip Cookie recipe offers a subtle twist to the classic chocolate chip cookie. The cookies come out of the oven crispy around the edges and on the bottom, but with a soft and chewy center…. Everything a cookie should be! 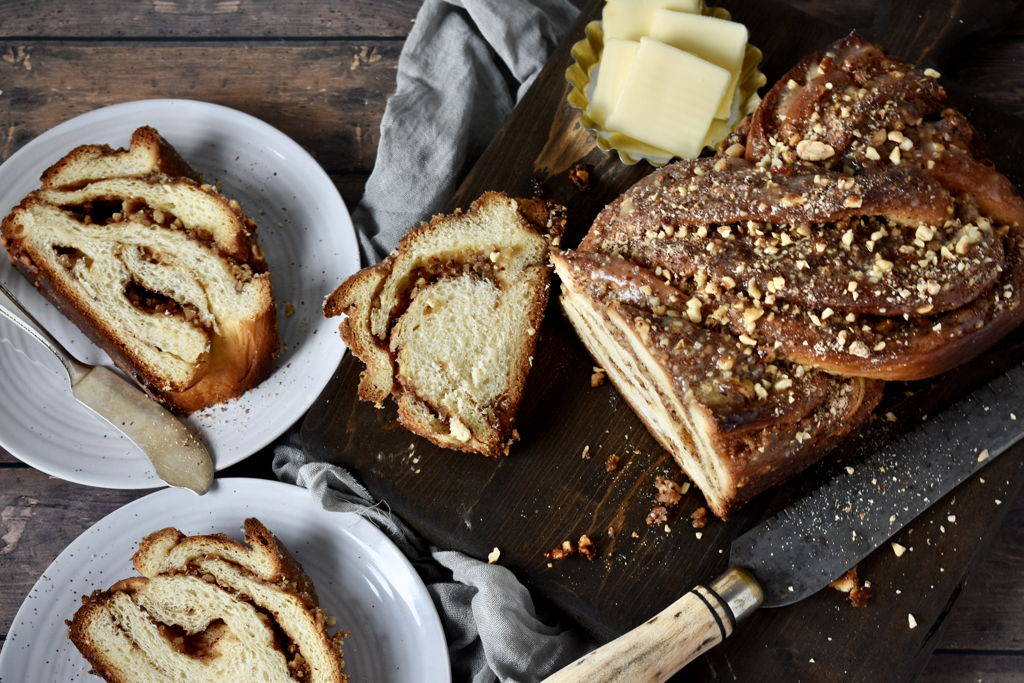 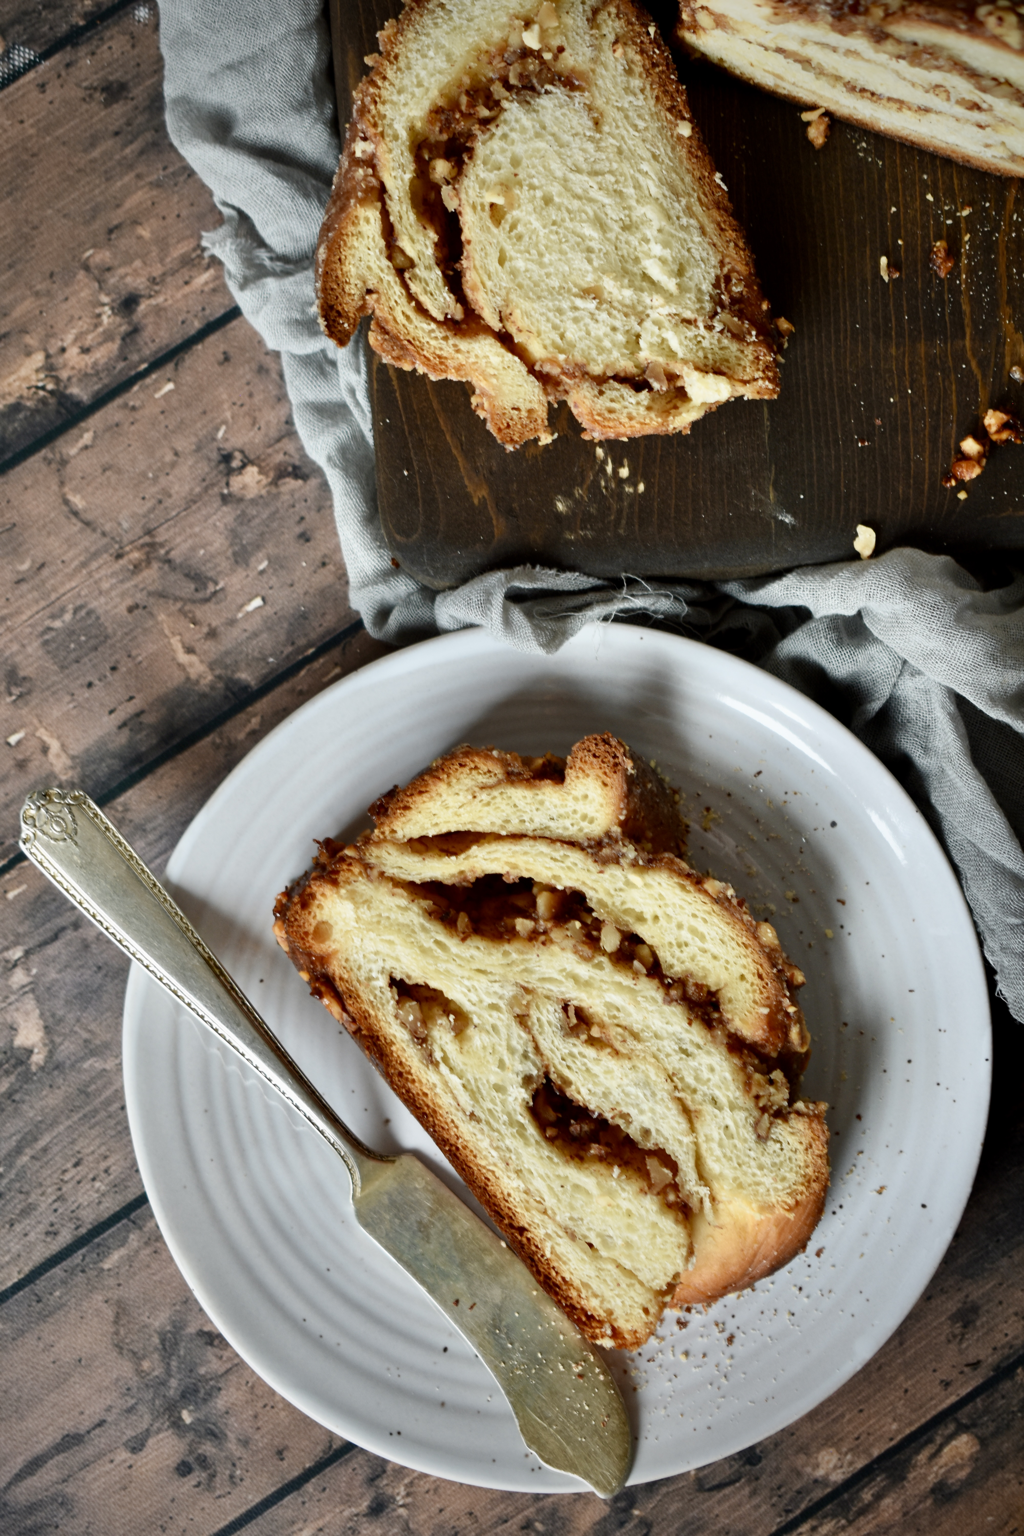 ORANGE CINNAMON CHOCOLATE CHIP COOKIES Makes about one dozen cookies INGREDIENTS:
1 1/4 cups butter, softened 1 cup sugar 1 cup dark brown sugar 1/2 tsp. salt 1/2 tsp. cinnamon 1 tbsp. vanilla extract 2 tbsp. orange zest 2 eggs 3 cups all-purpose flour 1 tsp. baking soda 8 oz. (2 bars) Baker’s semi-sweet chocolate, roughly chopped INSTRUCTIONS: Preheat oven to 350° F and line two large cookie sheets with parchment paper. Using a stand mixer with the paddle attachment, combine the butter, sugar, and brown sugar and mix on high until light in color and fluffy. Quickly mix in the salt, cinnamon, vanilla, orange zest, and eggs. Once combined, stop the mixer and add the flour and baking soda. Mix on low just until the flour is combined, then add the chopped chocolate and mix just until the chocolate is evenly distributed. Using a cookie scoop, scoop and place the dough onto the prepared cookie sheets, leaving about 2-3” between cookies. Bake the cookies on the bottom rack of the oven at 350° F for 13-15 min., just until the edges look a little wrinkled and are beginning to brown. Remove from the oven and cool on the pan for 2 minutes, then transfer to a wire rack to finish cooling.
0 Comments
Rice Krispie treats have always been one of my favorite sweets. When I was in high school playing volleyball, I they were my “energy bar”, and I don’t even want to admit to how many I probably consumed. But these Rice Krispie treats are seriously next level deliciousness. The sweetened condensed milk makes them ooey gooey, and the hint of peanut butter and vanilla adds a little more depth of flavor. They are so dang good! I may or may not have eaten this whole pan by myself. Shhhh….. 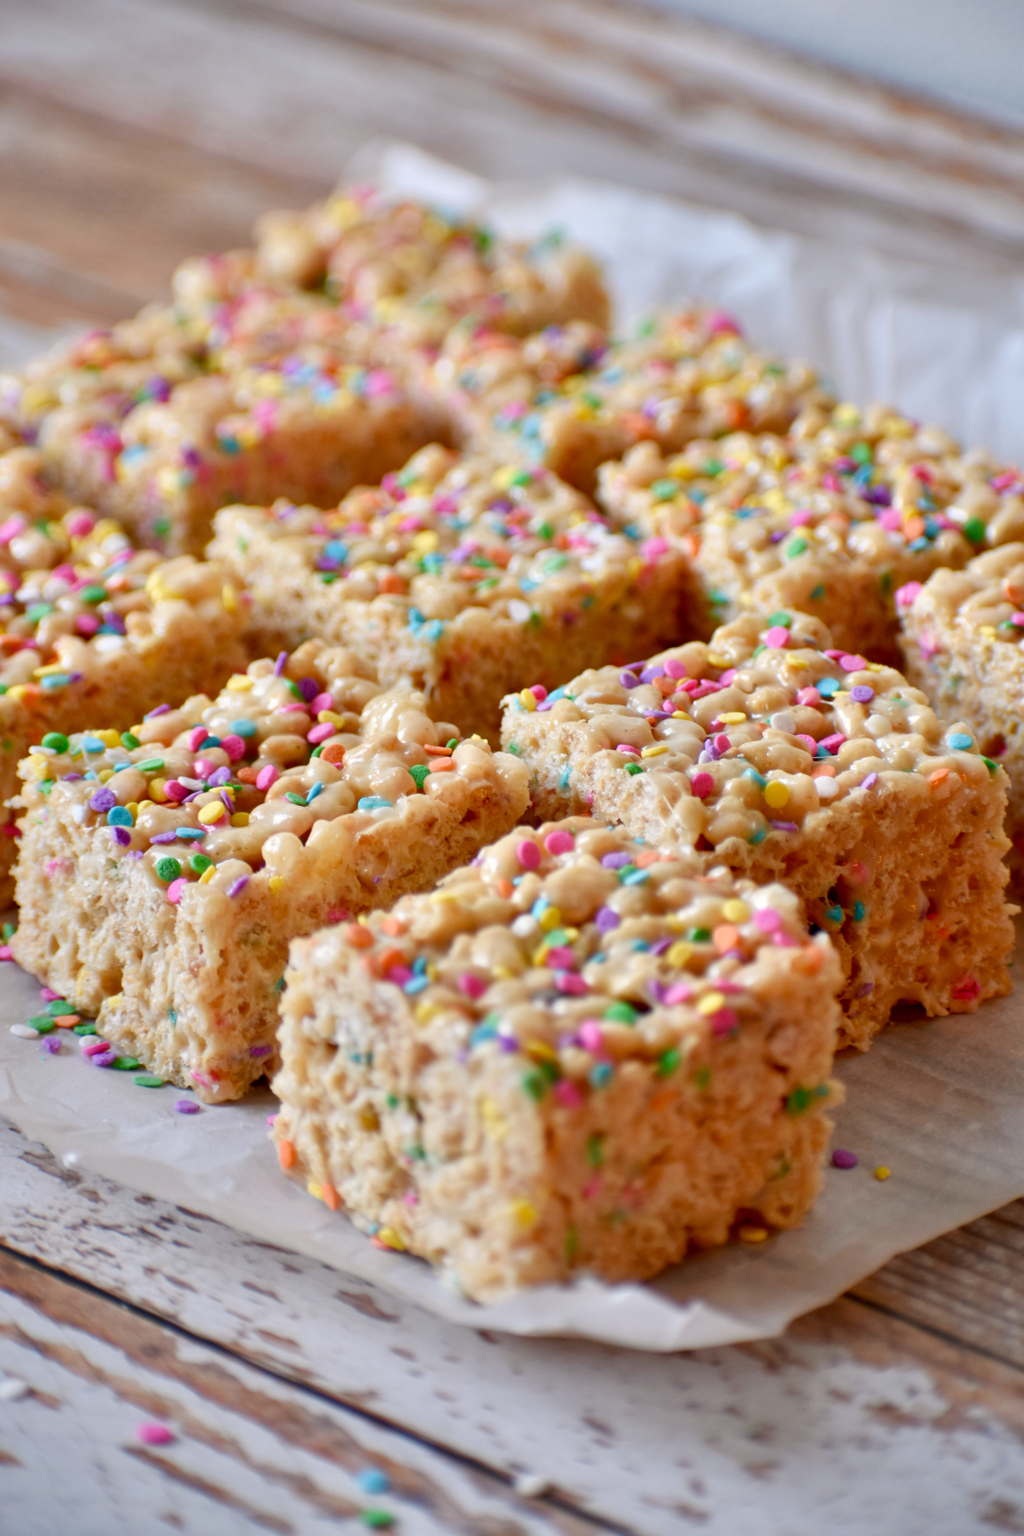 NEXT LEVEL RICE KRISPIE TREATS Makes about 12 servings INGREDIENTS:
6 tbsp. salted butter 1/2 cup sweetened condensed milk 1 tsp. vanilla bean paste 3 tbsp. JIF creamy peanut butter 1 16oz. bag of mini marshmallows 5 1/2 cups of Rice Krispies 1/4 cup sprinkles (if desired) INSTRUCTIONS: Line an 8”x12” or 9”x13” pan with parchment paper or grease the bottom and sides of the pan with butter. Lightly grease the inside of a large bowl. Place Rice Krispies and sprinkles in the bowl and set aside. Lightly grease a large spatula and set aside. In a large saucepan over medium-low heat, melt the butter, then stir in the sweetened condensed milk, vanilla bean paste, and peanut butter. Once melted and combined, stir in the marshmallows. Continue stirring until all the marshmallows have melted. Pour the melted marshmallow mixture over the Rice Krispies and stir until evenly combined. Pour the mixture into the greased 8”x12” or 9”x13” pan. Using the greased spatula, gently press the mixture down into an even layer. Allow the Rice Krispie treats to set for 30-45 minutes, then cut and serve. Strawberries and chocolate are a classic pairing, yet as I thought about brownies with strawberries, I couldn’t recall ever seeing that combo before. So of course I had to try it! I was originally going to just too these brownies with a layer of roasted strawberries and ganache, but then remembered how my husband (and even me sometimes) doesn’t like chunks of fruit in his baked goods. So the roasted strawberries morphed into a smooth and creamy strawberry cheesecake layer. And I couldn’t be any happier! I seriously could eat one of these Strawberry Cheesecake Brownies every single day of my life!  The base brownie recipe is one that I developed while working on my cookbook (which is still sort of a work-in-progress). It is dense, chewy and fudgy and everything a brownie should be, in my opinion. To make the brownies, you start off mixing the dry ingredients, then melt the butter and chocolate in a double boiler (see below), then add the sugar and other wet ingredients to the chocolate, stir that into the dry ingredients, then mix in more chocolate. It may sound a little complicated, but after you do it once, it’s a breeze! And trust me, you will want to make these brownies more than once! What is a double boiler, you ask? Well, a double boiler is essentially a medium-sized heatproof bowl (stainless steel or glass) that’s set over a medium-sized saucepan that has about an inch or two of water in it. The bottom of the bowl should not touch the water. The saucepan is placed over medium or medium-low heat and once the water is hot and bubbly, but not boiling, the double boiler is ready. (Wait, you don’t want a double BOILER to boil? I know, it’s confusing!) The double boiler is used a lot for melting chocolate or for egg based sauces because it is a slower, more gentle heat source that won’t cause the chocolate or sauce to seize up and separate like it would with direct heat.  STRAWBERRY CHEESECAKE BROWNIES Makes about 9 servings INGREDIENTS:
Brownies: 3/4 cup all-purpose flour 1/4 cup cocoa powder 1/4 tsp. salt 1/4 tsp. baking soda 1/2 cup butter, cut into cubes 1 cup semisweet chocolate chips 1/2 cup sugar 1/2 cup packed dark brown sugar 2 eggs + 1 egg yolk, room temperature 1 1/2 tsp. vanilla 3/4 cup semisweet chocolate chips 1/2 cup peanut butter Strawberry Cheesecake: 1 cup fresh strawberries, leaves removed** 8 oz. cream cheese, room temperature 1/3 cup powdered sugar 1 egg 1/2 tsp. vanilla INSTRUCTIONS: Preheat oven to 350° F. Line an 8x8 inch to 9x9 inch baking dish with parchment paper. In a food processor, add all ingredients for the strawberry cheesecake and process for 1-2 minutes until smooth. Set aside. In a large bowl, mix together the flour, cocoa powder, salt, and baking soda. Set aside. In a double boiler, melt the butter and 1 cup of chocolate chips, stirring constantly until fully melted. Once melted, remove from heat and whisk in the sugar and brown sugar until smooth. Quickly whisk in the eggs and egg yolk, then the vanilla. Add the chocolate mixture to the flour mixture and mix until well combined and batter is smooth. Stir in the chocolate chips. Spread the brownie batter in the bottom of the prepared baking dish. Pour the strawberry cheesecake over the top of the brownies. Sprinkle with chocolate chips if desired. Bake the brownies at 350° F for 30-35 minutes or until the center is set when the dish is jiggled. Cool completely in the dish. Once cool, lift the brownies out of the dish by the parchment paper, cut and serve. Thick, chewy cookie bars with a little crunch and a lot of gooey chocolate chips... that's what I was aiming for with these cookie bars. And on Round 2 of working on this recipe, that's exactly what I got.  My first attempt at creating this recipe was a bit of a flop. They turned out to be too sweet, almost gritty with sugar. Come to find out, there were a couple reasons for this:
Now, I could've kept the brown butter and just made one of those other adjustments, but I also found that the flavor combo was a bit too rich and actually competed against the richness of the chocolate and walnuts instead of complimenting them. I wanted those two ingredients to shine in this recipe, so regular softened butter it was!   LOADED OATMEAL COOKIE BARS Makes 24 servings INGREDIENTS:
1 cup unsalted butter, softened 1/2 cup sugar 3/4 cup dark brown sugar 2 large eggs 1 tsp. maple extract 1 tsp. vanilla extract 1 tbsp. molasses 1 1/2 cups all-purpose flour 1/2 tsp. salt 1 tsp. baking soda 1 tsp. baking powder 2 cups old-fashioned oats (not quick oats) 1 1/2 cups semi-sweet chocolate chips 1/2 cup walnuts, chopped & lightly toasted Flaky sea salt, to garnish, if desired INSTRUCTIONS: Preheat oven to 350° F. Generously grease or line an 8x12 inch or 9x13 inch baking dish with parchment paper. Using a stand mixer with a paddle attachment, mix together the butter, sugar, brown sugar, eggs, maple extract, vanilla extract, and molasses. Mix on medium speed for about 3 minutes. Add the flour, salt, baking soda, and baking powder to the bowl and mix on low speed for about 2 minutes. Add the oats and mix until well combined, then add the chocolate chips and walnuts and mix until well combined. Press the cookie dough into the prepared baking dish until you have an even, smooth layer. Bake at 350° F for 25-30 minutes until the edges are golden brown. Remove from oven and cool for at least 20 minutes before cutting. Cut into 24 pieces and serve warm or at room temperature. These bars took a few tries to get right, but I'm so glad I stuck with it! Most of the time when I'm working on a new recipe, it comes together fairly easily. But then there are those, like this one, that seem to be the biggest pain in the butt ever! The first time I made it, I included baking soda in the crumble, and just had too much topping to begin with, so I ended up with a weird hollow shell for the topping. Plus the custard was too runny. The second time, I undercooked the shortbread and again had too much topping. The custard was better, but still not quite right. So I added some more cornstarch and rhubarb, and the third time was the charm! These Rhubarb Custard Crumble Bars have three layers - crust, custard filling, and crumble topping. And they're surprisingly easy to make! The crust is a basic shortbread that's baked for a bit prior to adding the other two layers. The custard consists of eggs, sweetened condensed milk, sugar, cornstarch, and lots of fresh chopped rhubarb. The sweetened condensed milk really lends to the creamy texture of the custard. Then the bars are topped with a crispy oatmeal crumble, which adds some great texture and flavor. Overall, these bars are sweet, a little tart from the rhubarb, creamy and crunchy and oh so delicious! 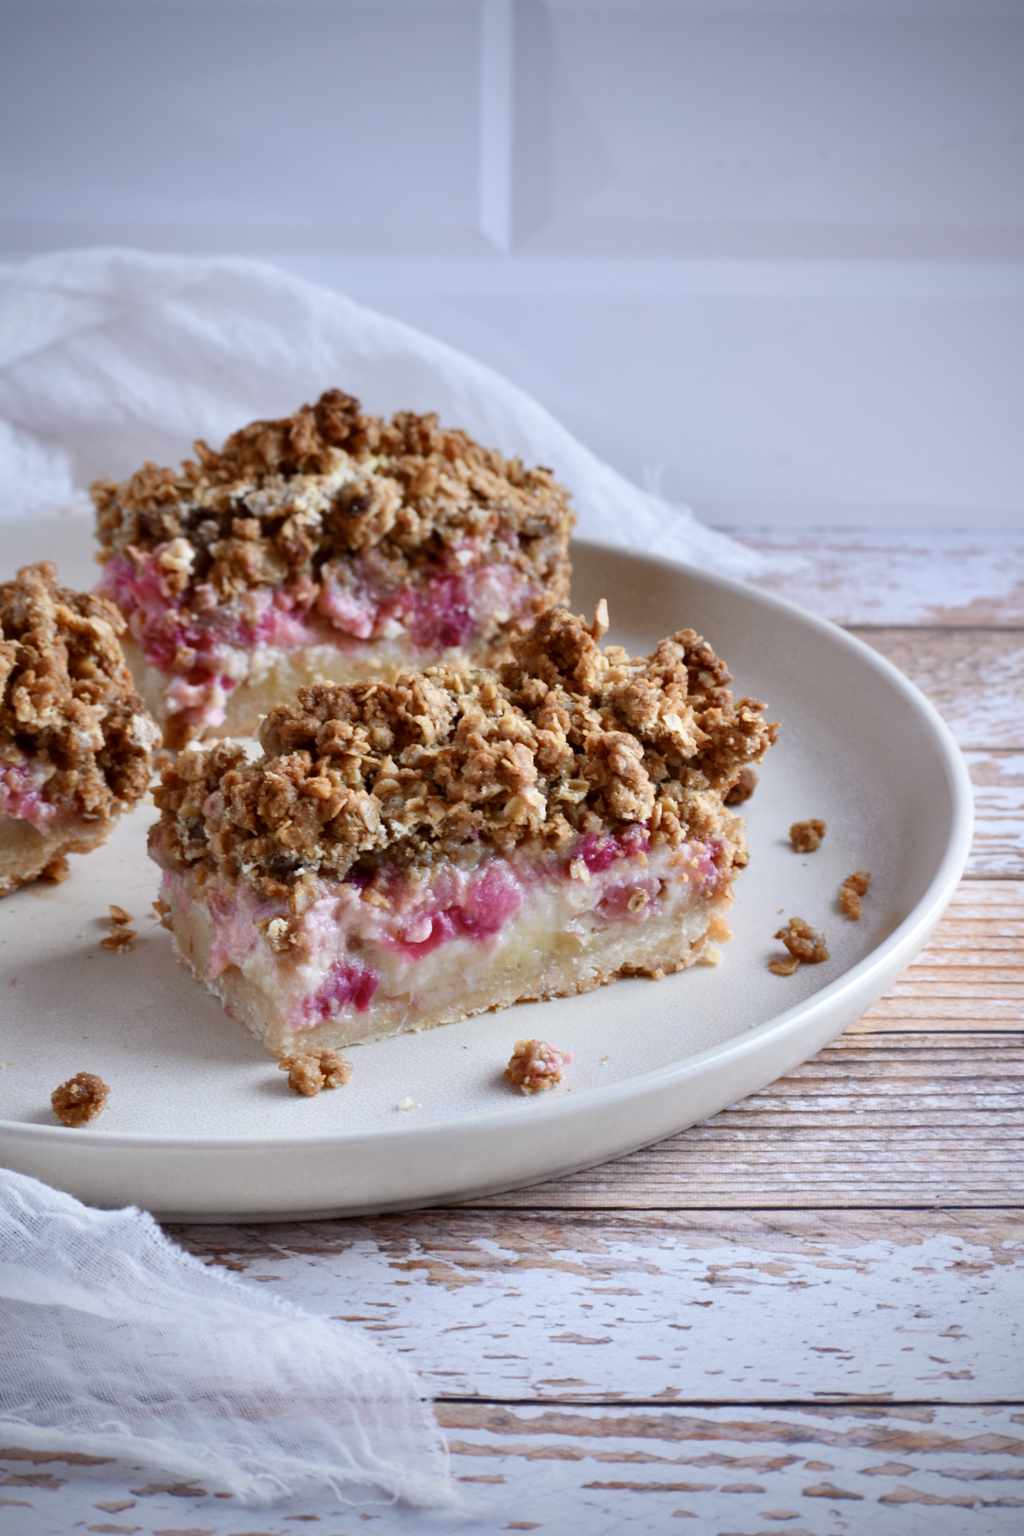 RHUBARB CUSTARD CRUMBLE BARS Makes about 8 -16 bars INGREDIENTS:
Shortbread Crust: 1/2 cup butter, softened 1/4 cup sugar 1 cup all-purpose flour 1/4 tsp. salt Custard Filling: 4 eggs 1 cup sugar 1/4 cup cornstarch 1/2 cup sweetened condensed milk 1/2 tsp. vanilla 4 cups fresh rhubarb, thinly sliced Crumble Topping: 6 tbsp. butter, melted 1/2 cup dark brown sugar 1/2 cup flour 1 cup quick oats 1/2 tsp. cinnamon INSTRUCTIONS: Preheat oven to 325° F. Line an 8x8 inch baking dish with parchment paper. In a large bowl or using a stand mixer with a paddle attachment, mix together all ingredients for the crust until well combined. The mixture will be fairly crumbly. Press the mixture into the bottom of the prepared baking dish until even and smooth. Bake the crust for 20 minutes. Remove from oven and allow to cool for 10-15 minutes. Increase the oven temperature to 350° F. In a large bowl, mix together the the eggs, sugar, cornstarch, sweetened condensed milk, and vanilla for the filling until smooth, then stir in the rhubarb. Set aside. In a medium bowl, or using a stand mixer with a paddle attachment, mix together all the ingredients for the topping until well combined and crumbly. Pour the custard mixture into the baking dish on top of the slightly cooled crust, then sprinkle the topping evenly over the custard. Bake for 45-55 minutes or until the center is set when the dish is jiggled and the topping is beginning to brown. Remove from oven and cool in the pan for about 20 minutes, then place in the refrigerator to cool completely. (This usually takes about 2 hours.) Prior to serving, place the dish in the freezer for 30 minutes. This will make cutting the bars easier. Lift the bars out of the dish using the parchment paper, and carefully pull back the parchment paper from the sides of the bars. Using a long sharp knife, cut into 8-16 equal sized bars and serve. Store any leftovers in an air-tight container in the refrigerator. When I grocery shop, I tend to have tunnel vision. I go in with a list (either written down or in my head) of things I need, and I go through the store in a systematic way to get what I need and get out of the store as fast as I can. But every so often, I like to peruse the grocery store, paying close attention to sections that I usually just glance over. I like to try to find items that I have never seen or noticed in the store before, or items I have never worked with. The spice section is definitely one of the sections I like to peruse. There are always some fun herbs and spices I've never worked with. This time, I discovered that you could get dried lavender flowers. (Not quite sure why I was so shocked by this, but I was nonetheless.) So I tossed it in my cart and when I got home, I started researching recipes to figure out what I could do with these beautiful, aromatic flowers.  So many of the recipes I found were sweets, and probably 90% of the time the lavender was paired with lemon, and/or honey. Well, me being me, I wanted to find something a little different from what's been done so many times. I began thinking of other flavors that might pair well with lavender. Lavender has a pretty intense flavor and scent. It is definitely very floral, which is quite unique in cooking and baking, and too much of it can be overwhelming. I felt it needed something to balance it out a bit, something a bit more earthy, like an herb perhaps. Rosemary. Yes, rosemary would be a perfect companion. It's earthy and warm, and has an intense flavor that can stand up to the lavender without overpowering it. And the pair in a simple shortbread would be divine! 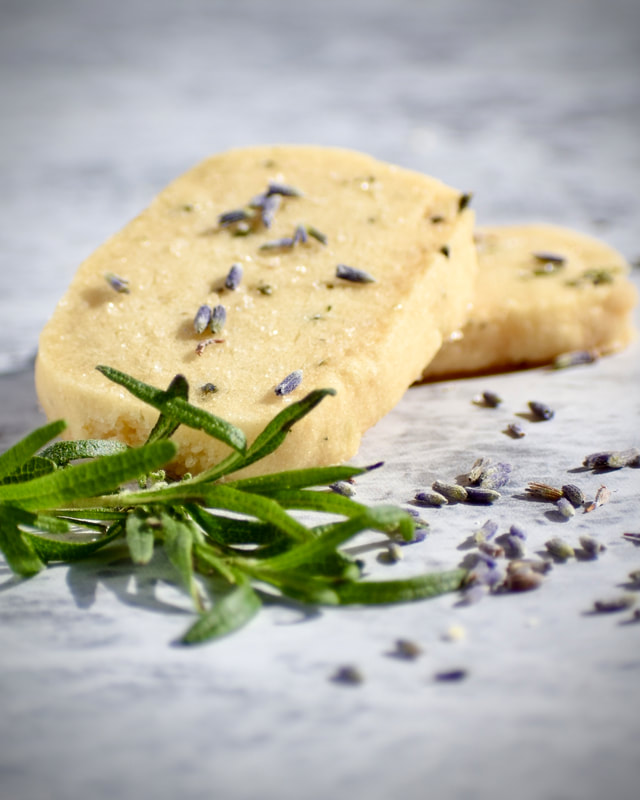 Shortbread cookies are super easy to make. The base recipe is 1 part sugar, 2 parts butter, and 4 parts flour. (So like in this recipe, 1/4 cup sugar, 1/2 cup butter, and 1 cup flour.) You can add a few other ingredients in small amounts for flavor, but that's basically it! The mixture will seem very dry and crumbly, but will pack down nicely, especially if you use parchment paper or plastic wrap. You can either form the shortbread into a log, freeze it, and then slice it into individual cookies, like I do here with this recipe. Or you can roll the shortbread out with a rolling pin and cut it with a knife or cookie cutters, then freeze it before baking. Freezing the dough is KEY! It will help solidify the butter and keep the cookies from spreading, and it also helps concentrate the flavors. Then you pop the cookies into the oven till they're slightly golden around the edges, and cool them completely before serving. Easy peasy! These Lemon Rosemary Shortbread cookies are crisp and buttery with a soft herbal and floral flavor. They are a perfect snack to pair with hot tea or to serve alongside whiskey or rosé. 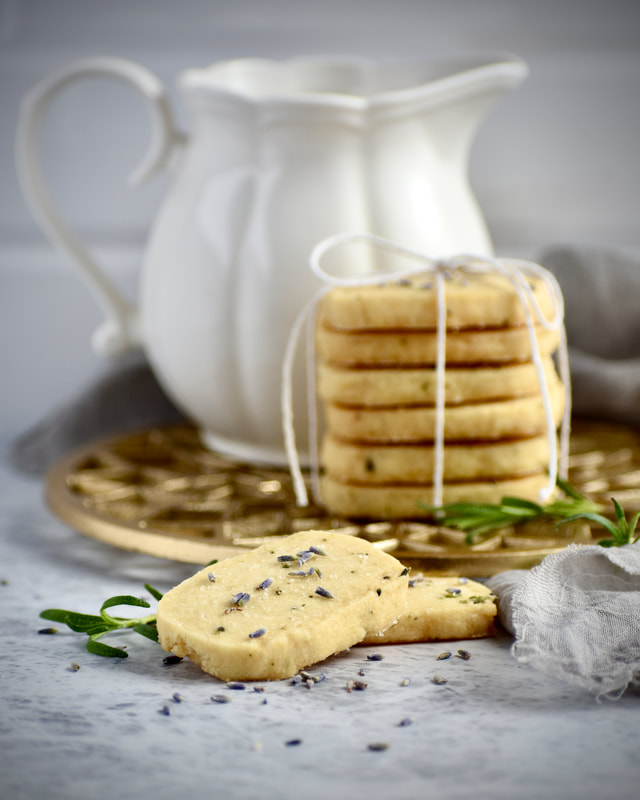 LEMON ROSEMARY SHORTBREAD Makes 12-18 cookies INGREDIENTS:
1/2 cup butter, softened 1/4 cup sugar 2 tbsp. honey Pinch of salt 1 cup all-purpose flour 3/4 tsp. dried lavender 1 tsp. fresh rosemary, minced 2 tbsp. cane sugar or turbinado sugar, for garnish INSTRUCTIONS: In a large bowl or stand mixer with a paddle attachment, mix together the butter, sugar, honey and salt until light and fluffy. Add the flour and mix until well combined and mixture is crumbly. Mix in the lavender and rosemary. Transfer the mixture to a sheet of parchment paper or plastic wrap. Pack the dough down and shape it into a compact log. Wrap it tightly with the parchment paper or plastic wrap and fold or twist the ends to seal them. If desired, flatten the sides of the log to create a square or rectangular shape. Place the log in the freezer for 30 minutes. Preheat oven to 325° F. Line a large baking sheet with parchment paper. Remove the dough from the freezer and carefully unwrap it. With a sharp knife, slice the log into 1/4 inch thick slices. Lay each slice flat on the prepared baking sheet, about 1 inch apart. Sprinkle with cane or turbinado sugar, then bake the shortbread for about 15-20 minutes, just until the edges start to turn golden brown. Remove from the oven and cool completely before serving. Store the cookies in an air-tight container. I honestly don’t think you could go wrong with a snickerdoodle. No matter if they’re soft and fluffy, thin and crispy, or flat and chewy, they’re still going to be sweet, sugary, and cinnamon-y. They are a classic, and one of my favorite cookies. But browning the butter first, takes them to a whole other level. This recipe will give you little round nuggets that are crispy and sugary on the outside, but perfectly soft and doughy on the inside. 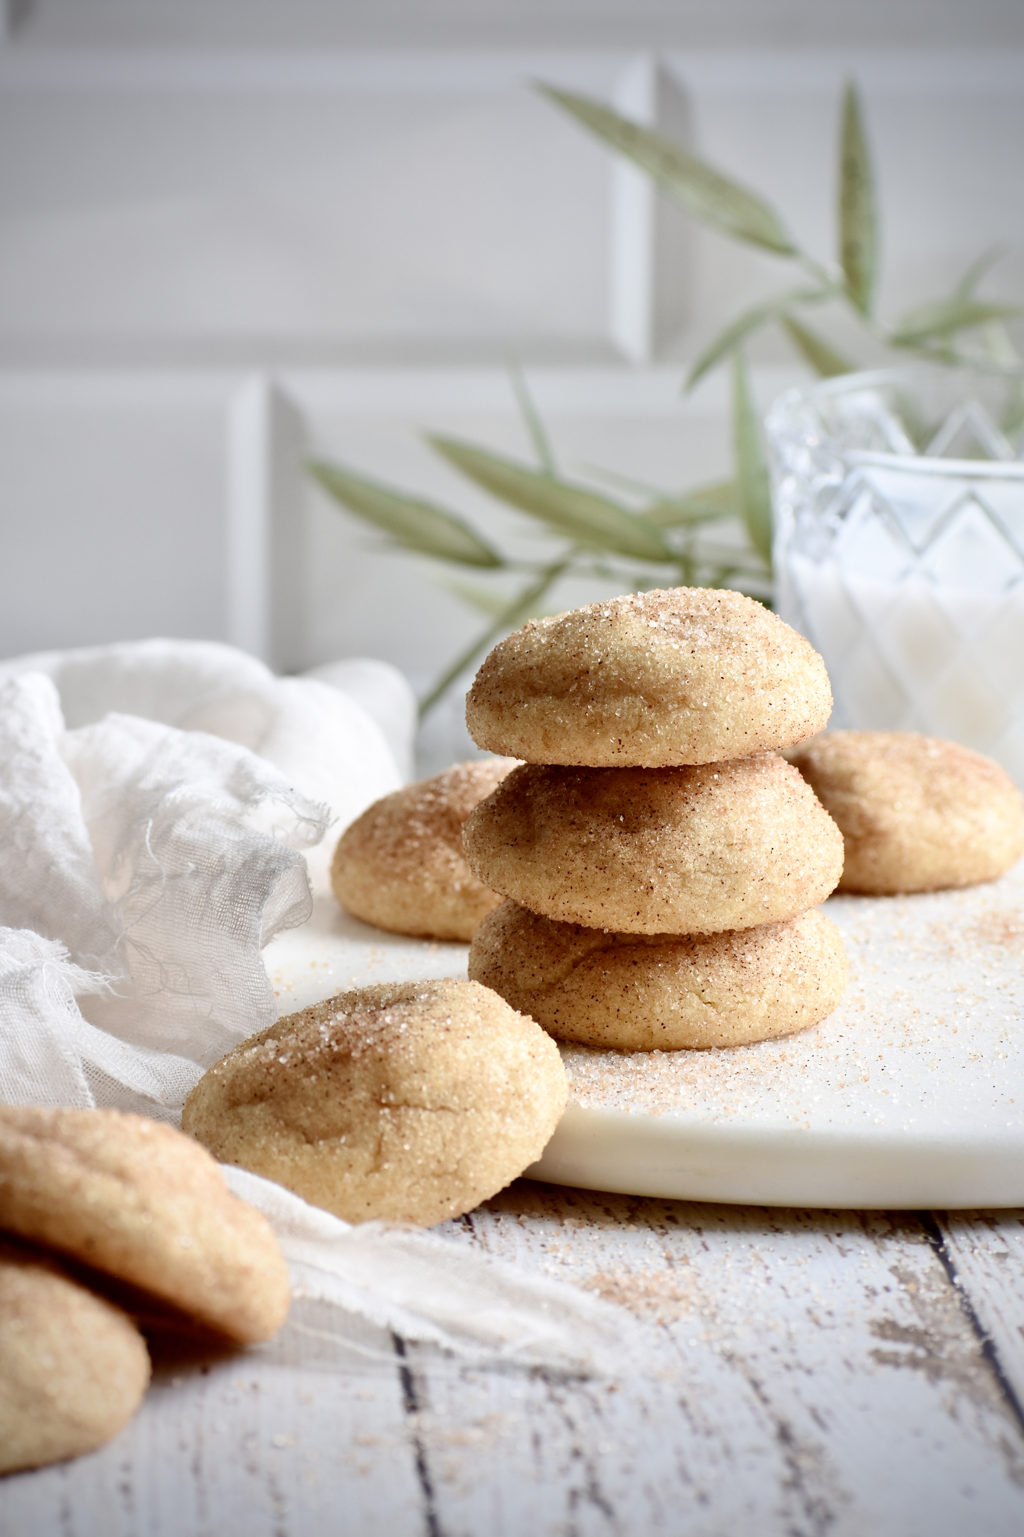 There are a few things that I did a little different with this recipe from the classic snickerdoodle:
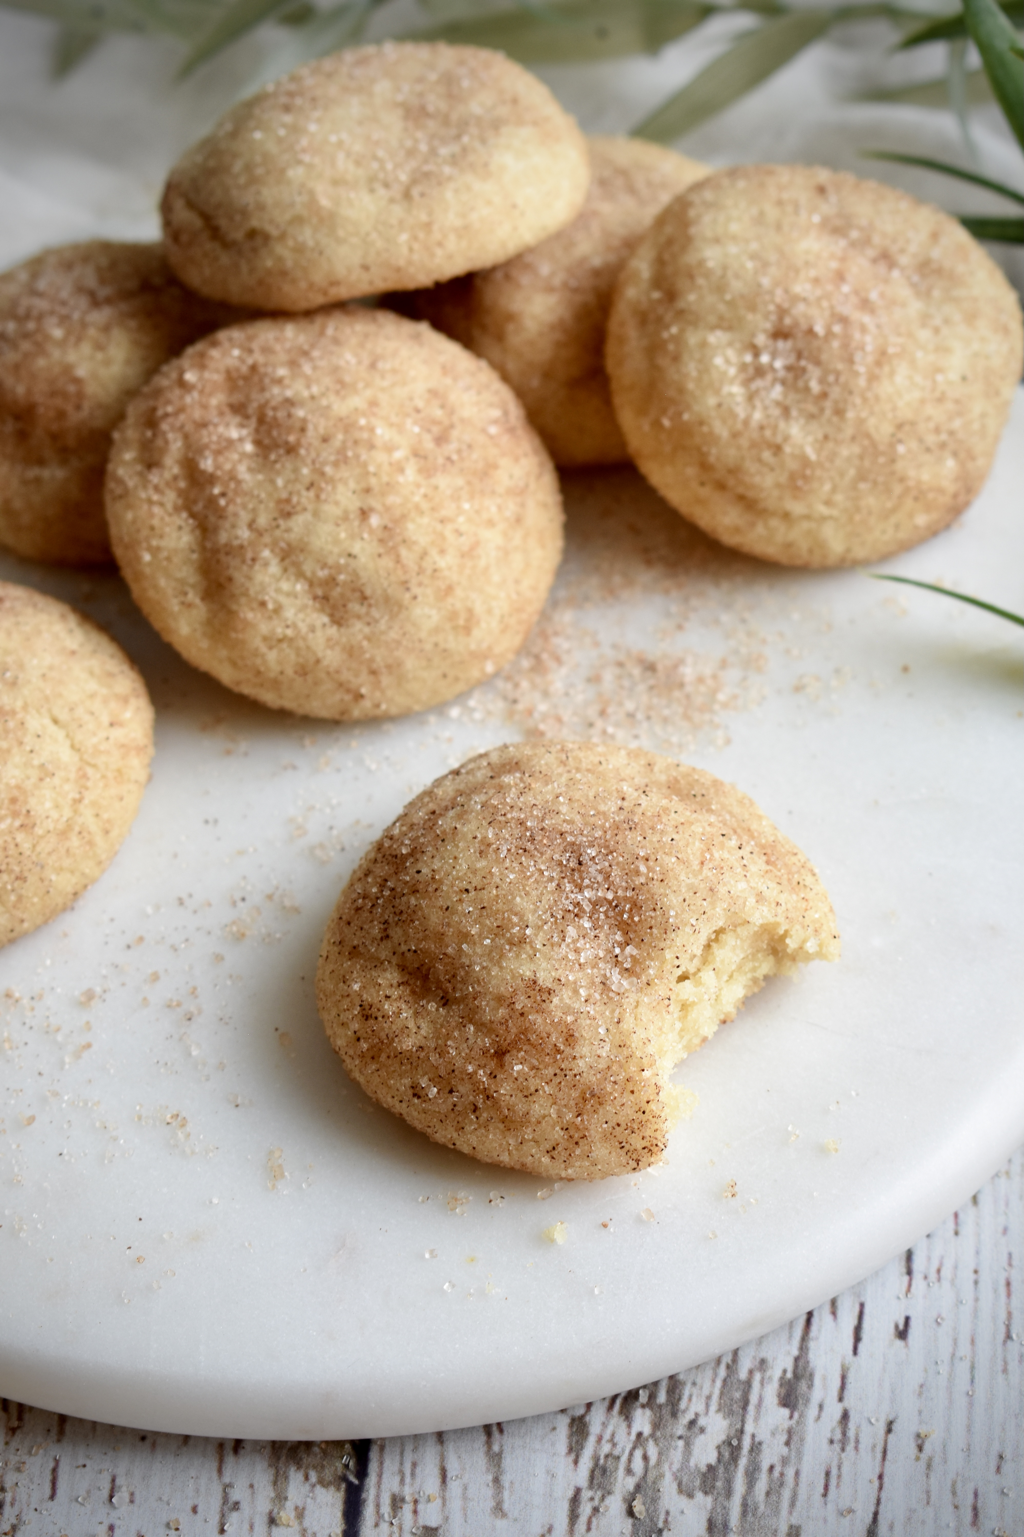 BROWN BUTTER SNICKERDOODLE COOKIES Makes about 2-3 dozen cookies INGREDIENTS:
Cookies: 1 cup butter 1 1/4 cups sugar 2 eggs 1/4 tsp. maple extract 1/4 tsp. vanilla extract 3 cups flour 1/2 tsp. salt 1/2 tsp. baking soda 1/2 tsp. cream of tartar Cinnamon Sugar: 1/4 cup cane sugar 1 tsp. cinnamon INSTRUCTIONS: Preheat oven to 375° F. Grease a baking sheet or line with parchment paper. Place the butter in a large saucepan and melt over medium heat. Continue to cook the butter for about 4-6 minutes, stirring frequently, until it begins to smell nutty and you start to see little browned bits in the bottom of the pan. Remove from heat and immediately pour the butter into a heatproof bowl to stop it from cooking. (The butter can burn quite quickly at this point if left too long on the stove or in the hot pan.) Place the bowl in the freezer or refrigerator to continue cooling. You’ll want the brown butter to be cool to the touch, but take it out of the freezer or refrigerator before it hardens. In a large bowl, or using a stand mixer with a paddle attachment, mix together the cooled brown butter and sugar, then mix in the eggs and both extracts until smooth. Add the flour, salt, baking soda, and cream of tartar and mix until we’ll combined. In a small bowl mix together the cinnamon and sugar. Roll the dough into 1 1/2 inch balls, then roll the dough balls in the cinnamon sugar mixture to coat. Place the dough balls on the prepared baking sheet. Bake at 375° F for 10 minutes. Remove from oven and cool on the pan for 2 minutes, the transfer to a wire cooling rack to cool completely. Chocolate is still the star of these rich, fudgy brownies, but the fresh mint provides a soft, subtle flavor to entice the tastebuds. 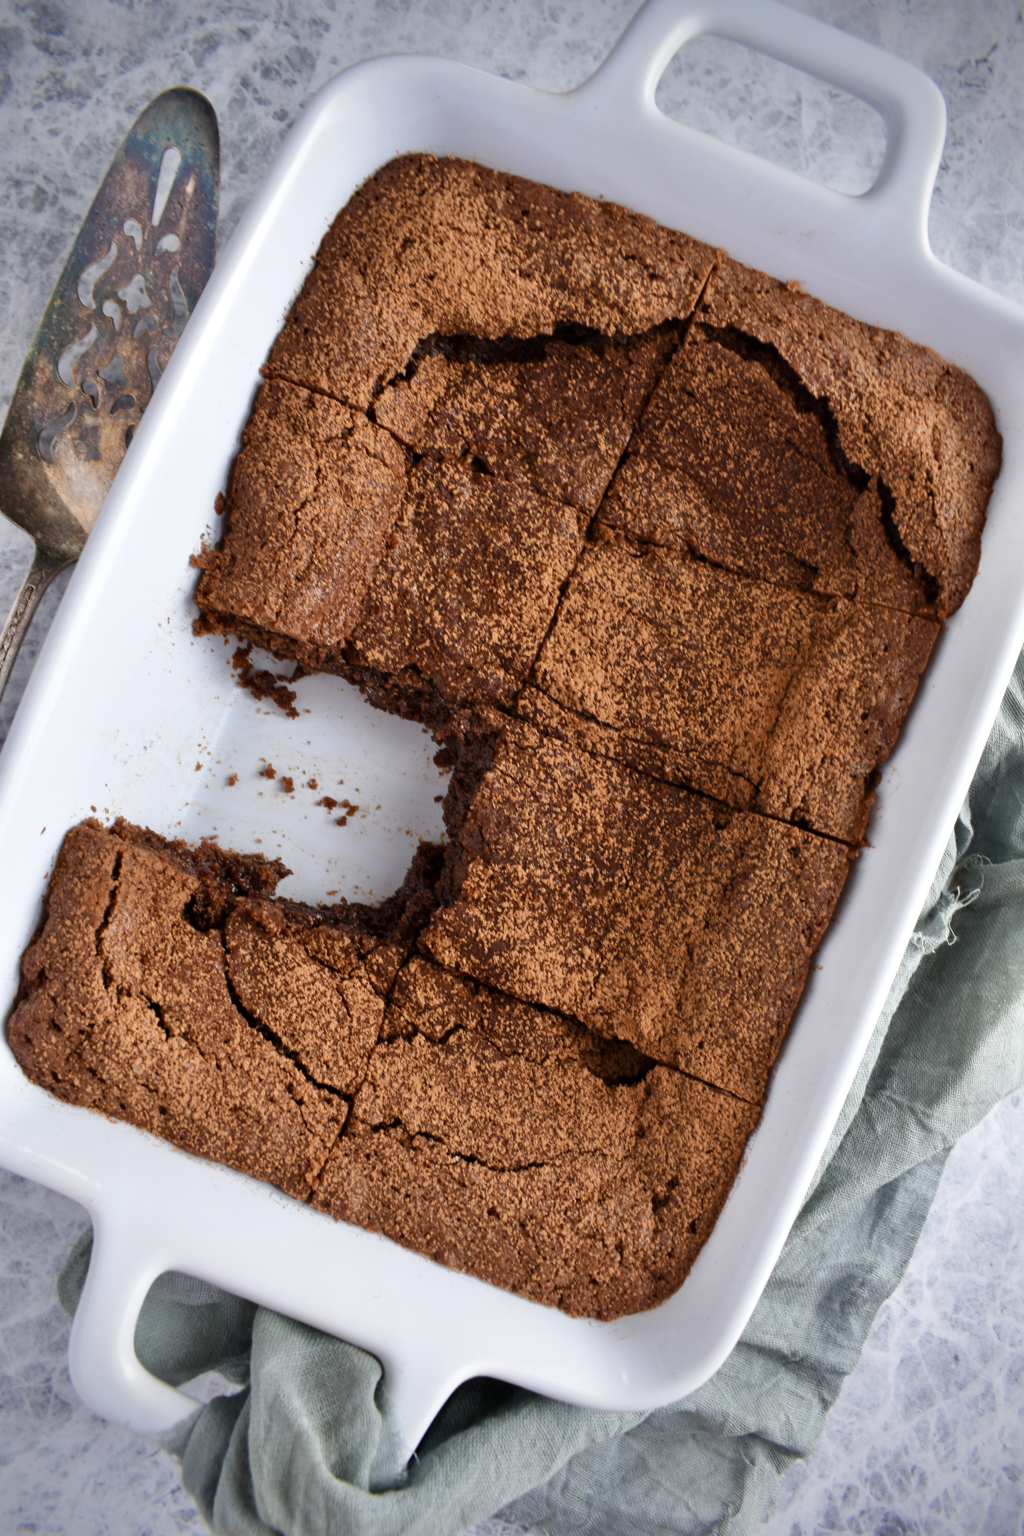 FRESH MINT BROWNIES Makes 8-9 servings INGREDIENTS:
3/4 cup butter, melted 2 tbsp. canola oil or coconut oil 1 1/2 cups sugar 1/2 cup cocoa powder 2 eggs + 1 egg yolk 3 tbsp. fresh mint, finely minced (spearmint or chocolate mint is ideal) 1/2 cup milk chocolate chips (optional) 1 cup flour 1/2 tsp. baking powder 1/8 tsp. baking soda 1/2 tsp. salt INSTRUCTIONS: Preheat oven to 350° F. Grease an 8x8 inch baking dish. In a large bowl, mix together the butter, oil, sugar, and cocoa powder, then mix in the eggs, mint, and chocolate chips. In a small bowl, mix together the flour, baking powder, baking soda, and salt. Fold the flour mixture into the cocoa mixture just until all ingredients are moistened. Do not overmix. Pour the batter into the prepared baking dish and spread until evenly distributed. Bake at 350° F for 30 minutes for a fudgy center, or up to 35 minutes for a firmer center. Allow to cool in the pan before serving. These cookies are sweet, salty, crisp, crunchy, and chewy... all the things a great cookie should be! Ok, I’ll be honest they are like crrrrraaack!!! Seriously, sooo good! I had this idea in my head for weeks, imagining how great the combo would be to have the bitter sweetness of the dark chocolate, the sweet buttery flavor of the toffee, and then the salty crunchiness of the kettle chips. Throw in a little extra brown sugar and molasses to the mix and holy moly! These bad boys turned out way better in real life than what I even imagined in my head. 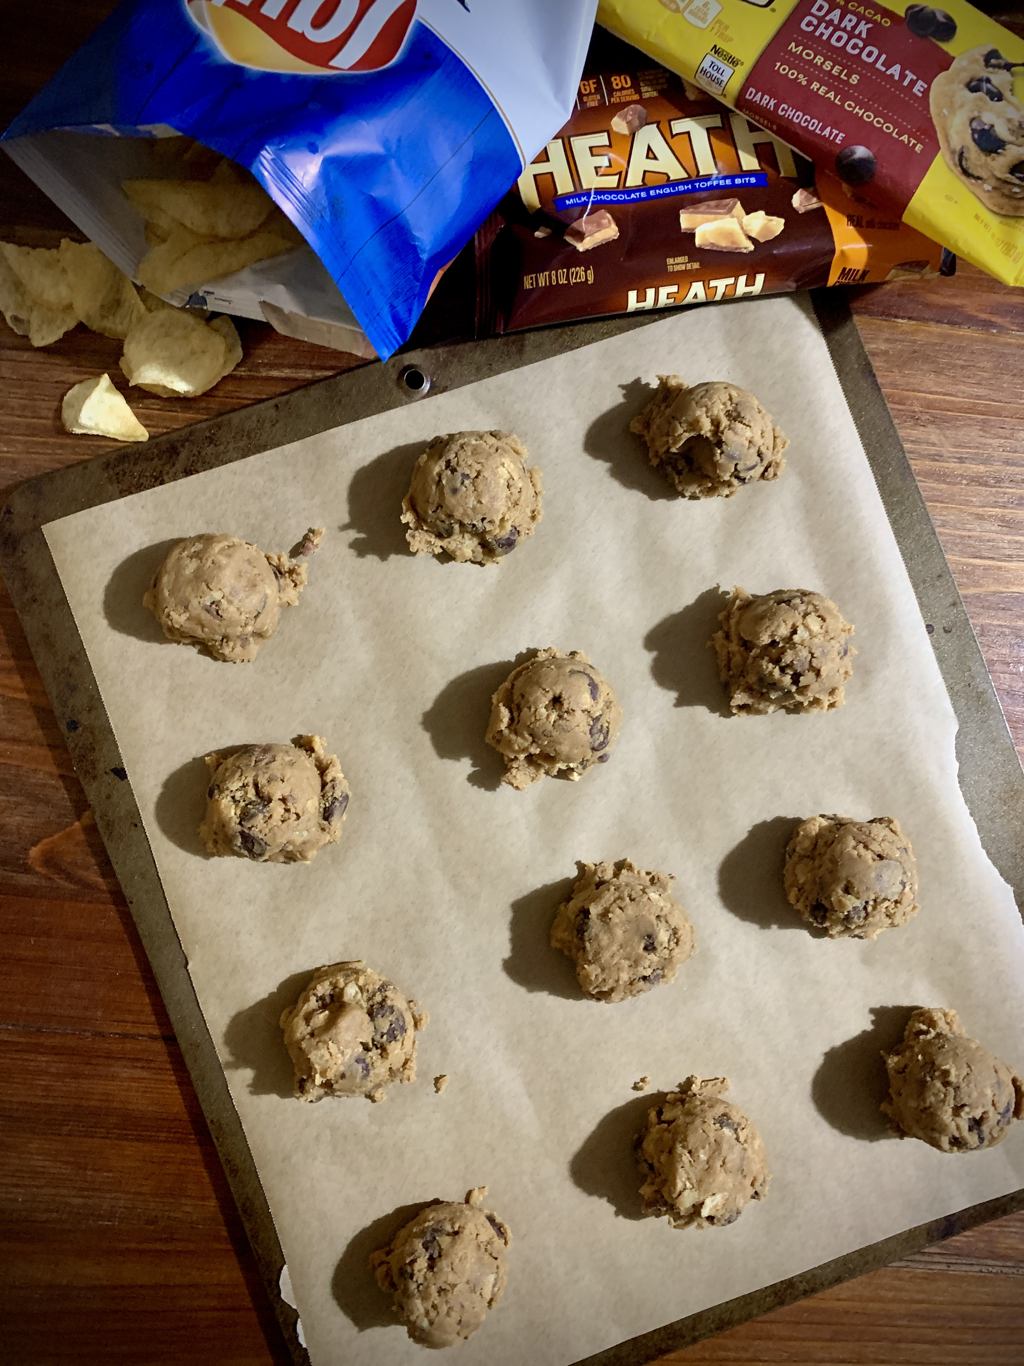 Makes 2 - 2 1/2 dozen cookies. INGREDIENTS: 3/4 cup butter, softened 1/2 cup sugar 1 cup brown sugar 1 egg + 1 egg yolk 1 tbsp. molasses 1 tsp. vanilla 2 cups flour 3/4 tsp baking soda 1/2 tsp salt 1 10-ounce bag of dark chocolate chips 1 8-ounce bag of Heath toffee bits 1 1/2 cups crushed kettle cooked potato chips, regular or sea salt flavor Flaky or chunky sea salt, to garnish INSTRUCTIONS: Preheat oven to 350° F. Line 2 large cookie sheets with parchment paper. in a stand mixer with a paddle attachment, beat the butter on medium high speed for 2 minutes until smooth and fluffy. Add the sugar and brown sugar and beat for 2 more minutes. Add the egg and egg yolk, then the molasses and vanilla. Turn the mixer off and add the flour, baking soda, and salt to the bowl. Stir the baking soda and salt into the flour a bit, then turn the mixer on low and mix until we’ll blended and smooth. Add the chocolate chips, toffee bits, and potato chips. Mix until we’ll blended. Using a 2 tbsp. scoop and drop the dough onto the prepared cookie sheets about 2 inches apart. (If you don’t have a 2 tbsp. scoop, simply roll about 2 tbsp. of dough into a ball and place on the cookie sheets.) Bake at 350° F for 10-12 minutes or until golden brown around the edges. Remove from oven and immediately sprinkle with flaky or chunky sea salt. Cool on the cookie sheet for 2-3 minutes, then carefully transfer to a wire rack to finish cooling.  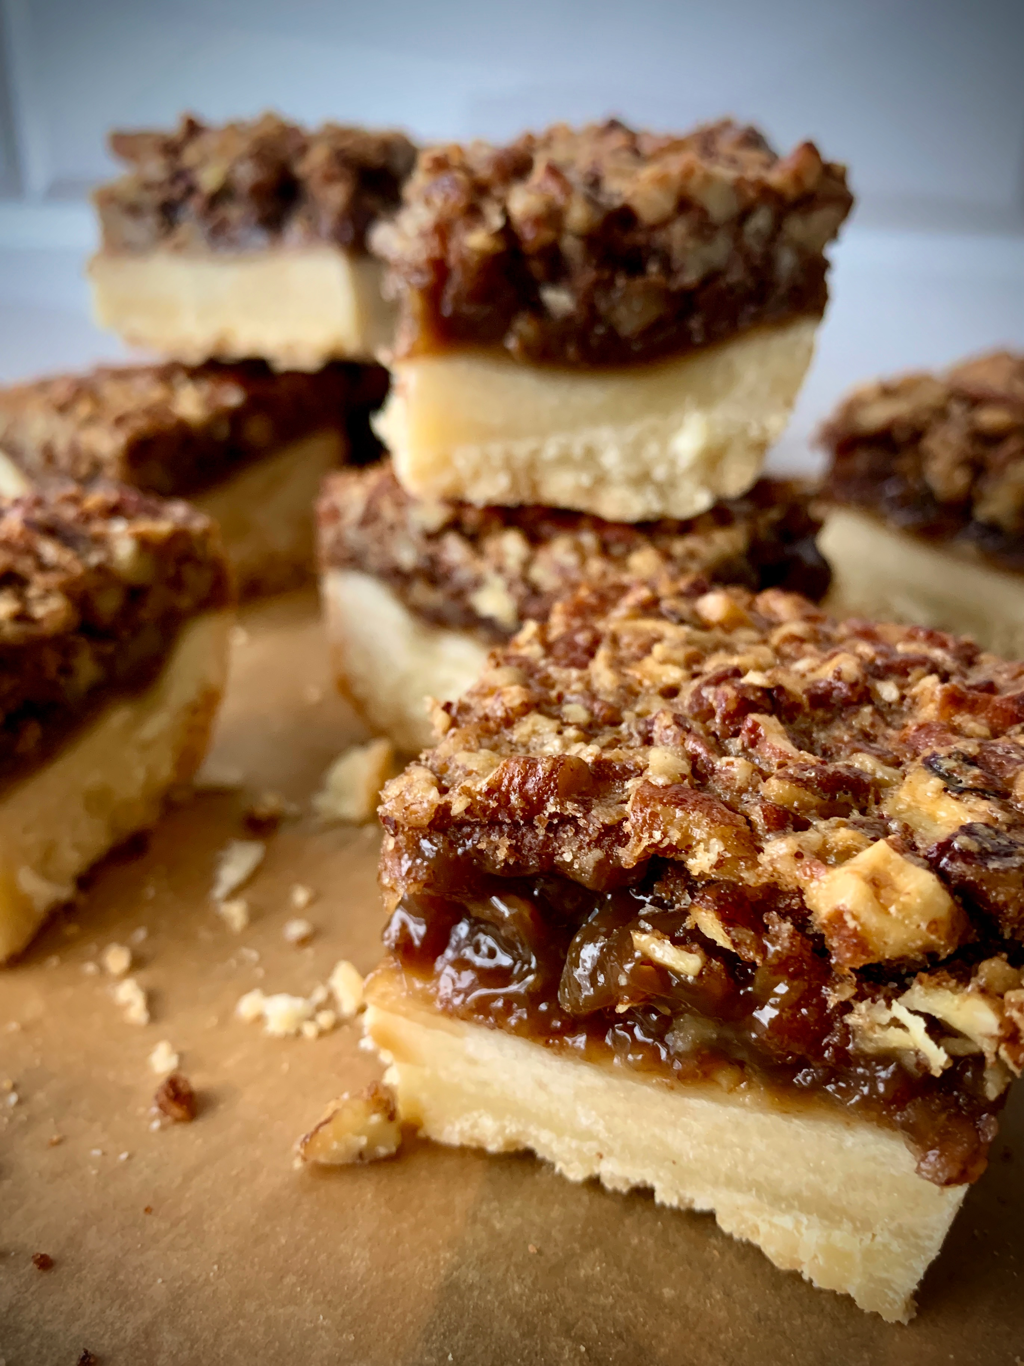 INGREDIENTS:
Shortbread Crust: 1 cup butter, softened 1/2 cup sugar 1 tsp. vanilla 2 cups all-purpose flour 1/4 tsp. salt Pecan Topping: 1/2 cup maple syrup 1/2 cup brown sugar 2 eggs 1 tsp. vanilla 1 tsp. maple extract 1/2 tsp. salt 2 tbsp. butter, melted 1 tbsp. flour 2 tbsp. Knob Creek Bourbon 2 cups pecans, chopped INSTRUCTIONS: Preheat oven to 350°. Line a 8”x8” baking dish with parchment paper. Using a stand mixer with the paddle attachment, mix together the butter and sugar for the crust until light and fluffy. Add the vanilla, flour, and salt and continue to mix until we’ll blended and crumbly. Press the dough evenly along the bottom of prepared pan. Set aside. In a separate bowl, mix together all of the ingredients for the topping. Spread the topping evenly over the shortbread dough. Bake at 350° F for 40-50 minutes, until the center is fairly set when the dish is jiggled. Remove from oven and allow to cool completely. Lift the bars out of the dish using the parchment paper and transfer to a wire rack. Refrigerate the bars for at least 1 hour before cutting and serving. Mix until smooth:
3/4 cup butter, room temp 1 cup brown sugar Add: 1 egg 1/2 cup molasses 1 tsp vanilla 1 cup chopped bacon 3/4 cup chopped pecans Sift together and mix in: 2 1/2 cups flour 1/4 tsp salt 2 tsp baking soda 1 tsp cinnamon 1 tsp ginger 1/2 tsp nutmeg Place 1/4 cup sugar on small plate. Roll dough into balls, then roll dough balls in sugar to coat. Place on a greased cookie sheet. Bake at 350° for 10-12 min. until set. Let cool for 5 min., then glaze. Maple glaze: 3 cups powdered sugar 2 tbsp maple syrup 1/2 tsp vanilla 2 tbsp butter, melted 4 tbsp cream cheese, room temp 1-2 tbsp milk 1 c. Crisco
1 c. peanut butter (JIF Creamy is the best!) 1 c. sugar 1 c. brown sugar 2 eggs 1 tsp. vanilla 2 1/4 c. flour 2 tsp. baking soda 1/4 tsp. salt Mix all ingredients. Roll into 1 1/2" balls and place on a greased cookie sheet. Bake at 350° for 10-12 min. until golden around edges. I originally got the idea for this recipe from my mom's old Joy of Cooking cookbook from the 70s, which has since fallen apart. I can't seem to find the recipe anywhere in the new version of the cookbook, so I took what I could remember of it and created these butterscotch brownies. They are crispy around the edges and have a crispy top, but a chewy and gooey center which makes them oh so delicious! 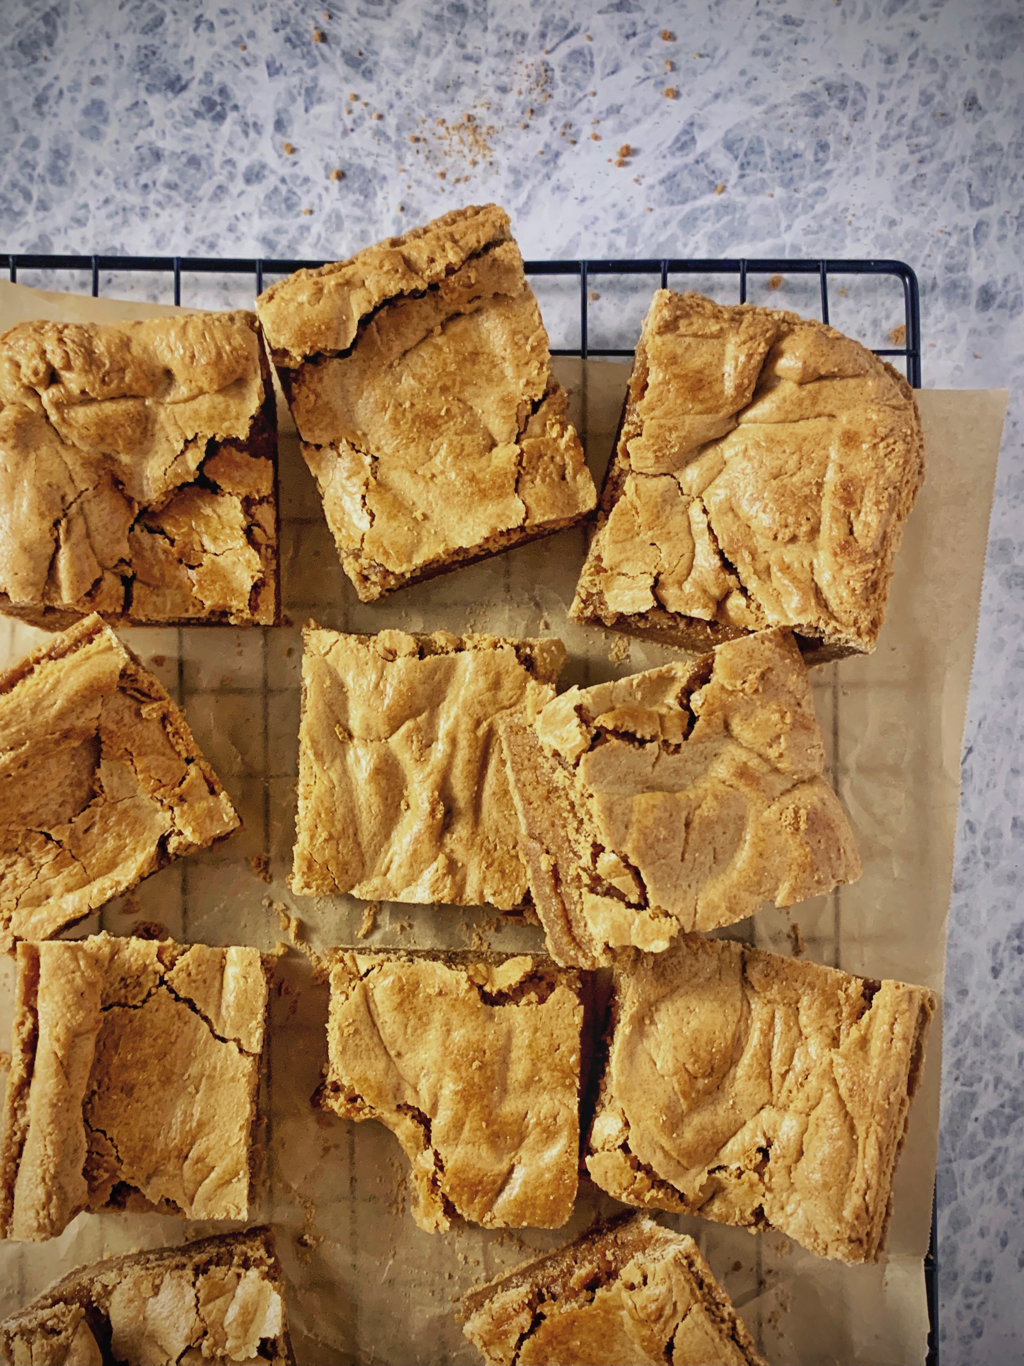 Makes about 9-12 servings
INGREDIENTS: 1 1/2 cups all-purpose flour 2 tsp. baking powder 1/2 tsp. salt 1/4 cup butter 2 tbsp. heavy cream 2 cups dark brown sugar 2 eggs, at room temperature 1/2 tsp. maple extract INSTRUCTIONS: Preheat oven to 350° F. Line a 9x9 inch or 8x12 inch baking dish with parchment paper and spray lightly with oil. In a large bowl, mix together the flour, baking powder, and salt. Melt butter in a large saucepan over medium heat. Stir in heavy cream and brown sugar. The mixture will be thick. Stir frequently until the mixture begins to bubble. This should take about 5-7 minutes. Remove from heat and allow to cool slightly for 2 minutes. In a small bowl, whisk together the eggs and maple extract. Take about 2 tbsp. of the brown sugar mixture and quickly whisk it into the eggs. Repeat with another 2 tbsp. Then quickly whisk that egg mixture into the brown sugar mixture in the saucepan. (Work quickly so you don’t allow time for the eggs to cook.) Pour the brown sugar/egg mixture into the bowl with the flour and stir to combine until smooth. Pour the batter into the prepared baking dish, pressing it into the corners and evening out the top. Bake at 350° F for 25 min., or until edges are golden and top is puffy. When you jiggle the pan, the center of the brownies should be set. Cool in the baking dish for 10-15 minutes, then lift the brownies out of the dish using the parchment paper and place on a wire rack to cool completely. As it cools, the top will sink in and crack a little. Serve at room temperature or chilled. 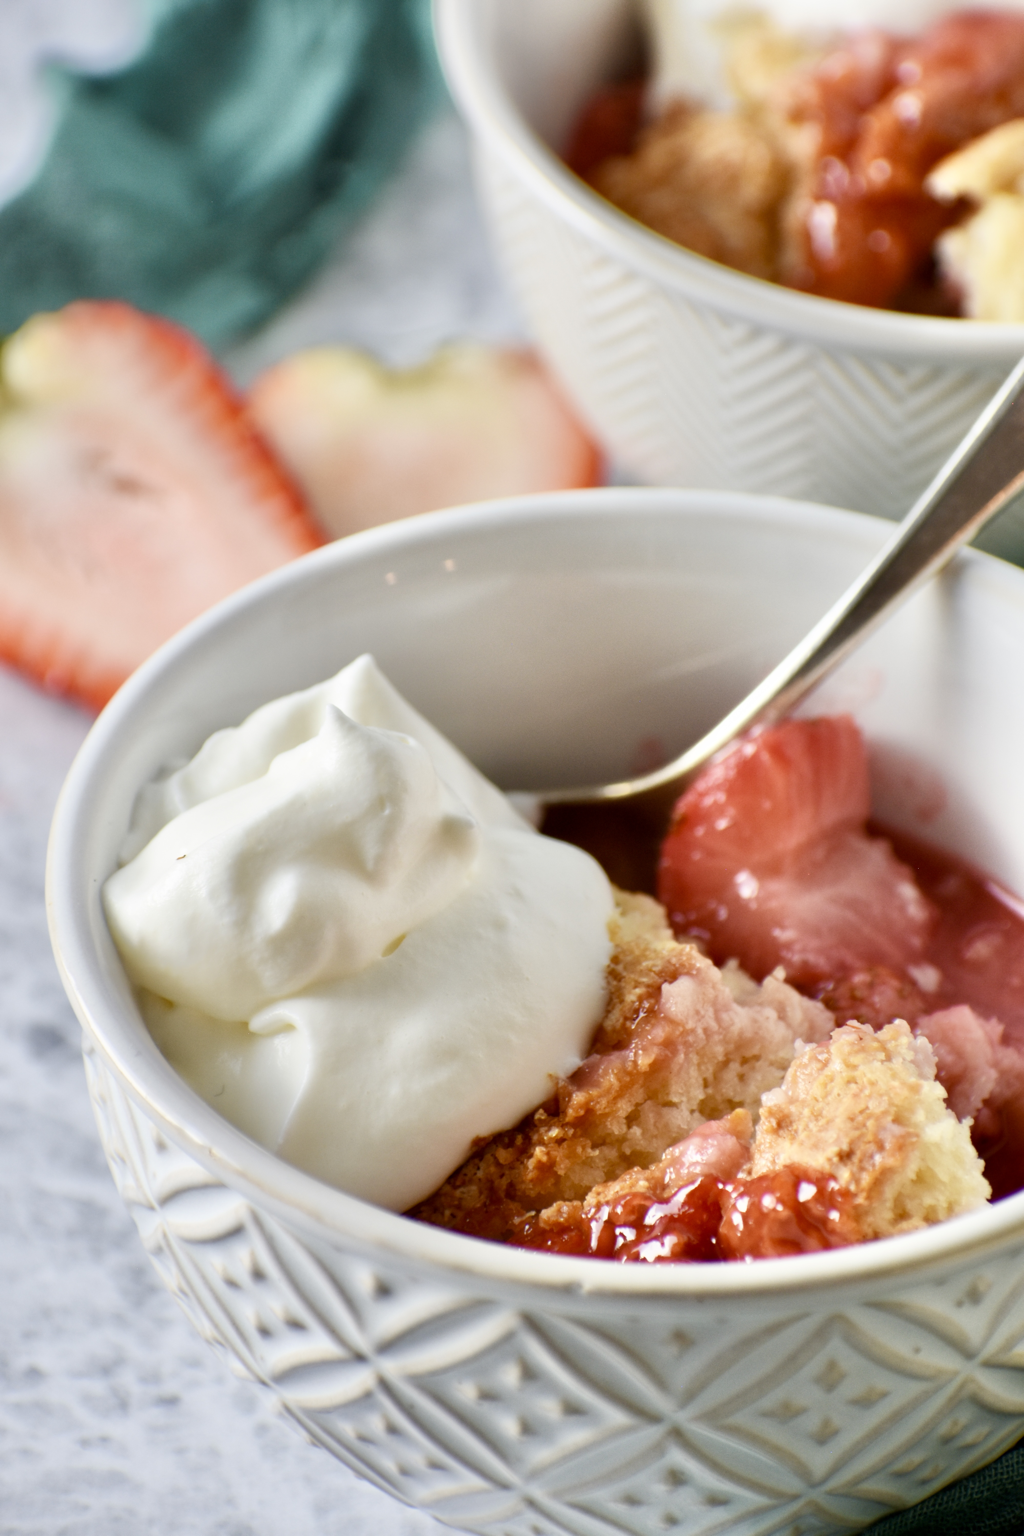 These chocolate peanut butter no-bake cookies have been one of our family-favorites for years. They are so simple and easy to make, and totally addictive! Half the time I never even get to the point of making cookies. One of my guilty pleasures is cooling the "goo" and eating it without the oatmeal. Yummy!
In a medium saucepan, over medium heat, stir together and bring to a boil: 1/2 c. butter 1/2 c. milk 1 1/4 c. sugar 4 tbsp. cocoa Once the mixtures boils for about a minute, add in: 1/2 c. peanut butter (you can use creamy or crunchy, but I prefer JIF Creamy) Boil another minute until mixture thickens a little Remove from heat and stir in: 1 tsp. vanilla Pour mixture into a large bowl with: 3 c. oatmeal Stir until well mixed. Drop by the spoonful onto a cookie sheet lined with parchment paper (not greased) and allow to cool completely. (This is always the worst part, 'cuz it seems to take them forever to cool, and they smell sooooo good!) |