|
Strawberries and chocolate are a classic pairing, yet as I thought about brownies with strawberries, I couldn’t recall ever seeing that combo before. So of course I had to try it! I was originally going to just too these brownies with a layer of roasted strawberries and ganache, but then remembered how my husband (and even me sometimes) doesn’t like chunks of fruit in his baked goods. So the roasted strawberries morphed into a smooth and creamy strawberry cheesecake layer. And I couldn’t be any happier! I seriously could eat one of these Strawberry Cheesecake Brownies every single day of my life!  The base brownie recipe is one that I developed while working on my cookbook (which is still sort of a work-in-progress). It is dense, chewy and fudgy and everything a brownie should be, in my opinion. To make the brownies, you start off mixing the dry ingredients, then melt the butter and chocolate in a double boiler (see below), then add the sugar and other wet ingredients to the chocolate, stir that into the dry ingredients, then mix in more chocolate. It may sound a little complicated, but after you do it once, it’s a breeze! And trust me, you will want to make these brownies more than once! What is a double boiler, you ask? Well, a double boiler is essentially a medium-sized heatproof bowl (stainless steel or glass) that’s set over a medium-sized saucepan that has about an inch or two of water in it. The bottom of the bowl should not touch the water. The saucepan is placed over medium or medium-low heat and once the water is hot and bubbly, but not boiling, the double boiler is ready. (Wait, you don’t want a double BOILER to boil? I know, it’s confusing!) The double boiler is used a lot for melting chocolate or for egg based sauces because it is a slower, more gentle heat source that won’t cause the chocolate or sauce to seize up and separate like it would with direct heat.  STRAWBERRY CHEESECAKE BROWNIES Makes about 9 servings INGREDIENTS:
Brownies: 3/4 cup all-purpose flour 1/4 cup cocoa powder 1/4 tsp. salt 1/4 tsp. baking soda 1/2 cup butter, cut into cubes 1 cup semisweet chocolate chips 1/2 cup sugar 1/2 cup packed dark brown sugar 2 eggs + 1 egg yolk, room temperature 1 1/2 tsp. vanilla 3/4 cup semisweet chocolate chips 1/2 cup peanut butter Strawberry Cheesecake: 1 cup fresh strawberries, leaves removed** 8 oz. cream cheese, room temperature 1/3 cup powdered sugar 1 egg 1/2 tsp. vanilla INSTRUCTIONS: Preheat oven to 350° F. Line an 8x8 inch to 9x9 inch baking dish with parchment paper. In a food processor, add all ingredients for the strawberry cheesecake and process for 1-2 minutes until smooth. Set aside. In a large bowl, mix together the flour, cocoa powder, salt, and baking soda. Set aside. In a double boiler, melt the butter and 1 cup of chocolate chips, stirring constantly until fully melted. Once melted, remove from heat and whisk in the sugar and brown sugar until smooth. Quickly whisk in the eggs and egg yolk, then the vanilla. Add the chocolate mixture to the flour mixture and mix until well combined and batter is smooth. Stir in the chocolate chips. Spread the brownie batter in the bottom of the prepared baking dish. Pour the strawberry cheesecake over the top of the brownies. Sprinkle with chocolate chips if desired. Bake the brownies at 350° F for 30-35 minutes or until the center is set when the dish is jiggled. Cool completely in the dish. Once cool, lift the brownies out of the dish by the parchment paper, cut and serve.
0 Comments
This is literally the easiest and best rustic-style bread you can make. There’s nothing tricky about it, and it takes like maybe 10 minutes total hands-on work time! You can mix it up in the morning and then just forget about it all day. Pop it in the oven right before dinner and you’ve got a fresh loaf to serve with your dinner and for sandwiches for lunch the next day. And the bread itself is fantastic! It’s airy with a slightly chewy texture and a crisp crust. It’s also great for French toast, crostini, or to serve with a cheese platter. 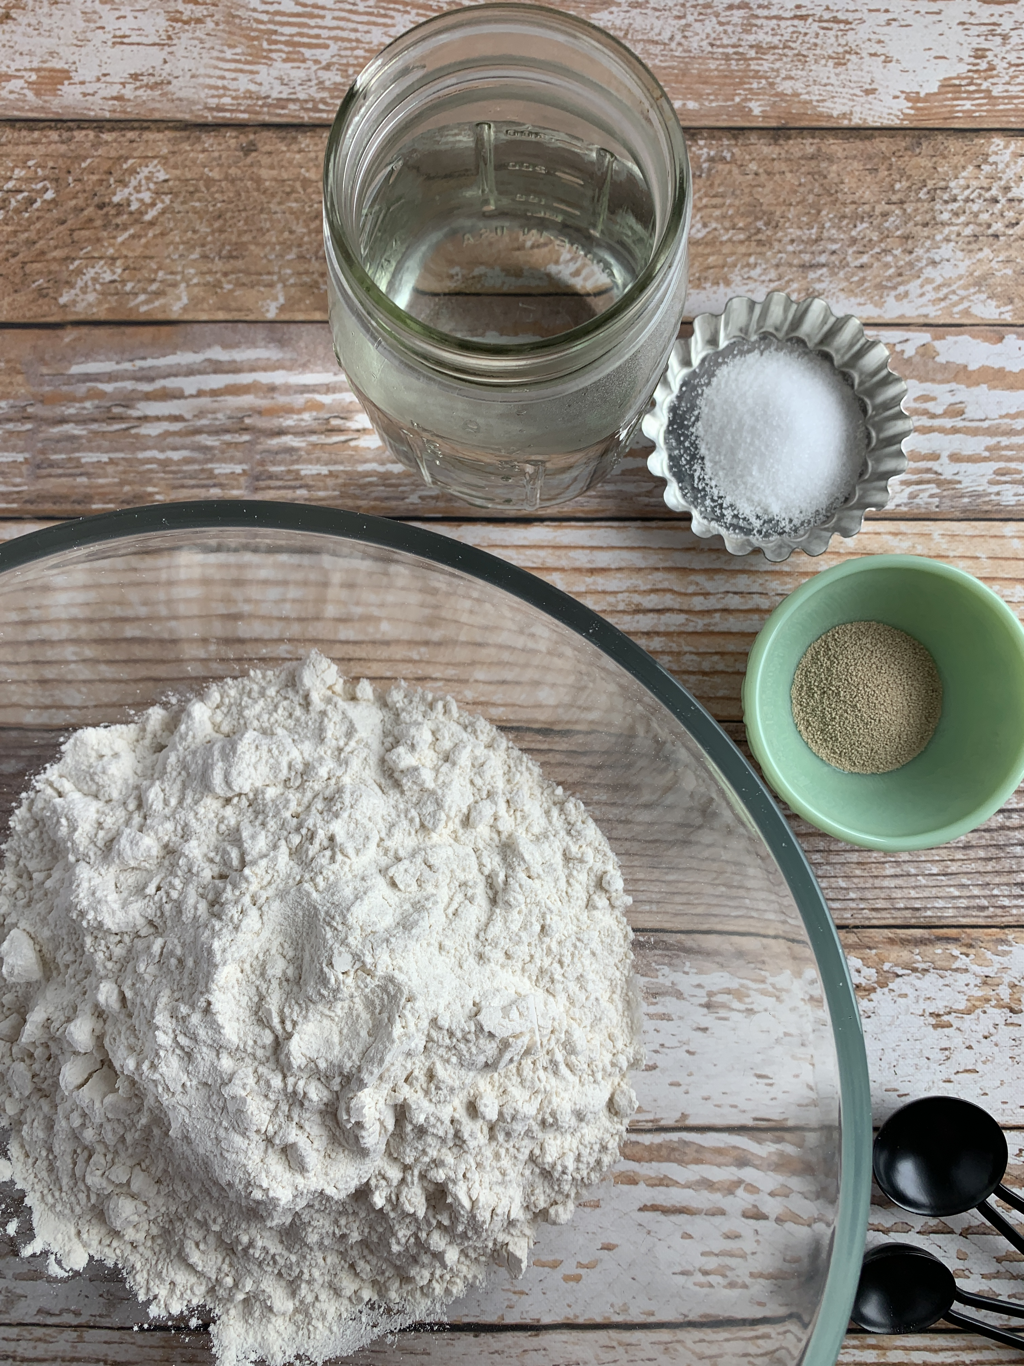 You only need 4 basic ingredients! You can’t get much simpler than that! Mix it all up just until all the flour is moistened. The dough will look like a shaggy mess, and not at all like anything that’s turn into a loaf of bread, but trust me, it all comes together in the end. Just cover it with some plastic wrap, leave it on your counter and forget about it for about 8-12 hours. 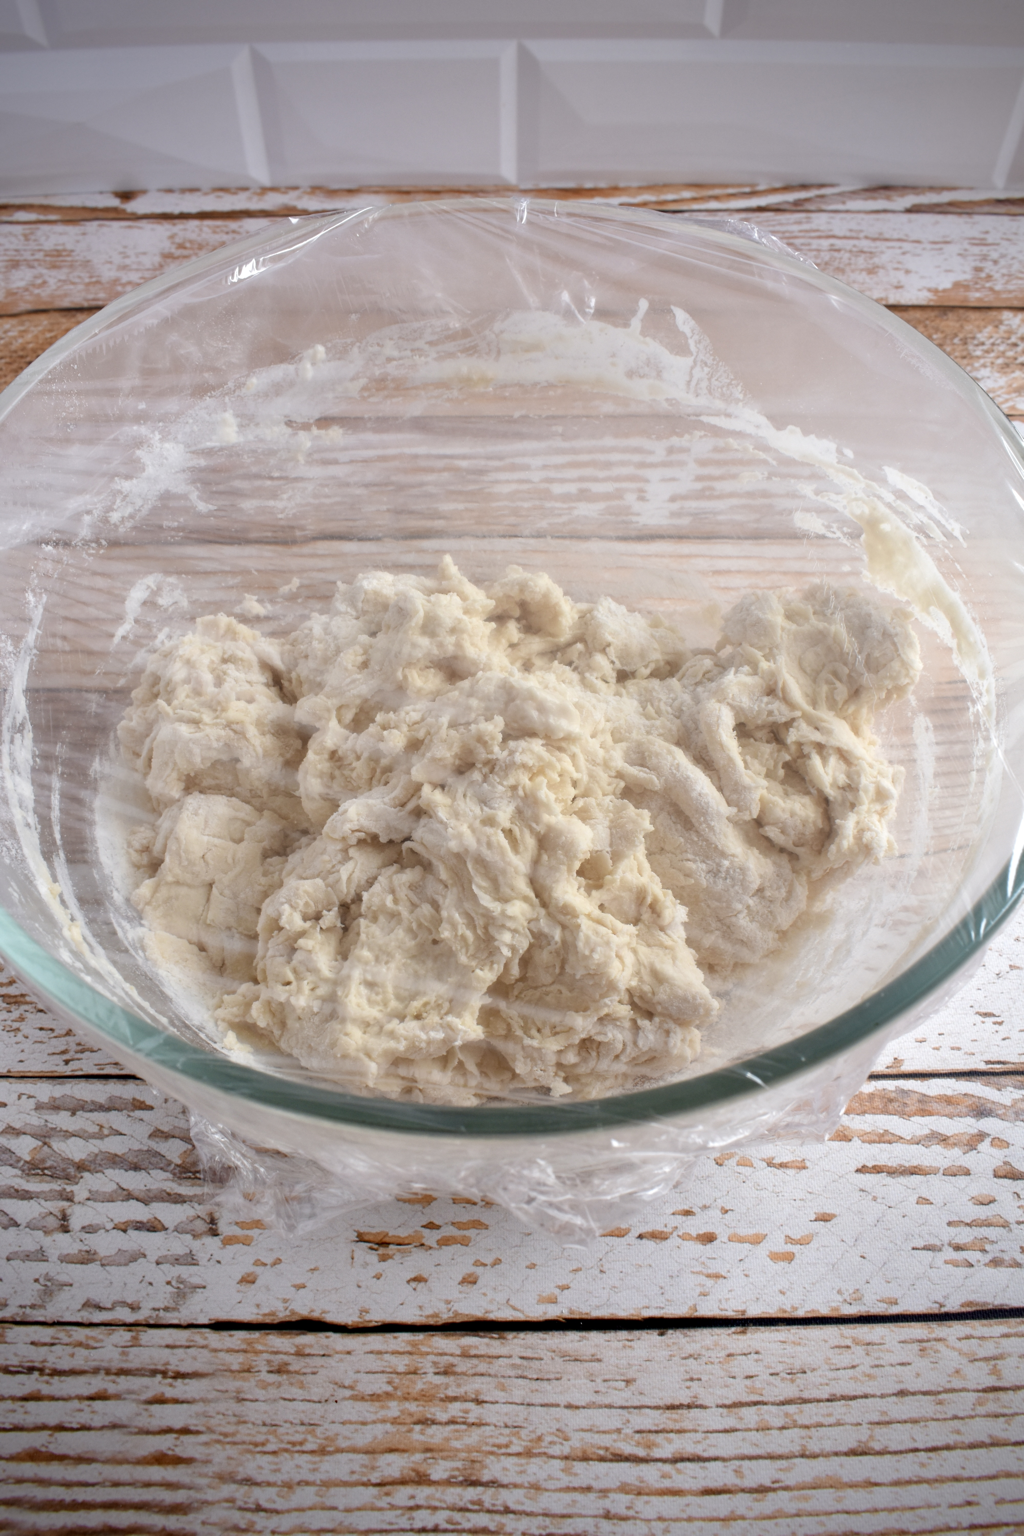 After it’s been left alone to rise for at least 8 hours, put your empty dutch oven in the oven and turn it on to 450°F. Set a timer for 30 minutes. While that’s heating up, you’ll scoop the bread dough out onto a well- floured surface and gently shape the dough into a ball. Put the ball onto a large sheet of parchment paper. It might feel chunky and dry in spots, but again, trust me! When the timer goes off, take the dutch oven out, put the dough and parchment paper inside, put the lid on and put the dutch oven back in the oven to bake. Bake the bread for 40 minutes with the lid on, then 15 minutes without the lid. 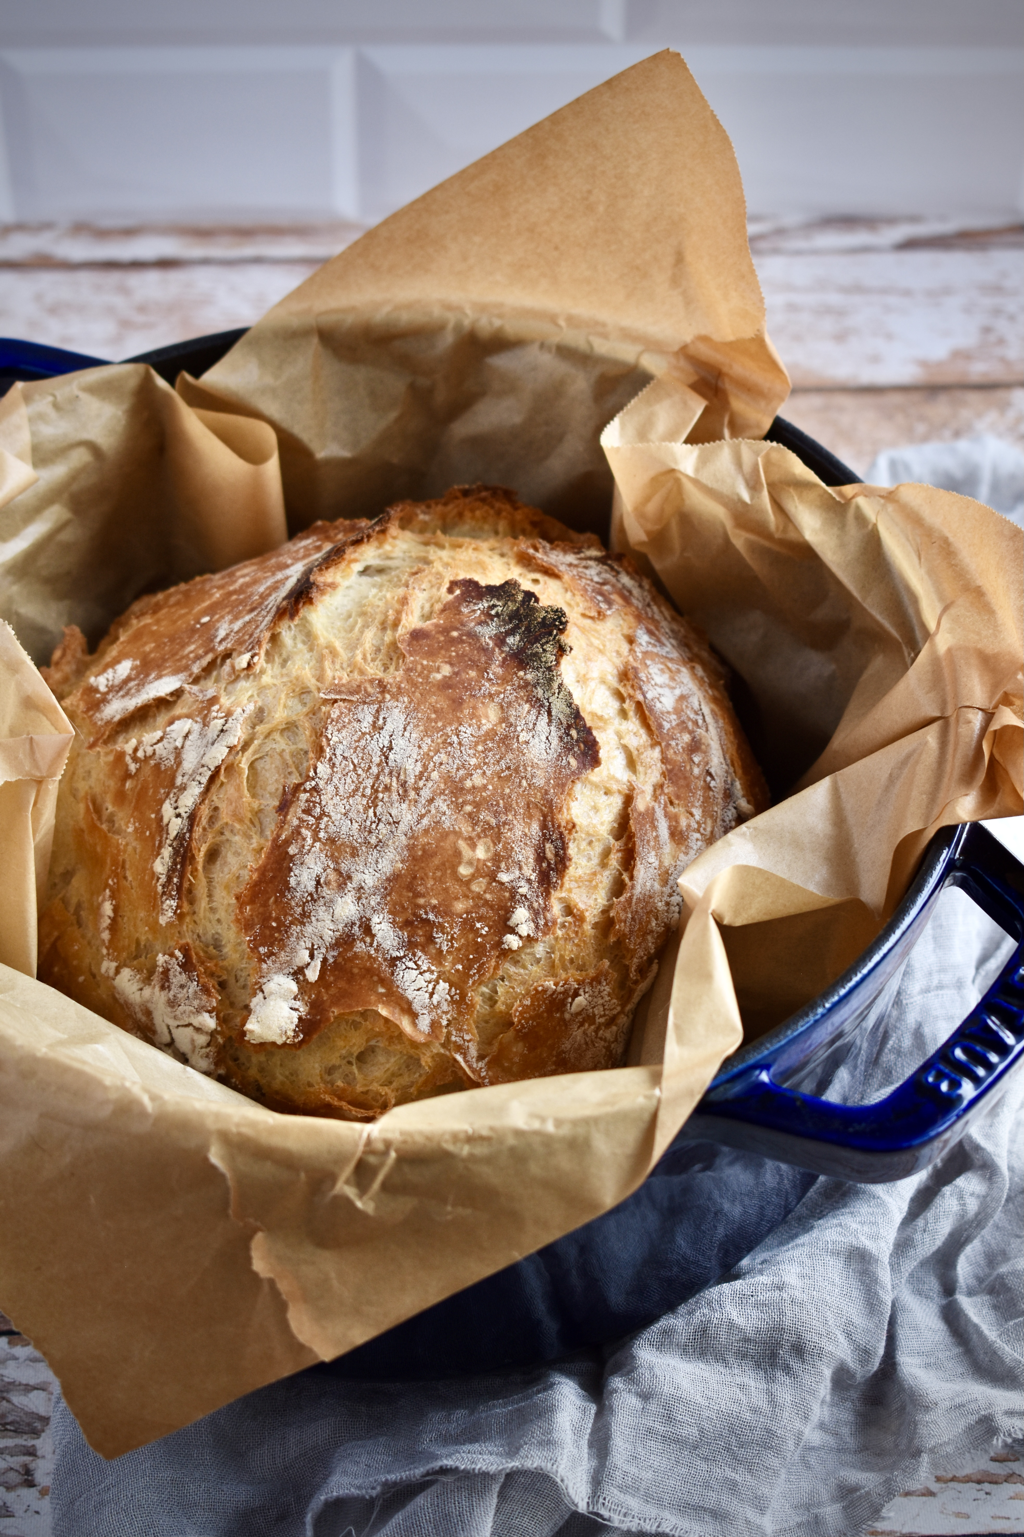 And you’re done! It’s that easy! Now go enjoy this gorgeous loaf that looks like it's straight from the bakery! 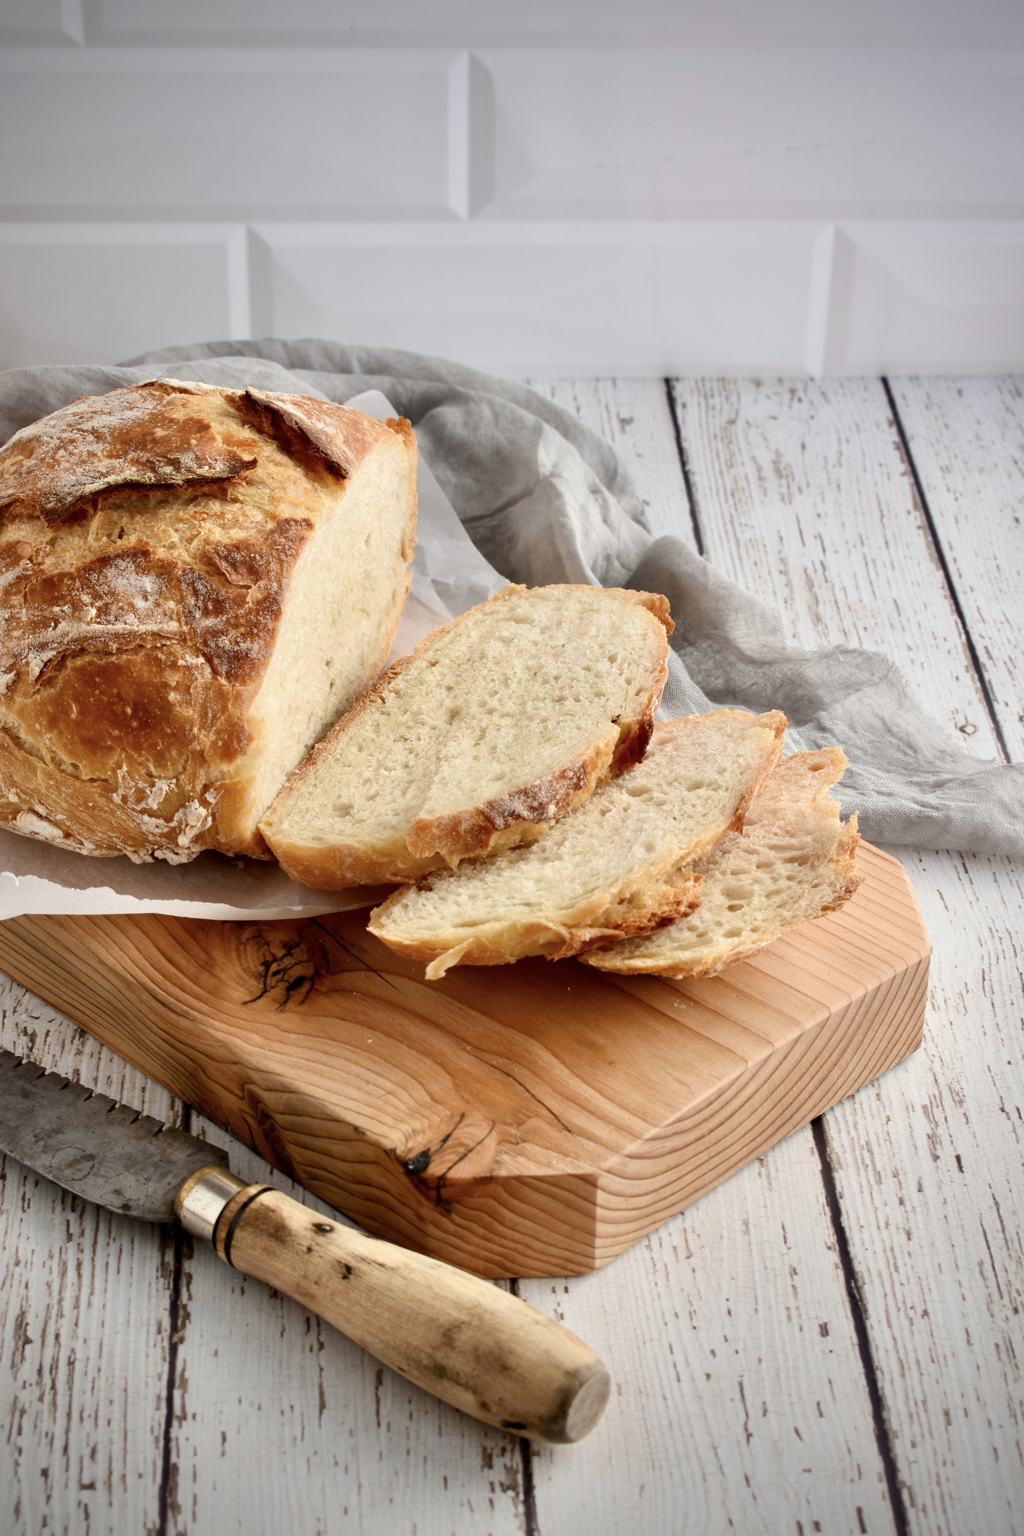 EASY RUSTIC ARTISAN BREAD Makes 1 round rustic-style loaf, roughly 7-8 inches in diameter INGREDIENTS:
3 cups all-purpose flour 1 tsp. active dry yeast 1 1/2 tsp. salt 1 1/2 cups warm water INSTRUCTIONS: In a large bowl, combine flour, yeast, and salt. Pour the warm water over the mixture and stir just until all the flour is moistened. The dough will look like a shaggy mess, not a nice smooth ball. Cover the bowl with plastic wrap and leave the bowl on the counter for 8-12 hours. Place a 4-6 quart Dutch Oven with the lid on inside the oven and preheat the oven to 450° F for 30 minutes. While the oven is preheating, transfer the dough to a floured surface and gather it into a ball. Place dough on a large piece of parchment paper. Once the oven and Dutch Oven have preheated for 30 minutes, carefully remove the Dutch Oven and lift the bread dough using the parchment paper, placing it inside the Dutch Oven. Cover with the lid. Bake at 450° F for 40 minutes with the lid on, then remove the lid and bake for an additional 15 minutes, or until the crust is golden brown. Remove from oven, and carefully lift the bread out of the Dutch Oven using the parchment paper. Allow the bread to cool on a wire rack. I perfected this banana bread recipe almost 10 years ago because everyone I know who loves banana bread always will share a loaf and say, “This is the BEST banana bread!” But every time I try it, I’m disappointed. It’ll be moist and sweet and banana-y, but it always seems to be missing something. Turns out, it’s brown sugar! Nobody I know solely uses brown sugar in their banana bread recipe, if they even use any at all. This Brown Sugar Banana Bread, in my opinion, IS the best banana bread ever. It is soft, moist, and has caramelized banana flavor. 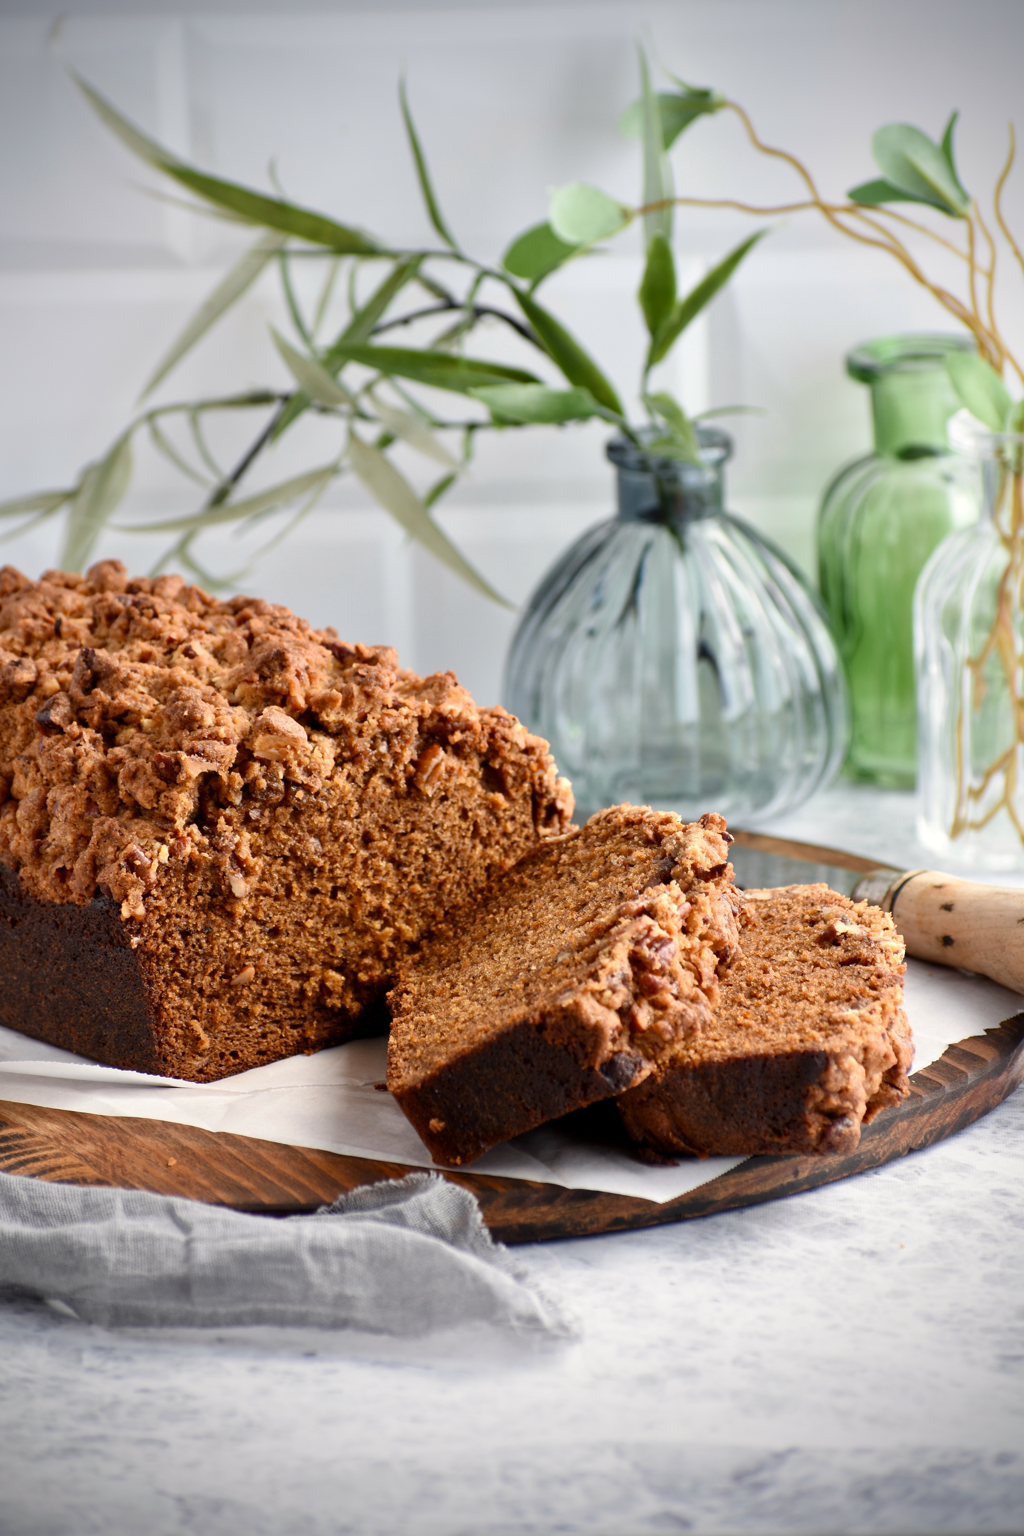 This recipe comes with an optional pecan streusel topping as well. The bread is perfectly delicious with it, but if you want to give it a little something extra, do the topping. It adds a nice crunch and a little extra sweetness. 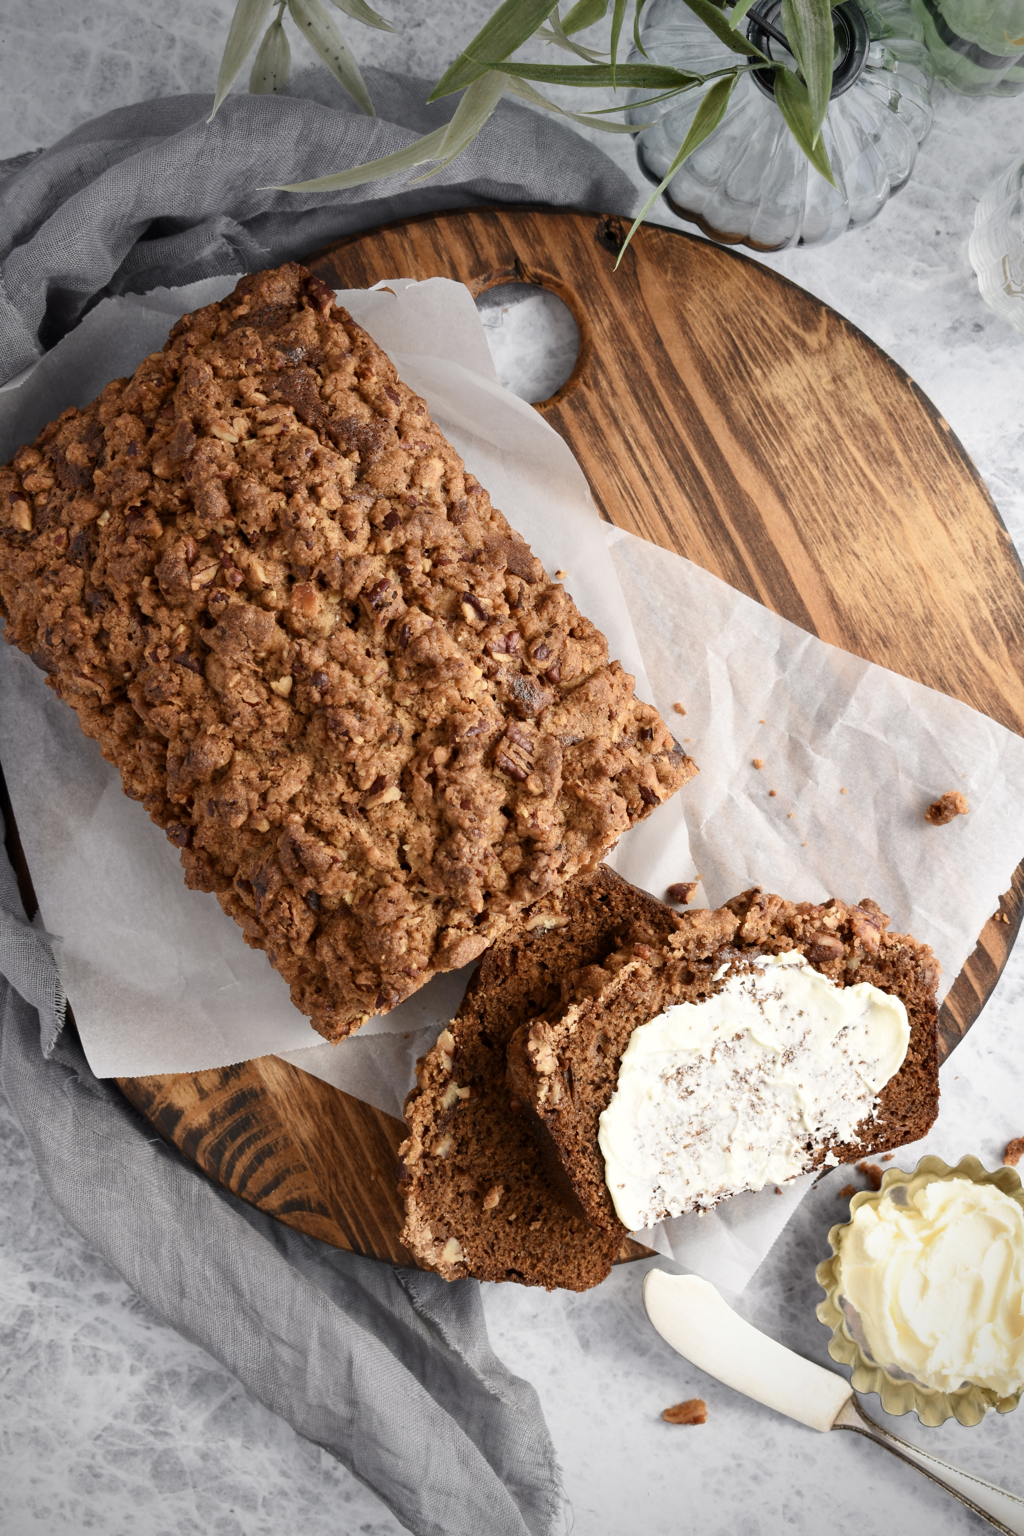 BROWN SUGAR BANANA BREAD WITH PECAN STEUSEL TOPPING Makes 1 loaf INGREDIENTS:
Bread: 4 bananas, very ripe 5 tbsp. butter, melted 1 cup dark brown sugar 2 eggs 1 tsp. vanilla 2 tsp. molasses 1 2/3 cups all-purpose flour 1 tsp. baking soda 1/8 tsp. salt Pecan Streusel Topping: (optional) 2/3 cup pecans, roughly chopped 3 tbsp. flour 3 tbsp. brown sugar 2 tbsp. butter, melted INSTRUCTIONS: Preheat oven to 350° F. Generously grease a loaf pan of line with parchment paper. (If you’re doing the topping, I would recommend using parchment paper and leaving a little excess on the sides so you can lift the loaf out of the pan after it’s cooled.) In a small bowl, mix together all the ingredients for the topping until well combined and crumbly. Set aside. In a large bowl, mash the bananas with a fork until mostly smooth. Add melted butter and brown sugar and mix until smooth. Mix in eggs and vanilla until smooth, then add the flour, baking soda, and salt and stir until well combined. Pour the batter into the prepared loaf pan. Sprinkle the topping evenly over the batter. Bake at 350° F for 45-50 if you aren’t doing the topping, or 55-60 minutes with the topping, or until a toothpick inserted in the center comes out clean. Remove from oven and cool in pan for 15-20 minutes. Flip the loaf out of the pan or lift it out using the parchment paper, and finish cooling on wire rack. Serve warm or at room temperature. Wrap with plastic wrap once completely cooled. Ever since I first made this pie about 5 years ago, I’ve been dying to make it again. This time I added a little extra banana flavor to the pie by incorporating puréed banana into the whipped cream. The end result is absolutely delightful!  Banoffee pie is an English dessert made by combining bananas and toffee, hence the name! Often you will see the recipes for this pie using dulce de leche, which is made from slowly heating and caramelized going sweetened condensed milk, which can take hours. For this recipe, I wanted something similar in flavor, but quicker to produce, so I made the toffee base using more of a traditional caramel method. It still gives you a thick, rich toffee flavored base, only in less than 10 minutes. 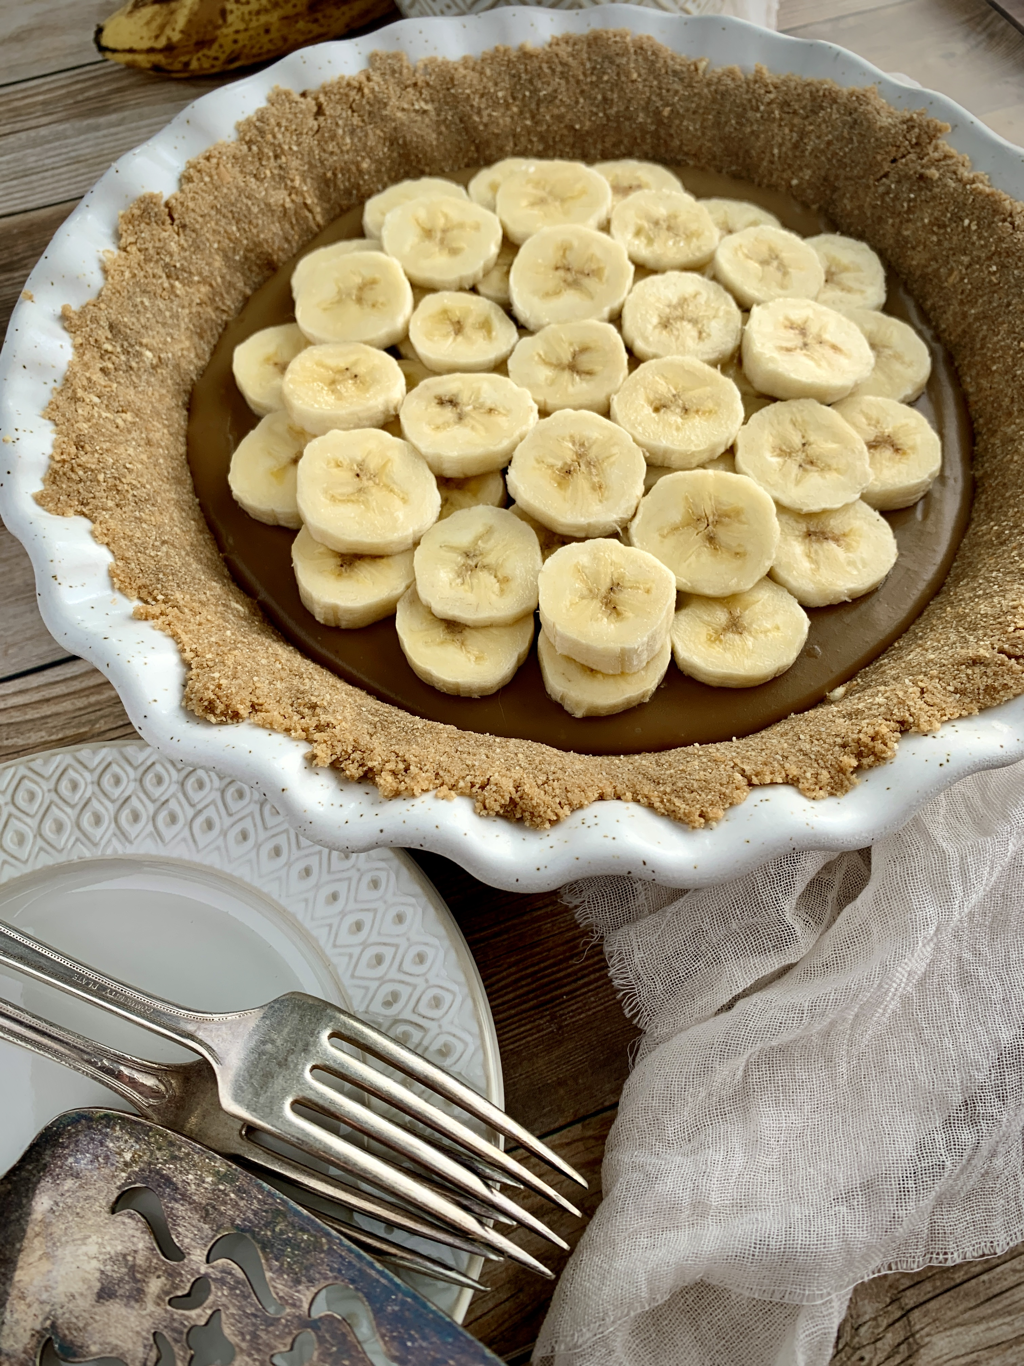 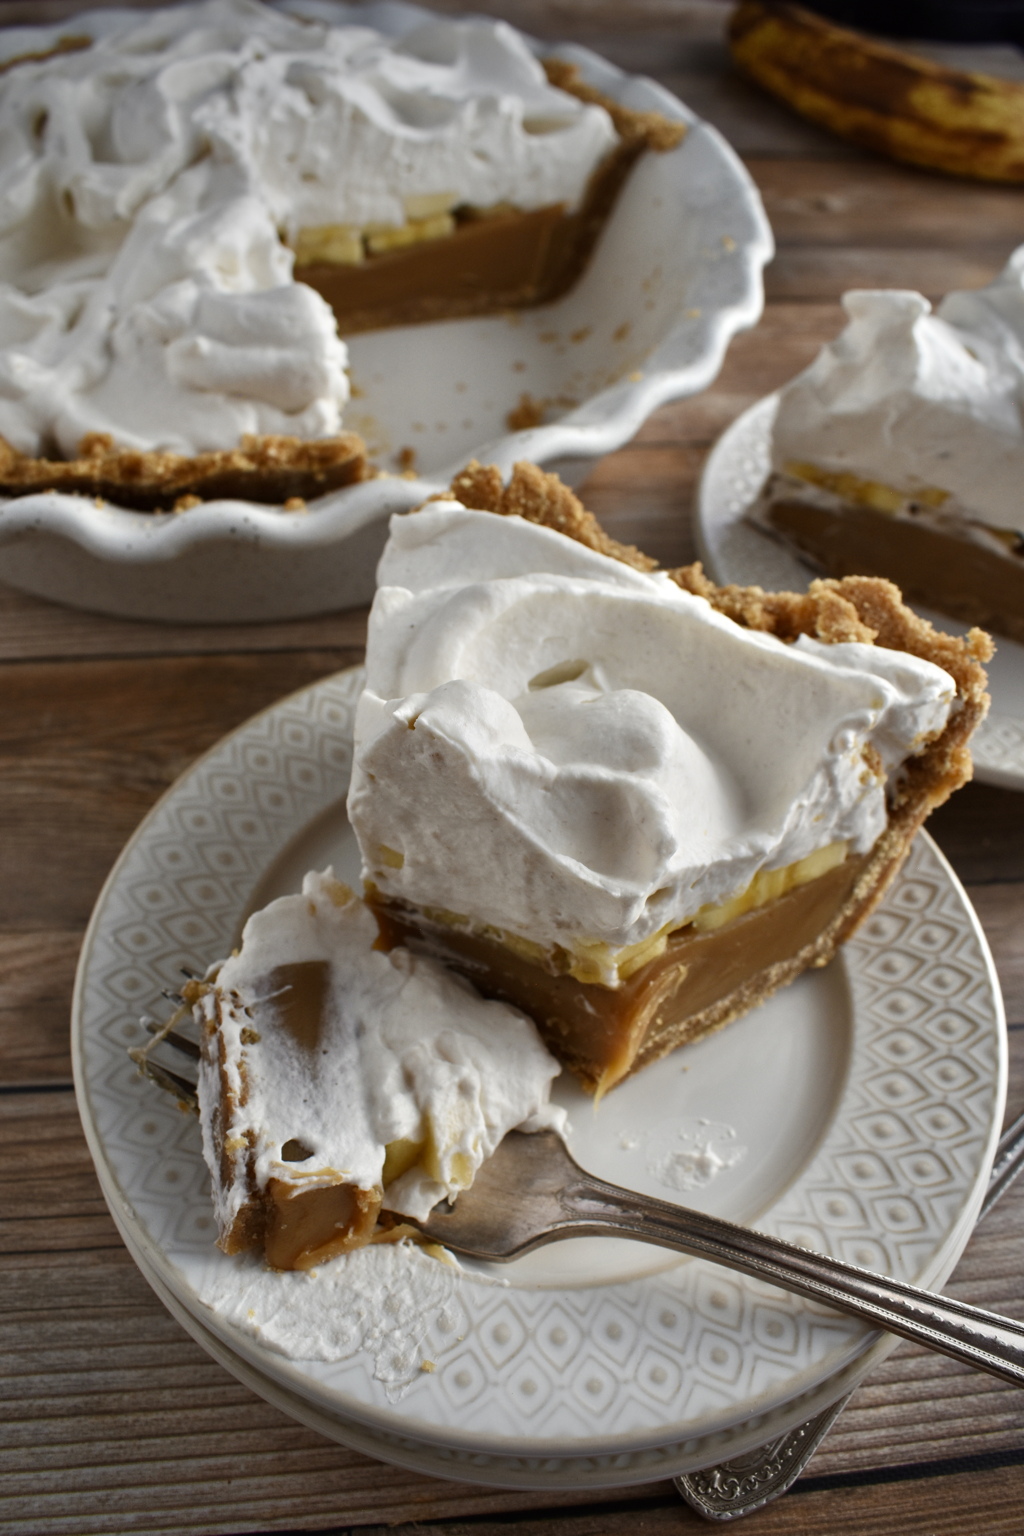 BANOFFEE PIE WITH BANANA WHIPPED CREAM Makes (1) 9-inch pie, about 6-8 servings INGREDIENTS:
Crust: 60 Nilla Wafers 1/2 cup butter, melted 1/2 cup brown sugar Pie: 1/2 cup butter 2/3 cup brown sugar 1 can sweetened condensed milk Pinch of salt 2 ripe bananas Banana Whipped Cream: 1 ripe banana 1 1/2 cups heavy whipping cream, cold 1/2 cup powdered sugar INSTRUCTIONS: Preheat oven to 350° F. Using a food processor, chop the Nilla Wafers until the crumbs are small and smooth. Add in the melted butter and brown sugar and process until well combined. Press the crumb mixture evenly into the bottom and up the sides of a 9” pie pan. Bake the crust for 7 minutes, then remove from oven. Allow the crust to cool at room temp for 5 minutes, then place in the freezer for 15-30 minutes. In a large saucepan, melt the butter for the pie over medium heat. Add the brown sugar and stir constantly for about 4-5 minutes. During that time, the brown sugar and butter should combine and come to a boil. Once boiling, stir in the sweetened condensed milk and pinch of salt, and continue to cook for 2-3 more minutes, stirring constantly, until the mixture has thickened. Remove from heat and allow to cool slightly in the pan for 5-10 minutes. Pour the caramel into the prepared pie crust, and return to the freezer for 1 hour. Remove the pie from the freezer. Slice the 2 bananas into thin slices and spread the slices evenly over the caramel. Set aside. Using a food processor or blender, purée the banana for the whipped cream until completely smooth. Set aside. Pour the heavy whipping cream into the bowl of a stand mixer with a whisk attachment, or into a large bowl of using a hand mixer with a whisk attachment. Whisk the cream on high until soft peaks form. (When you pull the whisk out of the whipped cream, a peak should form but then quickly fall down.) Gradually add in the powdered sugar and continue whisking until stiff peaks form. (When you pull the whisk out of the whipped cream, the peak that forms will not fall.) Gently fold in the puréed banana, then whisk for another 30 seconds. Top the pie with the banana whipped cream. Serve immediately or place the pie in the refrigerator until ready to serve. If you’re looking for a cake that’s not terribly sweet, this is it! The rosemary and olive oil flavors give this cake a lovely warmth, while keeping it light and fresh. It is perfect for a mid-day treat or to finish a heavier meal. 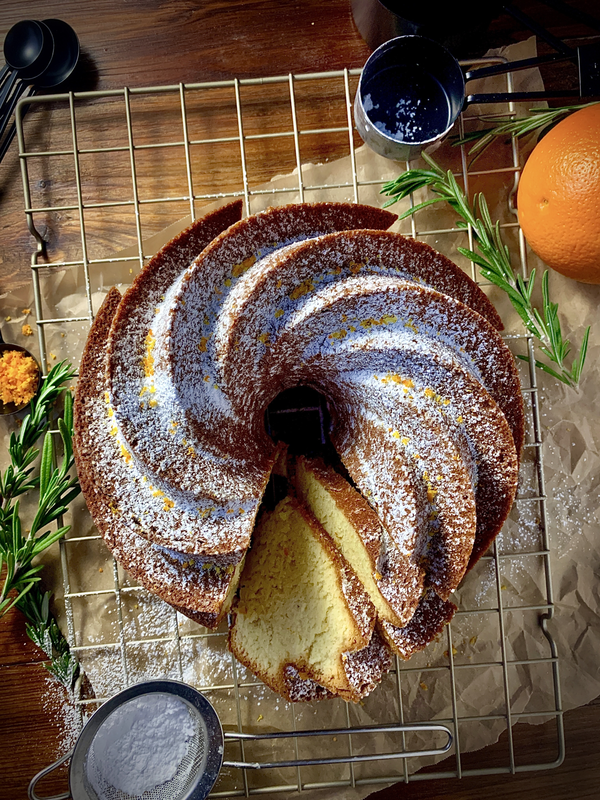 Can we also just take a moment to recognize how absolutely beautiful the shape of this cake is?! This Bundt cake pan is from Nordic Ware, and has the most lovely swirl of ridges and valleys. It is unique from every angle and a work of art! Here’s what the cake looked like fresh out of the oven... 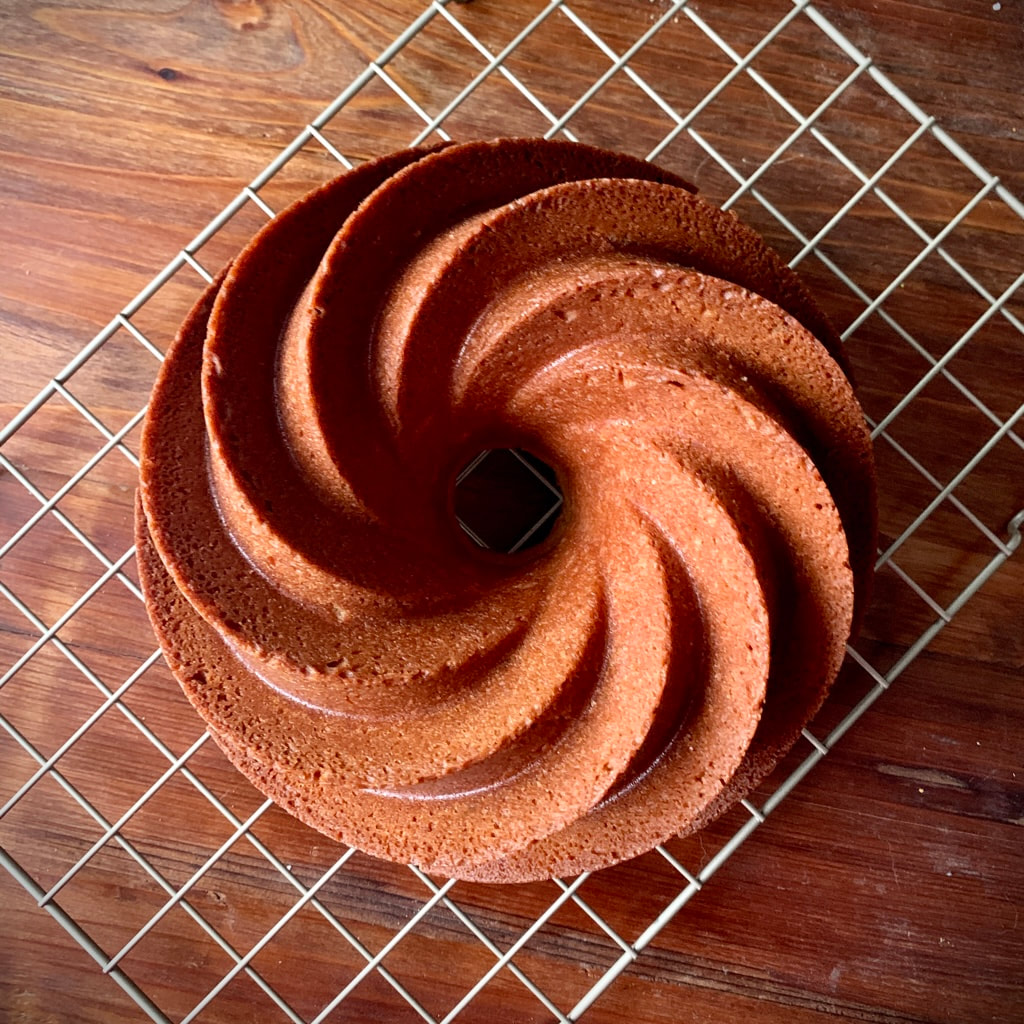 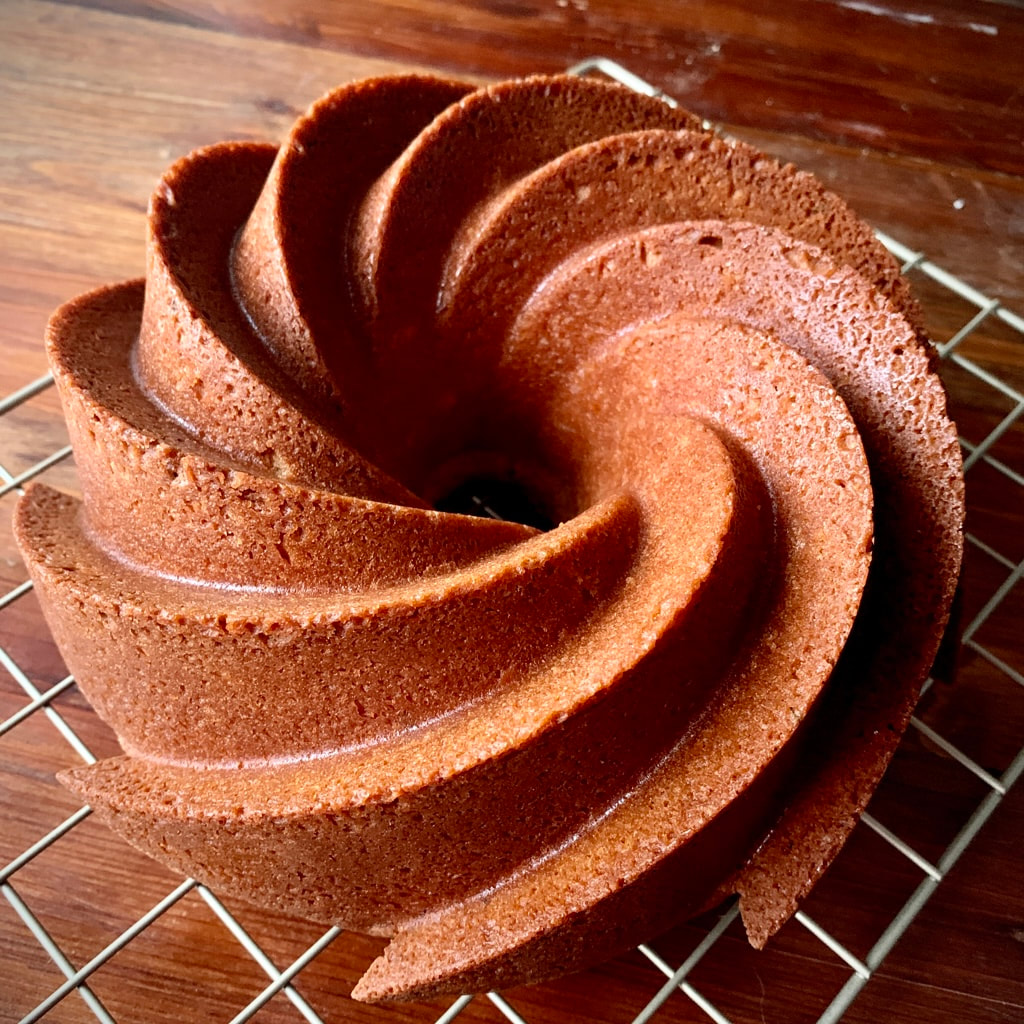 INGREDIENTS:
1 cup olive oil 2 large sprigs of rosemary 2 1/2 cups sugar 3 tbsp. orange zest (about 2 oranges) 1/2 cup fresh squeezed orange juice (about 2 oranges - use the same oranges you zested) 4 large eggs 1/4 cup sour cream 1 tbsp. fresh rosemary, finely minced 3 cups flour 1 1/4 tsp baking powder 1 tsp salt 1-2 tbsp. powdered sugar, to garnish 1 tbsp. orange zest, to garnish INSTRUCTIONS: Preheat oven to 350° F. Generously grease a burnt cake pan and set aside. Place the olive oil and 2 rosemary sprigs in a small saucepan and warm the oil over medium heat for 4-5 minutes. Remove from heat, cover the pan, and allow to cool and steep for at least 1 hour. Discard the rosemary from the olive oil. Using a stand mixer or hand mixer with a large bowl, whisk together the olive oil, sugar, orange zest, and orange juice until well combined and fluffy, about 5 minutes. Whisk in the eggs one at a time, then add the sour cream and rosemary. In a separate bowl, combine the flour, baking powder, and salt, then slowly whisk it into the other ingredients. Whisk on medium-high for about 2-3 minutes until batter is smooth. Pour the batter into the prepared Bundt cake pan. Tap the pan a couple times on the counter to release any bubbles. Place in the oven on the middle rack and bake at 350° F for about 1 hour 15 minutes, or until a toothpick inserted in the center comes out clean. Remove from oven and cool in the pan for 15-20 minutes, then carefully flip the cake out onto a wire cooling rack. Allow to cool for 5-10 minutes. To dust the cake with powdered sugar, place the powdered sugar in a fine mesh sieve. Hold the sieve over the cake and tap or shake it lightly to release the powdered sugar. Sprinkle the cake with orange zest. Serve warm or cooled. My hubby and I are huge pizza lovers, and I am especially a fan of deep dish pan pizzas. So it was only natural that the first thing I make in my new cast iron skillet was this lovely Sausage and White Cheddar Pizza! 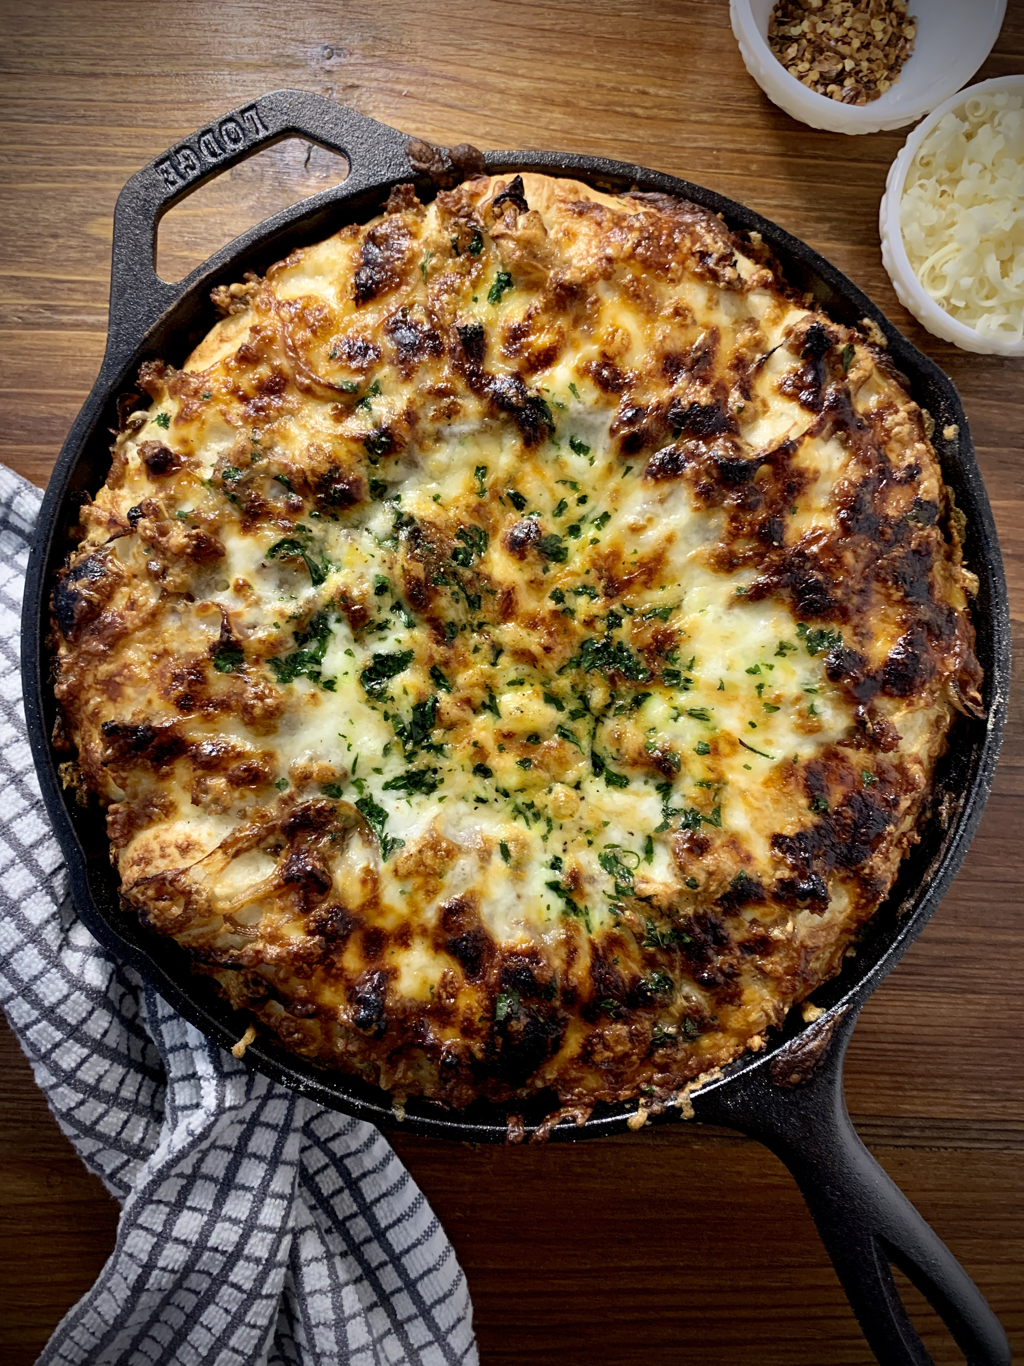 It turned out so good too! The crust was nice and crispy on the outside, yet soft and fluffy on the inside, and the combination of sweet, savory, and smoky flavors from the toppings was perfect! I found this great smoked white cheddar cheese that was a fantastic addition! And the drizzle of honey, while it may seem odd and out of place to some, takes the pizza to a whole other lever, in my opinion. Give it a try and let me know what you think! 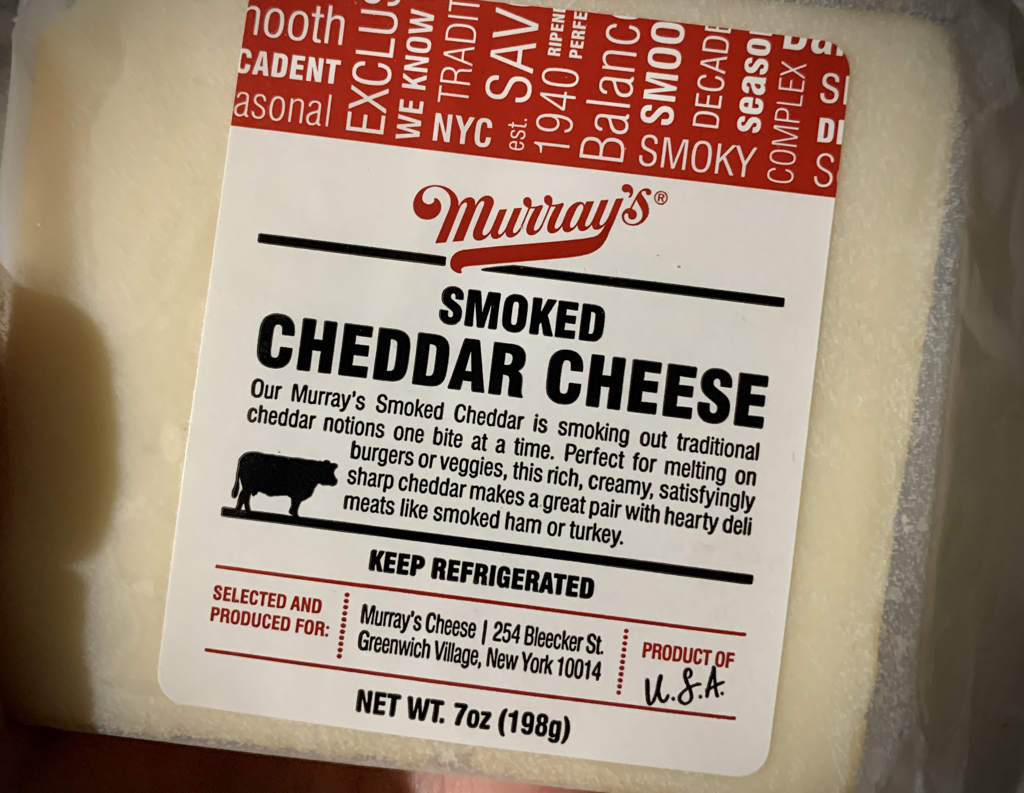 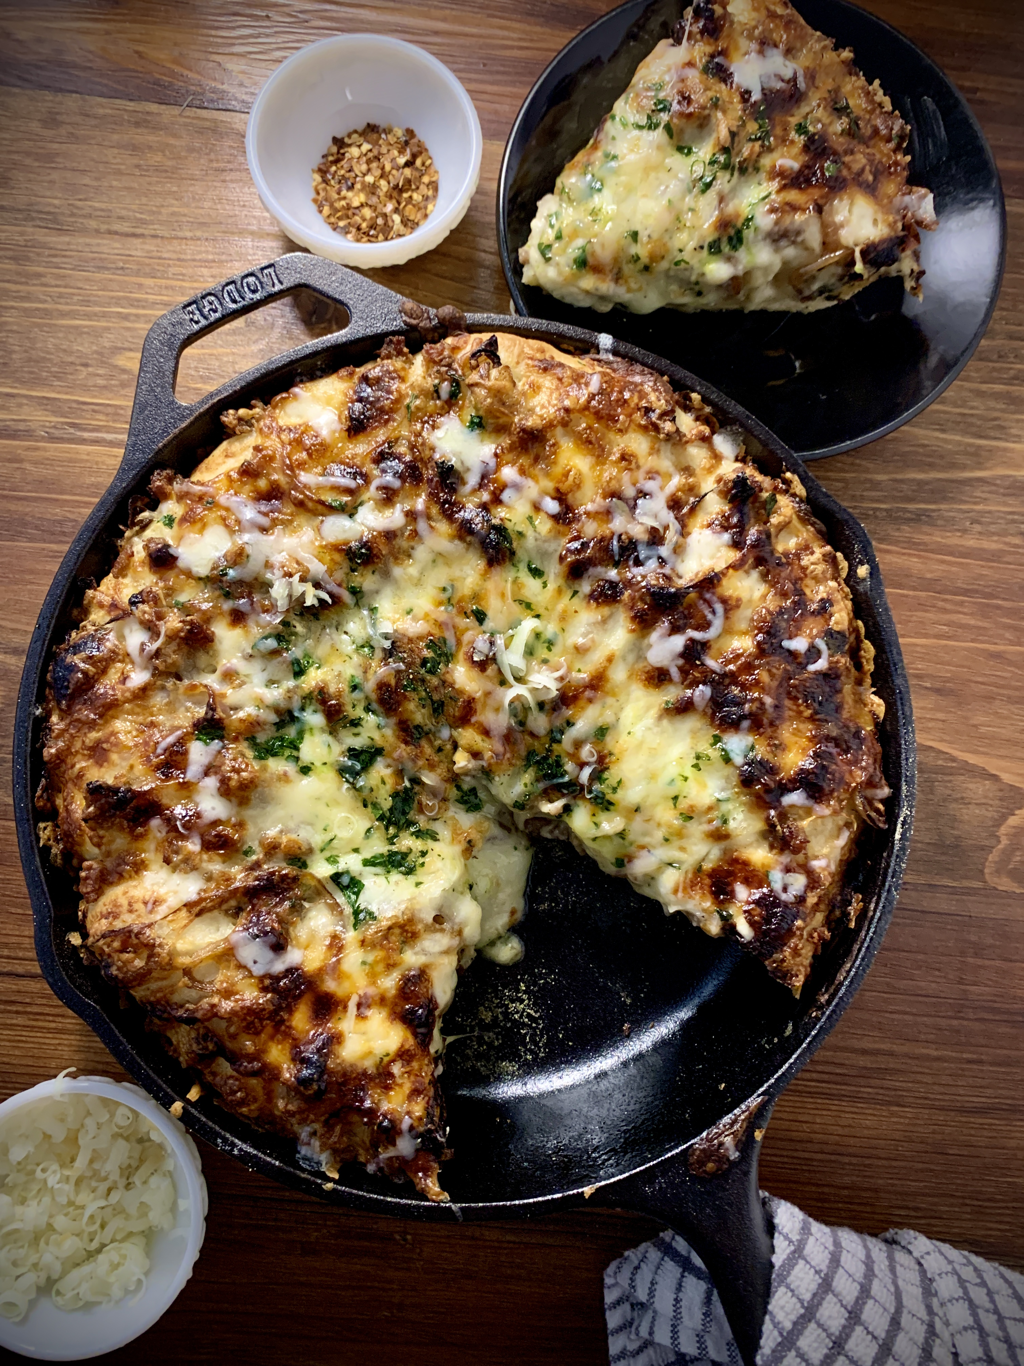 INGREDIENTS:
Crust: Cast Iron Pan Pizza Dough (Click to view the recipe. You may also use a store-bought pizza crust.) Creamy Garlic Sauce: 2 tbsp. butter 2 tbsp. garlic, roughly chopped 2 tbsp. flour 1/4 cup heavy cream 3/4 cup milk 1/4 tsp nutmeg 1/4 tsp salt 2 tbsp. parmesan cheese, grated Toppings: 1/2 cup Jimmy Dean maple flavored ground pork sausage 1 large shallot, thinly sliced 1 cup mozzarella cheese, shredded 1 cup smoked white cheddar cheese, shredded (or just regular white cheddar) 2 tbsp. parsley, minced 2 tbsp. honey INSTRUCTIONS: Prepare the Cast Iron Pan Pizza Dough according to the recipe. While the dough is rising, prepare the sauce and toppings. For the sauce, melt the butter in a small saucepan over medium heat. Add the garlic and cook for about 2 minutes. Whisk in the flour and cook for 1 minute, stirring frequently. Add the cream and whisk until smooth, then add the milk and continue to whisk until smooth. The sauce should be fairly thick. Remove from heat and stir in the nutmeg, salt, and Parmesan. Set aside and allow to cool. Spray a small saute pan with cooking oil and brown the sausage over medium high heat, chopping it up until it’s finely ground and fully cooked. Set aside and allow to cool. In a separate saute pan, heat olive oil over medium heat and add the shallots. Cook for about 5-7 minutes or until evenly browned, tossing frequently. Set aside and allow to cool. Once the dough has doubled in size, take the dough out of the oven, as well as the bread pan with water. Preheat the oven to 500° F. Place your seasoned 10-inch cast iron skillet on the stove and preheat it over medium heat. The skillet should be hot, but should not be smoking. Once hot, sprinkle the pan with cornmeal, then immediately transfer the dough to the pan. Press and stretch the dough evenly across the bottom of the pan and up the sides. Turn off the stove. Brush the entire crust with olive oil, then sprinkle with salt and pepper. Top the dough with your sauce, the sprinkle evenly with the sausage and shallots. Top with mozzarella, white cheddar, and parsley, then drizzle with honey. Place the pizza in the oven on the bottom rack. Bake 500° F for 15-20 minutes, or until the top and edges are golden brown. Remove the pizza from the oven. Cut and serve hot. These cookies are sweet, salty, crisp, crunchy, and chewy... all the things a great cookie should be! Ok, I’ll be honest they are like crrrrraaack!!! Seriously, sooo good! I had this idea in my head for weeks, imagining how great the combo would be to have the bitter sweetness of the dark chocolate, the sweet buttery flavor of the toffee, and then the salty crunchiness of the kettle chips. Throw in a little extra brown sugar and molasses to the mix and holy moly! These bad boys turned out way better in real life than what I even imagined in my head. 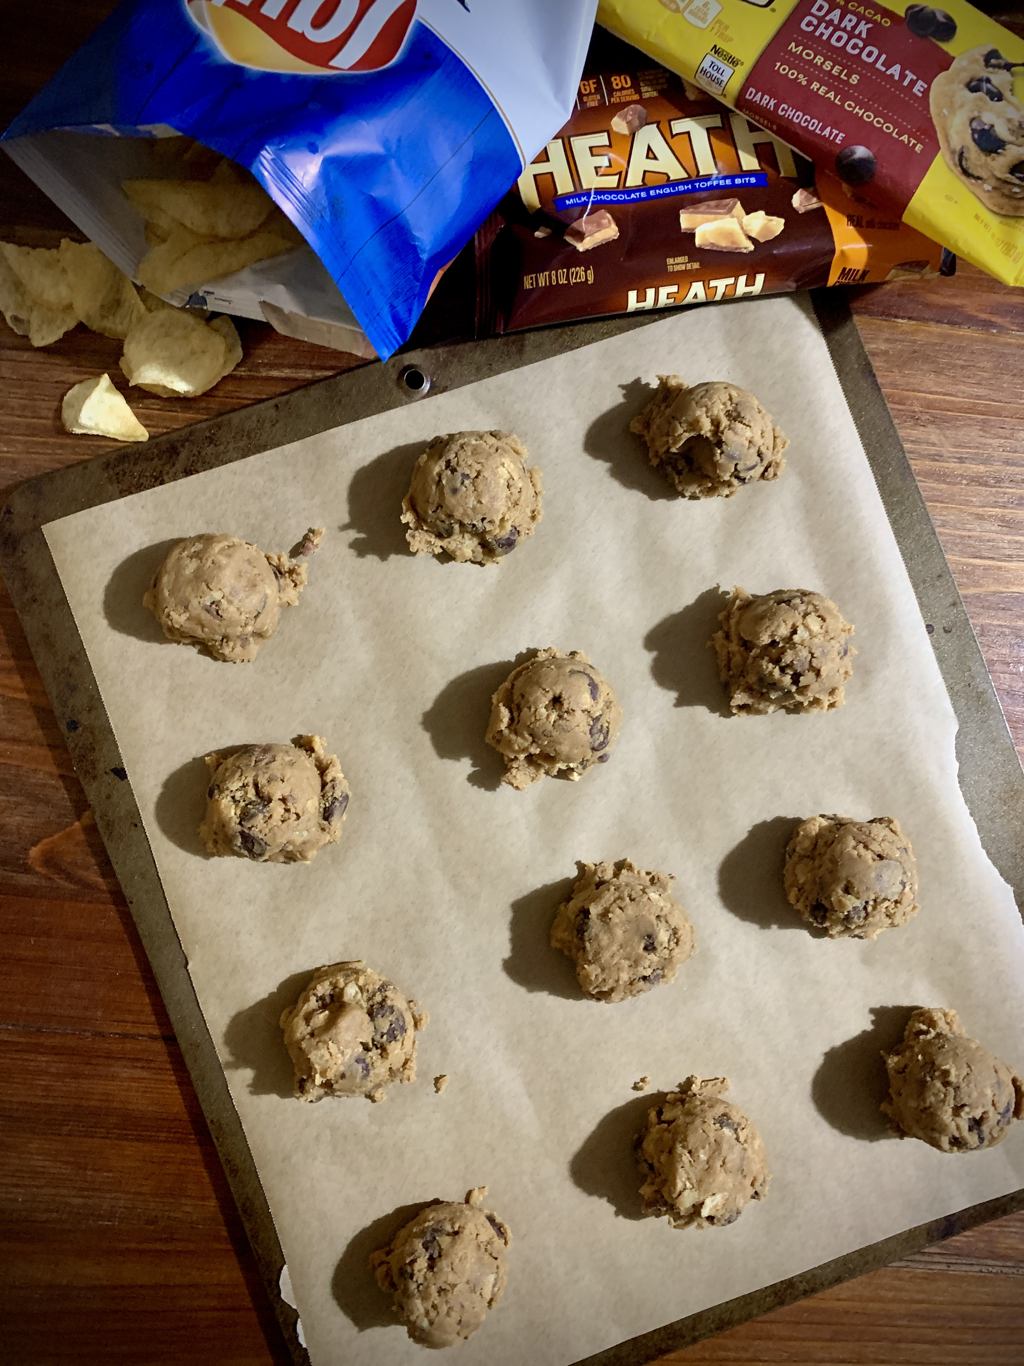 Makes 2 - 2 1/2 dozen cookies. INGREDIENTS: 3/4 cup butter, softened 1/2 cup sugar 1 cup brown sugar 1 egg + 1 egg yolk 1 tbsp. molasses 1 tsp. vanilla 2 cups flour 3/4 tsp baking soda 1/2 tsp salt 1 10-ounce bag of dark chocolate chips 1 8-ounce bag of Heath toffee bits 1 1/2 cups crushed kettle cooked potato chips, regular or sea salt flavor Flaky or chunky sea salt, to garnish INSTRUCTIONS: Preheat oven to 350° F. Line 2 large cookie sheets with parchment paper. in a stand mixer with a paddle attachment, beat the butter on medium high speed for 2 minutes until smooth and fluffy. Add the sugar and brown sugar and beat for 2 more minutes. Add the egg and egg yolk, then the molasses and vanilla. Turn the mixer off and add the flour, baking soda, and salt to the bowl. Stir the baking soda and salt into the flour a bit, then turn the mixer on low and mix until we’ll blended and smooth. Add the chocolate chips, toffee bits, and potato chips. Mix until we’ll blended. Using a 2 tbsp. scoop and drop the dough onto the prepared cookie sheets about 2 inches apart. (If you don’t have a 2 tbsp. scoop, simply roll about 2 tbsp. of dough into a ball and place on the cookie sheets.) Bake at 350° F for 10-12 minutes or until golden brown around the edges. Remove from oven and immediately sprinkle with flaky or chunky sea salt. Cool on the cookie sheet for 2-3 minutes, then carefully transfer to a wire rack to finish cooling.  This Chicken Tortellini Soup is a hearty soup with subtle flavors, perfect for a chilly winter’s night! 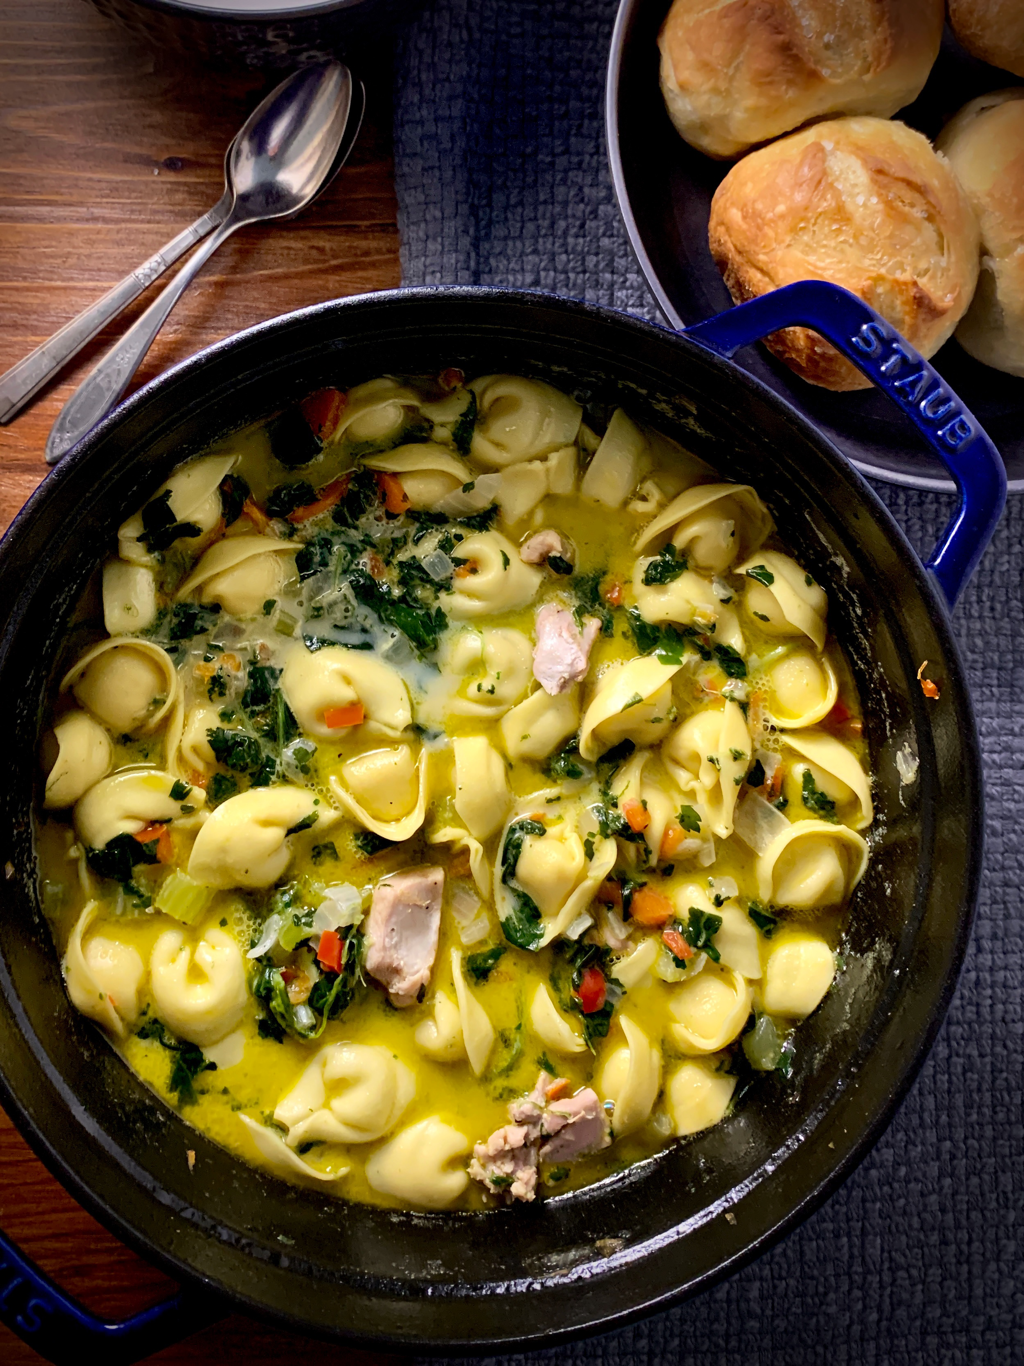 INGREDIENTS:
3 tbsp. butter 1 yellow onion, diced small 2 large celery stalks, minced 1/2 red bell pepper, minced 1 large carrot , halfed lengthwise & thinly sliced 4 boneless skinless chicken thighs or 2 boneless chicken breasts, cut into bite-sized pieces 4 cups chicken broth 1 cup frozen chopped spinach 1 bay leaf 1 tbsp. fresh parsley, minced 1/2 tsp. salt 1/2 tsp. black pepper 1/2 cup heavy cream 3 cups cheese tortellini, fresh or frozen INSTRUCTIONS: In a stock pot or Dutch oven, melt the butter over medium heat. Add the onion, celery, and red bell pepper and cook for 5 minutes. Add the the carrots and the chicken and continue to cook for 5 more minutes. Add the chicken broth, frozen spinach, bay leaf, parsley, salt, and black pepper. Bring to a boil, then reduce heat to medium low and simmer for 15 minutes. Add the heavy cream and cheese tortellini and simmer for another 5-10 minutes, or until tortellini is fully cooked. Serve hot. Makes about 4 servings. |